Service Guide
Page 8
... Procedure 67 Replacing the Thermal Module 67 Replacing the DIMM Module 67 Replacing the Hard Disk Drive Module 68 Replacing the Speaker Module 68 Replacing the Mainboard 70 Replacing the SDD Module 71 Replacing the USB/LED/Power/Card Reader Board 72 Replacing the WLAN Board 73 Replacing the LCM Module 73 Replacing the Upper Cover 75 Replacing the Keyboard 76 Replacing the 3G...
... Procedure 67 Replacing the Thermal Module 67 Replacing the DIMM Module 67 Replacing the Hard Disk Drive Module 68 Replacing the Speaker Module 68 Replacing the Mainboard 70 Replacing the SDD Module 71 Replacing the USB/LED/Power/Card Reader Board 72 Replacing the WLAN Board 73 Replacing the LCM Module 73 Replacing the Upper Cover 75 Replacing the Keyboard 76 Replacing the 3G...

Service Guide
Page 78
Hold the carrier and slide the HDD toward the mainboard until the interface connects. 4. Replace the Speaker Module in the HDD carrier. 2. Replace the four securing screws. 68 Chapter 3 Replace the two securing screws. Place the HDD in the lower cover. 2. Replacing the Hard Disk Drive Module IMPORTANT:The HDD is only available on the Aspire one HDD computer SKU. 1. Replacing the Speaker Module 1. Replace the four screws (two each side) to secure the carrier. 3.
Hold the carrier and slide the HDD toward the mainboard until the interface connects. 4. Replace the Speaker Module in the HDD carrier. 2. Replace the four securing screws. 68 Chapter 3 Replace the two securing screws. Place the HDD in the lower cover. 2. Replacing the Hard Disk Drive Module IMPORTANT:The HDD is only available on the Aspire one HDD computer SKU. 1. Replacing the Speaker Module 1. Replace the four screws (two each side) to secure the carrier. 3.
Service Guide
Page 101
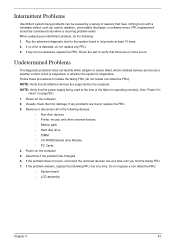
... 10 times. 2. NOTE: Verify that there are supported by a variety of the following FRU one at a time. If the problem does not recur, reconnect the removed devices one at a time until you find the failing FRU. 7. Run the advanced diagnostic test for damage..., such as: cosmic radiation, electrostatic discharge, or software errors. If the problem remains, replace the following devices: • Non-Acer devices • Printer, mouse, and other external devices • Battery pack • Hard disk drive • DIMM • CD-ROM/Diskette drive Module • PC Cards 4.
... 10 times. 2. NOTE: Verify that there are supported by a variety of the following FRU one at a time. If the problem does not recur, reconnect the removed devices one at a time until you find the failing FRU. 7. Run the advanced diagnostic test for damage..., such as: cosmic radiation, electrostatic discharge, or software errors. If the problem remains, replace the following devices: • Non-Acer devices • Printer, mouse, and other external devices • Battery pack • Hard disk drive • DIMM • CD-ROM/Diskette drive Module • PC Cards 4.


