User Manual
Page 32
... the BIOS, you can easily enjoy the benefits of previous chassis intrusion status. 32 Please adjust the BIOS option "Clear Status" to default setup, please turn off the computer and unplug the power cord from the power supply. When the jumper cap is placed on pins, the jumper is "Open".
... the BIOS, you can easily enjoy the benefits of previous chassis intrusion status. 32 Please adjust the BIOS option "Clear Status" to default setup, please turn off the computer and unplug the power cord from the power supply. When the jumper cap is placed on pins, the jumper is "Open".
User Manual
Page 39
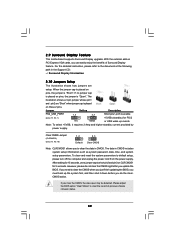
Power Switch (PWRBTN) (see p.13 No. 24) Power Switch is a smart switch, allowing users to quickly turn on /off or reset the system or clear the CMOS values. If you want to clear the CMOS values, please clean your system password in ... quickly reset the system. 2.12 Smart Switches This motherboard has three smart switches: power switch, reset switch and clear CMOS switch, allowing users to quickly turn on /off the system.
Power Switch (PWRBTN) (see p.13 No. 24) Power Switch is a smart switch, allowing users to quickly turn on /off or reset the system or clear the CMOS values. If you want to clear the CMOS values, please clean your system password in ... quickly reset the system. 2.12 Smart Switches This motherboard has three smart switches: power switch, reset switch and clear CMOS switch, allowing users to quickly turn on /off the system.
User Manual
Page 54
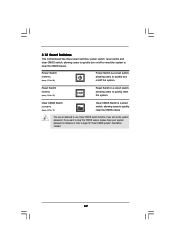
... This section explains how to use the BIOS SETUP UTILITY to enter the BIOS SETUP UTILITY after POST, restart the system by pressing + + , or by turning the system off and then back on. You may not exactly match what you see on your system. If you start up the security features...
... This section explains how to use the BIOS SETUP UTILITY to enter the BIOS SETUP UTILITY after POST, restart the system by pressing + + , or by turning the system off and then back on. You may not exactly match what you see on your system. If you start up the security features...
User Manual
Page 64
... controller. Configuration options: [128B] and [256B]. The default value is power on. Intel VT-d Use this feature is [128B]. The default value of this to turn off in S1, S3 and S4 state. The default value is [Disabled]. PCIE Max Payload Size This determines the maximum TLP (Transaction Layer Packet) payload...
... controller. Configuration options: [128B] and [256B]. The default value is power on. Intel VT-d Use this feature is [128B]. The default value of this to turn off in S1, S3 and S4 state. The default value is [Disabled]. PCIE Max Payload Size This determines the maximum TLP (Transaction Layer Packet) payload...

User Manual
Page 65
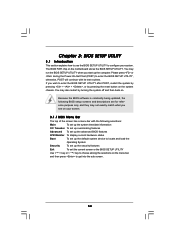
...the Suspend-toRAM feature. PS/2 Keyboard Power On Use this item to enable or disable PS/2 keyboard to turn on the system from the power-soft-off mode. If [Power Off] is [Disabled]. The default value...and the system starts to enable or disable ACPI HPET Table. PCI Devices Power On Use this motherboard to turn on AC/Power Loss Ring-In Power On PCI Devices Power On PS / 2 Keyboard Power On RTC ... Windows® VistaTM certification. 65 ACPI HPET Table Use this option to [Enabled] if you to turn on the system from the power-soft-off mode. Please set this item to boot up when the...
...the Suspend-toRAM feature. PS/2 Keyboard Power On Use this item to enable or disable PS/2 keyboard to turn on the system from the power-soft-off mode. If [Power Off] is [Disabled]. The default value...and the system starts to enable or disable ACPI HPET Table. PCI Devices Power On Use this motherboard to turn on AC/Power Loss Ring-In Power On PCI Devices Power On PS / 2 Keyboard Power On RTC ... Windows® VistaTM certification. 65 ACPI HPET Table Use this option to [Enabled] if you to turn on the system from the power-soft-off mode. Please set this item to boot up when the...
Quick Installation Guide
Page 26
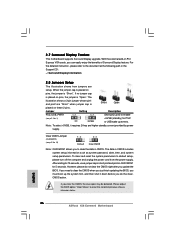
... Clear CMOS Note: CLRCMOS1 allows you do not clear the CMOS right after you clear the CMOS, the case open may be detected. English 26 ASRock X58 Extreme3 Motherboard With the external add-on these 2 pins. The illustration shows a 3-pin jumper whose pin1 and pin2 are setup. If you update the BIOS. 2.7 Surround... "Open". For the detailed instruction, please refer to clear the data in CMOS. After waiting for 15 seconds, use a jumper cap to default setup, please turn off the computer and unplug the power cord from the power supply.
... Clear CMOS Note: CLRCMOS1 allows you do not clear the CMOS right after you clear the CMOS, the case open may be detected. English 26 ASRock X58 Extreme3 Motherboard With the external add-on these 2 pins. The illustration shows a 3-pin jumper whose pin1 and pin2 are setup. If you update the BIOS. 2.7 Surround... "Open". For the detailed instruction, please refer to clear the data in CMOS. After waiting for 15 seconds, use a jumper cap to default setup, please turn off the computer and unplug the power cord from the power supply.
Quick Installation Guide
Page 32
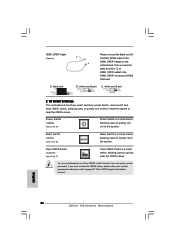
...) (see p.2 No. 23) Reset Switch is a smart switch, allowing users to page 26 "Clear CMOS jumper" description instead. English 32 ASRock X58 Extreme3 Motherboard If you set up the system password. black end C B A Please connect the black end (A) of HDMI_SPDIF cable to the HDMI_SPDIF connector... (see p.2 No. 24) Power Switch is a smart switch, allowing users to quickly clear the CMOS values You are not allowed to quickly turn on /off or reset the system or clear the CMOS values. HDMI_SPDIF Cable (Optional) A. white end (3-pin) 2.10 Smart Switches This motherboard...
...) (see p.2 No. 23) Reset Switch is a smart switch, allowing users to page 26 "Clear CMOS jumper" description instead. English 32 ASRock X58 Extreme3 Motherboard If you set up the system password. black end C B A Please connect the black end (A) of HDMI_SPDIF cable to the HDMI_SPDIF connector... (see p.2 No. 24) Power Switch is a smart switch, allowing users to quickly clear the CMOS values You are not allowed to quickly turn on /off or reset the system or clear the CMOS values. HDMI_SPDIF Cable (Optional) A. white end (3-pin) 2.10 Smart Switches This motherboard...
