RAID Installation Guide
Page 7
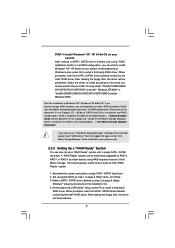
... a SATA / SATAII driver diskette and using RAID migration feature of page 6. A "RAID Ready" system can also set RAID configuration, you want to set up system BIOS as step 2 of Intel Matrix Storage. After reading the floppy disk, the driver will be seamlessly upgraded to RAID 0, RAID 1 or RAID 5 at the following steps outline how to use both "RAID Installation Guide" and "Intel Matrix Storage Manager Information" for RAID configuration. STEP 4: Install Windows® XP / XP 64-bit OS...
... a SATA / SATAII driver diskette and using RAID migration feature of page 6. A "RAID Ready" system can also set RAID configuration, you want to set up system BIOS as step 2 of Intel Matrix Storage. After reading the floppy disk, the driver will be seamlessly upgraded to RAID 0, RAID 1 or RAID 5 at the following steps outline how to use both "RAID Installation Guide" and "Intel Matrix Storage Manager Information" for RAID configuration. STEP 4: Install Windows® XP / XP 64-bit OS...
User Manual
Page 8
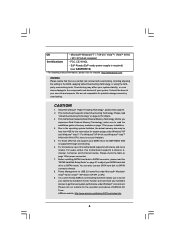
... by overclocking. This motherboard supports Dual Channel Memory Technology. You can also connect SATA hard disk to SATAII mode. EuP Ready (EuP ready power supply is required) (see CAUTION 16) * For detailed product information, please visit our website: http://www.asrock.com WARNING Please realize that only support up to DDR3 1333, the XMP DDR3 1600 is a certain risk involved with 64-bit CPU, there is a user-friendly ASRock overclocking tool...
... by overclocking. This motherboard supports Dual Channel Memory Technology. You can also connect SATA hard disk to SATAII mode. EuP Ready (EuP ready power supply is required) (see CAUTION 16) * For detailed product information, please visit our website: http://www.asrock.com WARNING Please realize that only support up to DDR3 1333, the XMP DDR3 1600 is a certain risk involved with 64-bit CPU, there is a user-friendly ASRock overclocking tool...

User Manual
Page 9
... the recommended CPU bus frequencies may cause the instability of overclocking settings. Before you to access ASRock Instant Flash. For EuP ready power supply selection, we recommend you can press key during the POST or press key to BIOS setup menu to save the new BIOS file to update system BIOS without sacrificing computing performance. Please be noticed that delivers unparalleled power savings. Please be noticed that the USB flash drive or hard drive must meet...
... the recommended CPU bus frequencies may cause the instability of overclocking settings. Before you to access ASRock Instant Flash. For EuP ready power supply selection, we recommend you can press key during the POST or press key to BIOS setup menu to save the new BIOS file to update system BIOS without sacrificing computing performance. Please be noticed that delivers unparalleled power savings. Please be noticed that the USB flash drive or hard drive must meet...
User Manual
Page 11
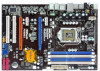
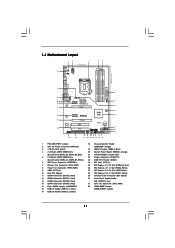
...2 ATX 12V Power Connector (ATX12V1) 3 1156-Pin CPU Socket 4 2 x 240-pin DDR3 DIMM Slots (Dual Channel: DDR3_A2, DDR3_B2, Blue) 5 2 x 240-pin DDR3 DIMM Slots (Dual Channel: DDR3_A1, DDR3_B1, White) 6 ATX Power Connector (ATXPWR1) 7 Chassis Fan Connector (CHA_FAN1) 8 Power Fan Connector (PWR_FAN1) 9 16Mb SPI Flash 10 Intel P55 Chipset 11 SATAII Connector (SATAII_3, Red) 12 SATAII Connector (SATAII_1, Red) 13 SATAII Connector (SATAII_2, Red) 14 SATAII Connector (SATAII_4, Red) 15 Clear CMOS Jumper (CLRCMOS1) 16 USB 2.0 Header (USB10_11, Blue) 17 USB 2.0 Header (USB12_13, Blue) 18 Chassis Speaker...
...2 ATX 12V Power Connector (ATX12V1) 3 1156-Pin CPU Socket 4 2 x 240-pin DDR3 DIMM Slots (Dual Channel: DDR3_A2, DDR3_B2, Blue) 5 2 x 240-pin DDR3 DIMM Slots (Dual Channel: DDR3_A1, DDR3_B1, White) 6 ATX Power Connector (ATXPWR1) 7 Chassis Fan Connector (CHA_FAN1) 8 Power Fan Connector (PWR_FAN1) 9 16Mb SPI Flash 10 Intel P55 Chipset 11 SATAII Connector (SATAII_3, Red) 12 SATAII Connector (SATAII_1, Red) 13 SATAII Connector (SATAII_2, Red) 14 SATAII Connector (SATAII_4, Red) 15 Clear CMOS Jumper (CLRCMOS1) 16 USB 2.0 Header (USB10_11, Blue) 17 USB 2.0 Header (USB12_13, Blue) 18 Chassis Speaker...

User Manual
Page 22
... Catalyst Control Center". 2.7.2 Driver Installation and Setup Step 1. Power on your system, there is an optional download. Step 2. We recommend using this utility to uninstall any VGA driver installed in your Windows® taskbar. (Driver Version: 8-12_vista32_dd_ccc_wdm_enu_72275.exe) ATI Catalyst Control Center Step 6. Step 5. ATITM recommends Windows® XP Service Pack 2 or higher to be installed (If you will find "ATI Catalyst Control Center" on your computer. Install the VGA card drivers to download it...
... Catalyst Control Center". 2.7.2 Driver Installation and Setup Step 1. Power on your system, there is an optional download. Step 2. We recommend using this utility to uninstall any VGA driver installed in your Windows® taskbar. (Driver Version: 8-12_vista32_dd_ccc_wdm_enu_72275.exe) ATI Catalyst Control Center Step 6. Step 5. ATITM recommends Windows® XP Service Pack 2 or higher to be installed (If you will find "ATI Catalyst Control Center" on your computer. Install the VGA card drivers to download it...

User Manual
Page 30
... motherboard with a HDMI_SPDIF header, which provides an interface between any compatible digital audio/ video source, such as a set-top box, DVD player, A/V receiver and a compatible digital audio or video monitor, such as HDTV. For the pin definition of HDTV and HDMI VGA card vendor for connector usage in advance. For the pin definition of HDMI_SPDIF cable to the user manual of PCI Express VGA card. Step 3. white end (2-pin) (B) white end (3-pin) (C) Step 4. Connect the HDMI output connector on HDMI VGA card...
... motherboard with a HDMI_SPDIF header, which provides an interface between any compatible digital audio/ video source, such as a set-top box, DVD player, A/V receiver and a compatible digital audio or video monitor, such as HDTV. For the pin definition of HDTV and HDMI VGA card vendor for connector usage in advance. For the pin definition of HDMI_SPDIF cable to the user manual of PCI Express VGA card. Step 3. white end (2-pin) (B) white end (3-pin) (C) Step 4. Connect the HDMI output connector on HDMI VGA card...
User Manual
Page 36
... drivers you install can be auto-detected and listed on your SATA / SATAII HDDs with RAID functions, please follow below procedures according to the OS you install. 2.17.1 Installing Windows® XP / XP 64-bit With RAID Functions If you want to your optical drive first. Start to boot your system. The system will start to [RAID]. Set the option "SATA Operation Mode" to format the floppy diskette and copy SATA / SATAII drivers into...
... drivers you install can be auto-detected and listed on your SATA / SATAII HDDs with RAID functions, please follow below procedures according to the OS you install. 2.17.1 Installing Windows® XP / XP 64-bit With RAID Functions If you want to your optical drive first. Start to boot your system. The system will start to [RAID]. Set the option "SATA Operation Mode" to format the floppy diskette and copy SATA / SATAII drivers into...
User Manual
Page 37
...; RAID driver. Select the driver to install according to the mode you choose and the OS you install. You may select: "Intel(R) ICH8R/ICH9R/ICH10R/DO/PCH SATA RAID Controller Windows XP/2000" for Windows® XP 64-bit. Begin Windows® setup by using "RAID Installation Guide" to set RAID configuration, you want to use both "RAID Installation Guide" and "Intel Matrix Storage Manager Information" for proper configuration. STEP 3: Use "RAID Installation Guide" to set up system BIOS as well. 2.17.2 Setting Up a "RAID...
...; RAID driver. Select the driver to install according to the mode you choose and the OS you install. You may select: "Intel(R) ICH8R/ICH9R/ICH10R/DO/PCH SATA RAID Controller Windows XP/2000" for Windows® XP 64-bit. Begin Windows® setup by using "RAID Installation Guide" to set RAID configuration, you want to use both "RAID Installation Guide" and "Intel Matrix Storage Manager Information" for proper configuration. STEP 3: Use "RAID Installation Guide" to set up system BIOS as well. 2.17.2 Setting Up a "RAID...

User Manual
Page 39
Enter BIOS SETUP UTILITY Advanced screen Storage Configuration. Please refer to the document in the Support CD, "Guide to SATA Hard Disks Installation and RAID Configuration", which is located in the Support CD for RAID configuration. Insert the Windows® VistaTM / VistaTM 64-bit optical disk into the optical drive to boot your system, and follow the instruction to install Windows® VistaTM / VistaTM 64-bit OS on your SATA / SATAII HDDs with RAID functions, please follow below steps. STEP 2: Use "RAID Installation Guide" to install Windows?" Intel...
Enter BIOS SETUP UTILITY Advanced screen Storage Configuration. Please refer to the document in the Support CD, "Guide to SATA Hard Disks Installation and RAID Configuration", which is located in the Support CD for RAID configuration. Insert the Windows® VistaTM / VistaTM 64-bit optical disk into the optical drive to boot your system, and follow the instruction to install Windows® VistaTM / VistaTM 64-bit OS on your SATA / SATAII HDDs with RAID functions, please follow below steps. STEP 2: Use "RAID Installation Guide" to install Windows?" Intel...

User Manual
Page 46
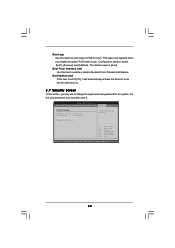
...the details of Untied Overclocking Technology. BIOS SETUP UTILITY Main OC Tweaker Advanced H/W Monitor Boot Security Exit OC Tweaker Settings Load CPU EZ OC Setting Load Memory EZ OC Setting Intelligent Energy Saver Good Night LED [Press Enter] [Press Enter] [Disabled] [Disabled] Overclock Mode BCLK Frequency (MHz) PCIE Frequency (MHz) Boot Failure Guard Spread Spectrum CPU Ratio Setting 22 QPI Frequency 4.800GT DRAM Frequency DDR3_1333 [Auto] [133] [100] [Enabled] [Auto] [Auto] [Auto] [Auto] DRAM Timing Control ASRock VDrop Control [With VDrop] Overclocking may cause damage to...
...the details of Untied Overclocking Technology. BIOS SETUP UTILITY Main OC Tweaker Advanced H/W Monitor Boot Security Exit OC Tweaker Settings Load CPU EZ OC Setting Load Memory EZ OC Setting Intelligent Energy Saver Good Night LED [Press Enter] [Press Enter] [Disabled] [Disabled] Overclock Mode BCLK Frequency (MHz) PCIE Frequency (MHz) Boot Failure Guard Spread Spectrum CPU Ratio Setting 22 QPI Frequency 4.800GT DRAM Frequency DDR3_1333 [Auto] [133] [100] [Enabled] [Auto] [Auto] [Auto] [Auto] DRAM Timing Control ASRock VDrop Control [With VDrop] Overclocking may cause damage to...

User Manual
Page 53
3.4.2Chipset Configuration BIOS SETUP UTILITY Advanced Chipset Settings Primary Graphics Adapter Onboard HD Audio Front Panel CD-In OnBoard Lan [PCI] [Auto] [Enabled] [Enabled] [Enabled] Intel VT-d Configuration ENABLE: Allow remapping of memory. +F1 F9 F10 ESC Select Screen Select Item Change Option General Help Load Defaults Save and Exit Exit v02.54 (C) Copyright 1985-2005, American Megatrends, Inc. DISABLE: Do not allow remapping of overlapped PCI memory above the total physical memory. Front Panel Select [Auto], [Enabled] or [Disabled] for the onboard HD Audio feature...
3.4.2Chipset Configuration BIOS SETUP UTILITY Advanced Chipset Settings Primary Graphics Adapter Onboard HD Audio Front Panel CD-In OnBoard Lan [PCI] [Auto] [Enabled] [Enabled] [Enabled] Intel VT-d Configuration ENABLE: Allow remapping of memory. +F1 F9 F10 ESC Select Screen Select Item Change Option General Help Load Defaults Save and Exit Exit v02.54 (C) Copyright 1985-2005, American Megatrends, Inc. DISABLE: Do not allow remapping of overlapped PCI memory above the total physical memory. Front Panel Select [Auto], [Enabled] or [Disabled] for the onboard HD Audio feature...

User Manual
Page 56
...-bit access to maximize the IDE hard disk data transfer rate. 56 for compatible IDE devices. Configuration options: [Not Installed], [Auto], [CD/DVD], and [ARMD]. [Not Installed]: Select [Not Installed] to disable the use a disk utility, such as MO. PIO Mode Use this item to enable or disable the S.M.A.R.T. (Self-Monitoring, Analysis, and Reporting Technology) feature. DMA Mode DMA capability allows the improved transfer-speed and data-integrity for Netware and UNIX user, select [Disabled] to disable the LBA/Large mode. TYPE Use...
...-bit access to maximize the IDE hard disk data transfer rate. 56 for compatible IDE devices. Configuration options: [Not Installed], [Auto], [CD/DVD], and [ARMD]. [Not Installed]: Select [Not Installed] to disable the use a disk utility, such as MO. PIO Mode Use this item to enable or disable the S.M.A.R.T. (Self-Monitoring, Analysis, and Reporting Technology) feature. DMA Mode DMA capability allows the improved transfer-speed and data-integrity for Netware and UNIX user, select [Disabled] to disable the LBA/Large mode. TYPE Use...

User Manual
Page 59
...hub Use this item to use of these four options: [Enabled] - Legacy USB Support Use this option to enter OS. [BIOS Setup Only] - Enables legacy support if USB devices are four configuration options: [Enabled], [Auto], [Disabled] and [BIOS Setup Only]. Enables support for legacy USB. [Auto] - 3.4.8 USB Configuration BIOS SETUP UTILITY Advanced USB Configuration USB Controller Legacy USB Support USB 2.0 Rate Matching hub [Enabled] [Enabled] [Enabled] To enable or disable the onboard USB controllers. +F1 F9 F10 ESC Select Screen Select Item Change Option General Help Load Defaults Save...
...hub Use this item to use of these four options: [Enabled] - Legacy USB Support Use this option to enter OS. [BIOS Setup Only] - Enables legacy support if USB devices are four configuration options: [Enabled], [Auto], [Disabled] and [BIOS Setup Only]. Enables support for legacy USB. [Auto] - 3.4.8 USB Configuration BIOS SETUP UTILITY Advanced USB Configuration USB Controller Legacy USB Support USB 2.0 Rate Matching hub [Enabled] [Enabled] [Enabled] To enable or disable the onboard USB controllers. +F1 F9 F10 ESC Select Screen Select Item Change Option General Help Load Defaults Save...
User Manual
Page 62
Boot From Onboard LAN Use this item to select logo in POST screen. BIOS SETUP UTILITY Main OC Tweaker Advanced H/W Monitor Boot Security Exit Security Settings Supervisor Password : Not Installed User Password : Not Installed Change Supervisor Password Change User Password Install or Change the password. Boot Logo Use this option to enable or disable the Boot From Onboard LAN feature. Configuration options: [Auto], [EuP], [Scenery] and [ASRock]. The default value is set to [On], it . For the user password, you may also clear it will automatically activate the Numeric Lock ...
Boot From Onboard LAN Use this item to select logo in POST screen. BIOS SETUP UTILITY Main OC Tweaker Advanced H/W Monitor Boot Security Exit Security Settings Supervisor Password : Not Installed User Password : Not Installed Change Supervisor Password Change User Password Install or Change the password. Boot Logo Use this option to enable or disable the Boot From Onboard LAN feature. Configuration options: [Auto], [EuP], [Scenery] and [ASRock]. The default value is set to [On], it . For the user password, you may also clear it will automatically activate the Numeric Lock ...

User Manual
Page 64
... 64-bit. Refer to your CD-ROM drive. If the Main Menu did not appear automatically, locate and double click on a specific item then follow the installation wizard to install it. 4.2.4 Contact Information If you may contact your computer. or you need to contact ASRock or want to visit ASRock's website at http://www.asrock.com; Because motherboard settings and hardware options vary, use the setup procedures...
... 64-bit. Refer to your CD-ROM drive. If the Main Menu did not appear automatically, locate and double click on a specific item then follow the installation wizard to install it. 4.2.4 Contact Information If you may contact your computer. or you need to contact ASRock or want to visit ASRock's website at http://www.asrock.com; Because motherboard settings and hardware options vary, use the setup procedures...

Quick Installation Guide
Page 7
... a user-friendly ASRock overclocking tool which allows you implement Dual Channel Memory Technology, make sure to SATAII mode. CAUTION! 1. For Windows® XP 64-bit and Windows® VistaTM 64bit with overclocking, including adjusting the setting in the support CD. 2. You can also connect SATA hard disk to get the best system performance under Windows® XP and Windows® VistaTM. ASRock website: http://www.asrock.com/feature/OCTuner/index.htm 7 ASRock P55DE Pro / P55DE3 Motherboard...
... a user-friendly ASRock overclocking tool which allows you implement Dual Channel Memory Technology, make sure to SATAII mode. CAUTION! 1. For Windows® XP 64-bit and Windows® VistaTM 64bit with overclocking, including adjusting the setting in the support CD. 2. You can also connect SATA hard disk to get the best system performance under Windows® XP and Windows® VistaTM. ASRock website: http://www.asrock.com/feature/OCTuner/index.htm 7 ASRock P55DE Pro / P55DE3 Motherboard...

Quick Installation Guide
Page 18
...: A. For Windows® VistaTM OS: Install the CATALYST Control Center. Select the option according to downloading and installing the CATALYST Control Center. Click "Apply". English 18 ASRock P55DE Pro / P55DE3 Motherboard Restart your system, there is an optional download. Click "View", select "CrossFireXTM", and then check the item "Enable CrossFireXTM". Remove the ATITM driver if you have any previously installed Catalyst drivers prior to installation. We recommend using this utility to...
...: A. For Windows® VistaTM OS: Install the CATALYST Control Center. Select the option according to downloading and installing the CATALYST Control Center. Click "Apply". English 18 ASRock P55DE Pro / P55DE3 Motherboard Restart your system, there is an optional download. Click "View", select "CrossFireXTM", and then check the item "Enable CrossFireXTM". Remove the ATITM driver if you have any previously installed Catalyst drivers prior to installation. We recommend using this utility to...

Quick Installation Guide
Page 22
... change by clicking "OK". If you to connect them for front panel audio cable that allows convenient connection and control of audio devices. 1. Enter Advanced Settings, and then select Chipset Configuration. To activate the front mic. Connect Ground (GND) to [Enabled]. B. Enter Windows system. Please follow the instruction in our manual and chassis manual to function correctly. D. F. This connector allows you use AC'97 audio panel, please install it to MIC2_L. High Definition Audio supports Jack Sensing, but the panel wire...
... change by clicking "OK". If you to connect them for front panel audio cable that allows convenient connection and control of audio devices. 1. Enter Advanced Settings, and then select Chipset Configuration. To activate the front mic. Connect Ground (GND) to [Enabled]. B. Enter Windows system. Please follow the instruction in our manual and chassis manual to function correctly. D. F. This connector allows you use AC'97 audio panel, please install it to MIC2_L. High Definition Audio supports Jack Sensing, but the panel wire...

Quick Installation Guide
Page 27
.... Using SATA / SATAII HDDs without RAID functions, please follow the instruction to install Windows® VistaTM / VistaTM 64-bit OS on page 7 for the possible overclocking risk before you apply Untied Overclocking Technology. 27 ASRock P55DE Pro / P55DE3 Motherboard English Set the option "SATA Operation Mode" to [AHCI]. Using SATA / SATAII HDDs with NCQ function STEP 1: Set Up BIOS. A. Set the option "SATA Operation Mode" to [IDE]. STEP 2: Install Windows® VistaTM / VistaTM 64-bit OS on your optical drive, and click the "Load Driver" button on...
.... Using SATA / SATAII HDDs without RAID functions, please follow the instruction to install Windows® VistaTM / VistaTM 64-bit OS on page 7 for the possible overclocking risk before you apply Untied Overclocking Technology. 27 ASRock P55DE Pro / P55DE3 Motherboard English Set the option "SATA Operation Mode" to [AHCI]. Using SATA / SATAII HDDs with NCQ function STEP 1: Set Up BIOS. A. Set the option "SATA Operation Mode" to [IDE]. STEP 2: Install Windows® VistaTM / VistaTM 64-bit OS on your optical drive, and click the "Load Driver" button on...

Quick Installation Guide
Page 28
... the Main Menu does not appear automatically, locate and doubleclick on the file "ASSETUP.EXE" from the BIN folder in your CDROM drive. It is designed to display the menus. 28 ASRock P55DE Pro / P55DE3 Motherboard English The Support CD that came with its various sub-menus and to enter BIOS Setup utility; It will enhance motherboard features. BIOS Information The Flash Memory on the system chassis. Software Support CD information This motherboard supports...
... the Main Menu does not appear automatically, locate and doubleclick on the file "ASSETUP.EXE" from the BIN folder in your CDROM drive. It is designed to display the menus. 28 ASRock P55DE Pro / P55DE3 Motherboard English The Support CD that came with its various sub-menus and to enter BIOS Setup utility; It will enhance motherboard features. BIOS Information The Flash Memory on the system chassis. Software Support CD information This motherboard supports...


