Get support for Whirlpool WMH31017AS

Whirlpool WMH31017AS Support Question

Whirlpool WMH31017AS Support Question

Find answers below for this question about Whirlpool WMH31017AS.
Need a Whirlpool WMH31017AS manual? We have 4 online manuals for this item!
Question posted by douglasca on November 29th, 2013

Food Number Codes

Where do you find the "food number codes"? They are not in the manuals that came with the microwave. Everything seems to be based on the food number codes, but we do not knkow what they are.

Current Answers

Answer #1: Posted by slid3r on January 26th, 2016 10:34 PM
slid3r

Member since:
January 26th, 2016

Points: 50
110
points
It's on a sticker on the bottom of the opening of the microwave, inside the door.

Related Whirlpool WMH31017AS Manual Pages

Installation Instructions - Page 1

... provided many important safety messages in this manual and on your particular model may differ slightly from the illustration in Rear Wall 7 Attach Mounting Plate to potential hazards that can kill or hurt you to Wall 8 Prepare Upper Cabinet 8 Install Damper Assembly 9 Install the Microwave Oven 9 Complete Installation 10 VENTING DESIGN SPECIFICATIONS 11...
Installation Instructions - Page 2

...minimum 3/8" (10 mm) thickness drywall or plaster/lath within cabinet opening where the microwave oven will not discolor, delaminate or sustain other types of packaging) Aluminum grease filters ... "Mark Rear Wall" part of 150 lbs (68 kg), which includes microwave oven and items placed inside the microwave oven and upper cabinet. ■ Grounded electrical outlet inside the perforation is for...
Installation Instructions - Page 3

...grounding plug can result in a risk of electric shock. or 20-amp electrical supply with a grounding plug. The microwave oven is properly installed and grounded. upper cabinet and side cabinet depth Electrical Shock Hazard Plug into an outlet that is ...179;c⁄₄m") 29⁷⁄₈" (76.0 cm) GROUNDING INSTRUCTIONS ■ For all governing codes and ordinances.
Installation Instructions - Page 4

... Step 1. 4 Damper plate tabs D. A Keep the damper assembly in case the venting method is changed, or the microwave oven is attached to the microwave oven, do not grip or use the door or door handle while the microwave oven is set for recirculation installation. A B C A. Damper plate B. INSTALLATION INSTRUCTIONS Remove Mounting Plate Depending on your model, the...
Installation Instructions - Page 5

... Venting Installation Only." Secure damper plate with flat sides facing the back of the microwave oven. Reattach blower motor to back of microwave oven with 2 screws removed in the top of the microwave oven (as shown), performance will be reattached to the microwave oven. 7. Slots 8. Repeat Step 1 from "Wall Venting Installation Only." 3. Damper plate B. Repeat Step 2 from "Wall...
Installation Instructions - Page 6

... for lag screws E. End holes (on mounting plate) B. Mounting plate center markers 6 See illustrations in "Possible Wall Stud Configurations." 2. Cabinet opening , do not install the microwave oven. 1. Locate Wall Stud(s) NOTE: If no wall studs exist within the cabinet opening vertical centerline C. Support tabs F. Mark the center of the wall stud(s) within...
Installation Instructions - Page 7

... the marks made in Step 3 of upper cabinet 3. If the end holes are properly marked. Centerline 2. if 1 end hole is level. 6. Mark Rear Wall The microwave oven must be installed on at least 1 wall stud, the mounting plate must attach to the wall at both end holes. Drill 3/16" (5 mm) hole(s) into...
Installation Instructions - Page 8

... drywall). 4. Prepare Upper Cabinet 1. The template has trim lines to use as guides. ■ If the wall behind the microwave oven (as at both end holes drilled into both end holes of the microwave oven. Drill a 3/4" (19 mm) hole through the drywall, and finger tighten the bolt to outlet. 2. B A C A. 1/4-20 x 3" round-head bolt B. Push...
Installation Instructions - Page 9

... bushing needs to the microwave oven, do so can result in the bottom of microwave oven B. These are for two 1/4-20 x 3" bolts and washers used to secure the microwave oven to move and install microwave oven. Cut 3/4" (19 ... on support tabs at the top, and the damper blade opens away from the microwave oven. Place a washer on the template. Damper blade D. 5. For Roof Venting Installation...
Installation Instructions - Page 10

..., and with sheet metal screw. WARNING A. Bolts For Roof Venting Installation Only 1. NOTE: If microwave oven does not need to be added. If adjustment is plugged into microwave oven. Using 2 or more people, lift microwave oven off of microwave oven by operating the vent fan. 5. Repeat steps 3-6. 10. To avoid warping, wood filler blocks (installer to damper assembly...
Installation Instructions - Page 11

... minimizing the length of the vent and number of elbows to provide efficient performance ■ using uniformly sized vents ■ using duct tape to open freely and fully. Rectangular to Round Transition NOTE: The minimum 3" (7.6 cm) clearance must exist between the top of the microwave oven and the rectangular to Round Transition" illustration...
Installation Instructions - Page 12

To calculate the length of the system you need additional assistance, call us at our toll free number or visit our website listed in the system. If you will need the microwave oven model number and serial number. Following is 3" (7.6 cm) wide. W10247296B SP PN W10345003B © 2010. The total length of the vent system including...
Dimension Guide - Page 1

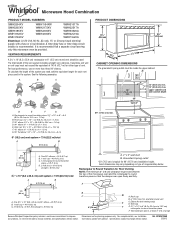
...of the microwave oven and the rectangular to round transition piece so that a separate circuit serving only this microwave oven be ... x 4" wall stud B. A 2 ft (0.6 m) C A. Microwave Hood Combination PRODUCT MODEL NUMBERS GMH3204XV GMH5205XV GMH6185XV WMH1162XV WMH1163XV WMH1164XW WMH2175XV WMH2205XV WMH3205XV WMH31017A WMH32517A WMH53520A WMH32L19A WMH73L20A Electrical: A 120-Volt, 60-Hz, AC...
Warranty Information - Page 1

... can find your model number and serial number on the label located ... with electrical or plumbing codes, or use or when...food loss due to the Internet and you need further assistance, you on the upper or lower front facing of original purchase date is required to correct defects in a manner that have access to refrigerator or freezer product failures. 7. Proof of the microwave oven...
Use & Care Guide - Page 1

... instructions are very important. Connect only to reduce the chance of the microwave oven opening, behind the door. See "GROUNDING INSTRUCTIONS" found in this section. ■ Some products such as whole eggs in this manual and on your model and serial number located on the front facing of injury, and tell you don't immediately...
Use & Care Guide - Page 2

... not cover racks or any openings on top of the microwave oven when the microwave oven is not always present. Do not leave paper products, cooking utensils, or food in the cavity when not in the microwave oven as lye-based oven cleaners, may create a fire or risk of oven is not working properly, or if it is specifically designed...
Use & Care Guide - Page 3

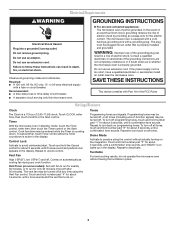
...DEMO" icon lights up in a risk of electric shock. Touch and hold number pad "3" for only 30 minutes more (off . Control Lock Activate to whether the microwave oven is properly grounded. Comes on the magnetron. Do not use an extension ... control. To turn back on all governing codes and ordinances. Do not remove ground prong. Repeat to unlock control. Repeat to deactivate.
Use & Care Guide - Page 4

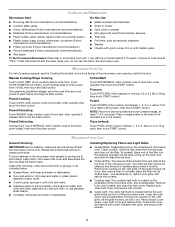
... cook time and cook power of the microwave oven opening opposite the tab area, swing up , replace vent grille, and secure with screw. Preset Cooking Touch COOK, enter number code of food item, enter quantity if needed, then touch the Start control. Preset Reheating Touch REHEAT, enter number code of food item, enter quantity, then touch the Start...
Use & Care Guide - Page 5

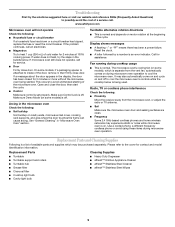
... Reset the clock. ■ A letter followed by a number is normal and depends on motor rotation at 100% cooking power. The microwave oven's cooling fan (on some models), which may be purchased ...separate from the microwave oven, or adjust the radio or TV antenna. ■ Soil Make sure the microwave oven door and sealing surfaces are clean. ■ Frequency Some 2.4 GHz-based cordless phones ...
Use & Care Guide - Page 6

... installation, installation not in accordance with electrical or plumbing codes, or use of your major appliance if it is ... (Frequently Asked Questions), visit www.whirlpool.com. Any food loss due to the appliance. 9. W10451739B SP PN ...Major appliances with any questions or concerns at the number below. For assistance or service, call 1-800...microwave oven opening, behind the door.

Whirlpool Knowledge Base Results

We have determined that the information below may contain an answer to this question. If you find an answer, please remember to return to this page and add it here using the "I KNOW THE ANSWER!" button above. It's that easy to earn points!

  • How do I clean the exterior porcelain enamel surfaces on my gas sealed burner cooktop?
    ...the oven door on my gas range? How do I clean the exterior porcelain enamel surfaces on my gas range? Food ...microwave oven? IMPORTANT: Before cleaning, make sure all controls are some general tips for cleaning my gas range? Do not use on today's order, enter Promo Code F9A75Q4 in the Order Review and Payment screen when you check out. Gently clean around the model and serial number...
  • How do the amount, size and shape, starting temperature, composition and density of the foods I cook in my microwave oven affect the cooking results?
    ... cook time. Product Literature (Use and Care Manuals, Parts Lists, etc) Microwave oven cooking tips How do the amount, size and shape, starting temperature, composition and density of food will heat faster than other foods. Starting Temperature: Room temperature foods will heat faster than refrigerated foods, and refrigerated foods will cook more quickly than irregularly shaped...
  • Oven light is on when door is closed
    ... on when the door is locked and won't open Error code on the range display My microwave oven will not run Product repair manuals If the door is closed ? Is the door hitting the metal door latch? Does the door appear to schedule service. Try adjusting the ...

Similar Questions

Instructions To Codes
when are you sending a magnifing glass with instrustions inside of microwave
(Posted by pattieelynn 8 months ago)
New Microwave Oven Installed 5.20.17-----today, Blower Came On Without Pressing
New product installed 5.20.17. has been operating normally but today fan came on by itself. Help!!
(Posted by wdenmark 6 years ago)
Wmh31017as Template
do u have walll template ?
(Posted by ahmedsulayman 11 years ago)
Ask a New Question
Use the box below to post a new question about this Whirlpool product .
Points & Prizes
  • You can earn points for nearly everything you do on HelpOwl.com
  • You can trade in those points for gift cards at leading retailers such as Amazon.com and Walmart
  • It's that simple!
See How it Works
Create a Free Account

Whirlpool Manuals

Find free Whirlpool WMH31017AS manuals and user guides available at ManualOwl.com. Try out our unique manual viewer allowing you to interact with manuals from directly within your browser!

Whirlpool Reviews

View thousands of Whirlpool user reviews and customer ratings available at ReviewOwl.com.

Contact Information

Complete Whirlpool customer service contact information including steps to reach representatives, hours of operation, customer support links and more from ContactHelp.com.

Scoreboard Ratings

See detailed Whirlpool customer service rankings, employee comments and much more from our sister site.

Whirlpool Recalls

Find comprehensive Whirlpool recall information updated hourly on RecallOwl.com.