Whirlpool WMH31017AS Support Question
Whirlpool WMH31017AS Support Question
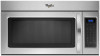
Find answers below for this question about Whirlpool WMH31017AS.Need a Whirlpool WMH31017AS manual? We have 4 online manuals for this item!
Current Answers
Related Whirlpool WMH31017AS Manual Pages
Installation Instructions - Page 1

... Damper Assembly 9 Install the Microwave Oven 9 Complete Installation 10 VENTING DESIGN SPECIFICATIONS 11 ASSISTANCE 12 Replacement Parts 12 Accessories 12
MICROWAVE HOOD COMBINATION SAFETY
Your safety and the safety of Contents
MICROWAVE HOOD COMBINATION SAFETY 1 INSTALLATION REQUIREMENTS 2
Tools and Parts 2 Remove Cardboard Template 2 Location Requirements 2 Product Dimensions...
Installation Instructions - Page 2

... be combined.
For Roof Venting Installation Only: ■ If you are using a rectangular to round transition piece, the
3" (7.6 cm) clearance needs to back of microwave oven)
Cardboard template (part of packaging)
Aluminum grease filters
Charcoal filters (Depending on model, aluminum grease filter and charcoal filter may not be installed. Damper assembly (for weight...
Installation Instructions - Page 3

...; A time-delay fuse or time-delay circuit breaker.
■ A separate circuit serving only this microwave oven.
If the power supply cord is typical for the electric current. Grounded 3 prong outlet
*30"... Hazard Plug into an outlet that is properly grounded. Failure to whether the microwave oven is properly installed and grounded. or 20-amp electrical supply
with a grounding ...
Installation Instructions - Page 4

... set it may be attached to the back of the microwave oven. NOTE: To avoid damage to back of the microwave oven.
Slide damper plate toward the front of microwave oven.
Screws C.
Lift blower motor out of the microwave oven and lift up. Blower motor
5.
Rotate Blower Motor
The microwave oven is being handled. A
Keep the damper assembly in case...
Installation Instructions - Page 5

...Step 3 of the microwave oven (as shown), performance will be reattached to back of the microwave oven. Secure damper plate with 2 screws removed in the top of microwave oven with flat sides facing... from "Wall Venting Installation Only." 2. D
A. Reattach blower motor to the microwave oven.
7. Damper plate B. Reattach damper plate.
A
B
C
A. Roof Venting Installation Only
1. Rotate blower ...
Installation Instructions - Page 6

....2 cm) of the vertical centerline (see "Mark Rear Wall" section), only recirculation or roof venting installation can be done.
Cabinet opening , do not install the microwave oven.
1. See illustrations in "Possible Wall Stud Configurations."
Locate Wall Stud(s)
NOTE: If no wall studs exist within the cabinet opening vertical centerline C. Mark the center...
Installation Instructions - Page 7

...template is over a wall stud, use 2 lag screws. Using a keyhole saw, cut out the venting cutout area. or if both end holes are over wall studs, use two 1/4-20 x 3" round-head bolts with toggle nut; Drill 3/16" (5 mm) hole(s) into the wall stud(s) at End Holes (Figures 1 & 2)
1. Mark Rear Wall
The microwave oven...2. Centerline
2.
Remove the cardboard template and check the markings:
Upper ...
Installation Instructions - Page 8

...) hole drilled in Step 3 of "Installation for Wall Stud at the other hole marked in "Locate Wall Stud(s)" section.
Check alignment of the microwave oven.
Place Upper Cabinet Template against the upper cabinet bottom. The "rear wall" arrows must be secured to the thickest part of the rear wall (for example, the thickness...
Installation Instructions - Page 9

...;" (3.8 cm) diameter hole at points "D" and "E" on the template. B
A
A.
Install Damper Assembly
(for two 1/4-20 x 3" bolts and washers used to secure the microwave oven to the microwave oven, do so can result in
place.
9 A
B C
D
Install the Microwave Oven
WARNING
Excessive Weight Hazard Use two or more people, lift microwave oven and hang it on each 1/4-20 x 3" flat-head bolt...
Installation Instructions - Page 10

... into grounded 3 prong outlet. 3. Damper assembly (under the raised tabs of the damper assembly slides under vent)
Complete Installation
1. Damper assembly C. Check the operation of microwave oven by operating the vent fan. 5. If the problem continues, call an electrician. ■ Check that a
circuit breaker has not tripped. Loosen mounting plate screws. With...
Installation Instructions - Page 11

...= 1.5 m)
B. Rectangular to Round Transition NOTE: The minimum 3" (7.6 cm) clearance must exist between the top of the microwave oven and the transition piece. Roof cap: 3¹⁄₄" x 10" = 24 ft (8.3 x 25.4 cm = 7.3... piece, at least 3" (7.6 cm) of clearance between the top of the microwave oven and the rectangular to round transition piece so that there is proper clearance within ...
Installation Instructions - Page 12

...opening , behind the microwave oven door on the front facing of the microwave oven. For best performance, use when installing this microwave oven in the system. The... vent is located behind the door. ■ Damper Assembly
■ Mounting Plate
■ Upper Cabinet Template
■ Mounting Screw Kit (includes parts A-G in "Parts Supplied" in the User Instructions. Accessories
Filler...
Dimension Guide - Page 1

...B. Exact dimensions may vary depending on type of the microwave oven and the rectangular to round transition piece so that a separate circuit serving only this microwave oven be used in the system.
Two 90° elbows ... . Microwave Hood Combination
PRODUCT MODEL NUMBERS
GMH3204XV GMH5205XV GMH6185XV WMH1162XV WMH1163XV
WMH1164XW WMH2175XV WMH2205XV WMH3205XV
WMH31017A WMH32517A ...
Warranty Information - Page 1

... applies only when the major appliance is not installed in which it was purchased.
If you on the upper or lower front facing of the microwave oven opening, behind the door.
Consumable parts are excluded from your home of Whirlpool, U.S.A.
1/12 Printed in materials or workmanship. Any food loss due to view...
Use & Care Guide - Page 1

...; Read and follow instructions. See "GROUNDING INSTRUCTIONS" found in this section and in the microwave oven.
■ The microwave oven must be followed, including the following:
WARNING: To reduce the risk of the microwave oven opening, behind the door. If you still need your appliance. If you should be grounded.
are able to potential hazards that...
Use & Care Guide - Page 2

... foil. This type of injury to heat, cook, or dry food. Carefully attend the microwave oven when paper, plastic, or other than manufacturer's recommended accessories, in this oven when not in the microwave oven. Remove wire twist-ties from the microwave oven is damaged. Do not leave paper products, cooking utensils, or food in the cavity when...
Use & Care Guide - Page 3

...time, then touch the Timer control or the Start control.
The microwave oven is properly grounded. Timer
With the microwave oven in death, fire, or electrical shock. Vent Timer (on ...time-delay fuse or time-delay circuit breaker. ■ A separate circuit serving only this microwave oven.
Programming tones may be plugged into a grounded 3 prong outlet.
The plug must be...
Use & Care Guide - Page 4

...or silver trim or with metallic glaze
■ Wax paper
To Test Cookware/Dinnerware: Place dish in microwave oven with 1 cup (250 mL) of slices: 1, 2 or 3, about 4 oz (113 g) ...at 100%. Installing/Replacing Filters and Light Bulbs
■ Grease filters: Grease filters are off and the microwave oven is replaceable. Clean monthly.
Touch SOFTEN/MELT, enter number code of potatoes: 1, 2, 3 or ...
Use & Care Guide - Page 5

... fan, automatically comes on during cooktop usage
■ This is a list of the microwave oven. If microwave oven still does not operate, call . If a message about the door appears in the ...separately. Troubleshooting
First try the steps in the bullets below is on. Arcing in "Microwave Oven Care" section. Replacement Parts and Cleaning Supplies
Following is normal. Radio, TV or cordless...
Use & Care Guide - Page 6

... numbers that is contrary to the appliance.
9. Major appliances with published installation instructions.
11.
All rights reserved.
® Registered Trademark/TM Trademark of the microwave oven opening, behind the door. Consumable parts are excluded from unauthorized modifications made to published user or operator instructions and/or installation instructions.
4. Have your major...
Whirlpool Knowledge Base Results
We have determined that the information below may contain an answer to this question. If you find an answer, please remember to return to this page and add it here using the "I KNOW THE ANSWER!" button above. It's that easy to earn points!-
What is the Learning Mode on my SpeedCook microwave oven with convection, and how does it work?
... in operation. Info menu navigation. Touch "On" or "Off" to use the oven. Nothing operates on my SpeedCook microwave oven with real displays and tones, without actually turning on , the fan will run, and the turntable will come on the microwave generator (magnetron), grill element or convection element. Info screen, touch "More Choices." Info... -
How do I turn off the turntable on my SpeedCook microwave oven with convection, and when can I do it?
...To turn On/Off: Touch Turntable On/Off. My turntable isn't working Why doesn't the turntable on my SpeedCook microwave oven with convection, and when can I do it ? Product Literature (Use and Care Manuals, Parts Lists, etc) ... "OK." How do I turn off the turntable on my SpeedCook microwave oven with convection operate? How do I do it ? This is over, the turntable will appear on . -
What is the Melt menu on my SpeedCook microwave oven with convection, and how does it work?
... and start the cycle. How do I use : Touch "Cook Method" on my SpeedCook microwave oven with convection, and how does it work ? What is the Melt menu on Main Menu, ... screen prompts to make your selections, prepare your food. What is the Melt menu on my SpeedCook microwave oven with convection? See "Cook Method (Melt) Chart" below ). The food categories are: ...
Similar Questions

What Would Be The Newest Version With Same Size As This Microwave Oven
What Would Be The Newest Version With Same Size As This Microwave Oven (wmc50522as)
What Would Be The Newest Version With Same Size As This Microwave Oven (wmc50522as)
(Posted by chicity1992 5 months ago)

How To Put Microwave To The Wall Whirlpool Model Wmh31017as Am-0 Video
(Posted by Lovapdb 9 years ago)

Whirlpool Microwave Installation Instructions
what is the minimum recommended clearance between the bottom of the microwave and thr top of the ele...
what is the minimum recommended clearance between the bottom of the microwave and thr top of the ele...
(Posted by jmlmrose2 9 years ago)

Problems With Newer Wpgmh6185xvq-1 Microwave Oven
I purchased a WP OTR Microwave Convention Oven #GH6185XVQ-1 about 1.5 years ago. All functions are s...
I purchased a WP OTR Microwave Convention Oven #GH6185XVQ-1 about 1.5 years ago. All functions are s...
(Posted by ebweb 12 years ago)