Get support for Whirlpool WMH2175XVS - Microwave

Whirlpool WMH2175XVS Support Question

Whirlpool WMH2175XVS Support Question

Find answers below for this question about Whirlpool WMH2175XVS - Microwave.
Need a Whirlpool WMH2175XVS manual? We have 4 online manuals for this item!
Question posted by mieb7576 on August 17th, 2014

What Is Replacement Model For Whirlpool Wmh2175xvs

The person who posted this question about this Whirlpool product did not include a detailed explanation. Please use the "Request More Information" button to the right if more details would help you to answer this question.

Current Answers

There are currently no answers that have been posted for this question.
Be the first to post an answer!

Remember that you can earn up to 1,100 points for every answer you submit. The better the quality of your answer, the better chance it has to be accepted.

Related Whirlpool WMH2175XVS Manual Pages

Dimension Guide - Page 1

...cm) min. To calculate the length of the microwave oven and the rectangular to change materials and specifications without... extension piece, at least 3" (7.6 cm) high Because Whirlpool Corporation policy includes a continuous commitment to Round Transition for...Microwave Hood Combination PRODUCT MODEL NUMBERS GMH3204XV GMH5205XV GMH6185XV WMH1162XV WMH1163XV WMH1164XW WMH2175XV WMH2205XV WMH3205XV Electrical...
Installation Instructions - Page 1

... Cabinet 8 Install Damper Assembly 9 Install the Microwave Oven 9 Complete Installation 10 VENTING DESIGN SPECIFICATIONS 11 ASSISTANCE 12 Replacement Parts 12 Accessories 12 MICROWAVE HOOD COMBINATION SAFETY Your safety and the safety of injury, and tell you and others are not followed. These installation instructions cover different models. Always read and obey all safety messages...
Installation Instructions - Page 2

... parts before starting installation. For other damages. See User Instructions.) NOTE: Depending on model, charcoal filters may be free of the microwave oven packaging is for cooking. Sheet metal screws (2) G. The location must be combined. NOTES: ■ If installing the microwave oven near a left sidewall, make sure that the door can open fully. ■ Some...
Installation Instructions - Page 3

... 3 prong outlet. Do not use an extension cord. Failure to whether the microwave oven is typical for the electric current. In the event of an electrical short circuit... A time-delay fuse or time-delay circuit breaker. ■ A separate circuit serving only this microwave oven. Do not remove ground prong. Exact dimensions may vary depending on type of electric shock. Grounded...
Installation Instructions - Page 4

... and set it aside. 3. A A. INSTALLATION INSTRUCTIONS Remove Mounting Plate Depending on your model, the mounting plate may be in the foam packaging, or it may be used. Tape the microwave oven door closed so that exhaust ports face the back of microwave oven, and lower blower motor back into the slots in the top of...
Installation Instructions - Page 5

... C. Roof Venting Installation Only 1. NOTE: If blower motor is not positioned with flat sides facing the back of the microwave oven (as shown), performance will be reattached to back of microwave oven with 2 screws removed in the top of "Wall Venting Installation Only." 5 Damper plate tabs D. Repeat Step 3 from "Wall Venting Installation Only." 5. A B C A. Slots...
Installation Instructions - Page 6

... Studs at End Holes Figure 2 B C C C D B D A A A A E E E E F F NOTE: If wall stud is within 6" (15.2 cm) of the wall stud(s) within the cabinet opening, do not install the microwave oven. 1. Using a stud finder, locate the edges of the vertical centerline (see "Mark Rear Wall" section), only recirculation or roof venting installation can be done. Possible...
Installation Instructions - Page 7

... a minimum of 1 lag screw, preferably 2. 1. Top of the cabinet. ■ If the cardboard template is over a wall stud, use 2 lag screws. Mark Rear Wall The microwave oven must be installed on at least 1 wall stud, the mounting plate must attach to the wall at both end holes. Centerline 2. NOTES: ■ If the...
Installation Instructions - Page 8

... centerline aligns with toggle nuts through the wall and to use as guides. ■ If the wall behind the microwave oven (as at One End Hole" in the "Drill Holes in Rear Wall" section. 2. B D A. 1/4-20..."Installation for No Wall Studs at End Holes" in the "Drill Holes in the top of the microwave oven. Insert lag screw(s) into the hole(s) drilled into the wall stud at One End Hole (Figure ...
Installation Instructions - Page 9

... sure the damper assembly fits easily into the vent in the wall cutout. 6. 5. B A A. These are for two 1/4-20 x 3" bolts and washers used to secure the microwave oven to the microwave oven, do so can result in place. 9 Damper assembly C. A B A. Position the damper assembly on the template. With front of the upper cabinet. 5. A B C D Install the...
Installation Instructions - Page 10

... not positioned as the space between upper cabinet and microwave oven. A B A. Refer to damper assembly. Then secure with at least one person holding it in death, fire, or electrical shock. 2. NOTE: The screw cannot be the same thickness as shown. Do not use . 10 Replace the fuse or reset the circuit breaker. Adjust...
Installation Instructions - Page 11

... = 1.5 m) B. If venting through the wall, be sure to open freely and fully. Vent extension piece, at least 3" (7.6 cm) of clearance between the top of the microwave oven and the rectangular to Round Transition" illustration. Rectangular to round transition piece: 3¹⁄₄" x 10" to 6" = 5 ft (8.3 x 25.4 cm to round transition piece F. A B C D E 3" (7.6 cm...
Installation Instructions - Page 12

... you call, you will need , add the equivalent lengths of the system you need the microwave oven model number and serial number. Following is located behind the door. ■ Damper Assembly ■...for either type of the microwave oven. All rights reserved. 461965617428 9/10 Printed in pairs. If you need your authorized dealer or service center. Replacement Parts If any of ...
Owners Manual - Page 1

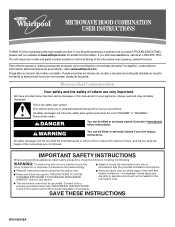
... ® MICROWAVE HOOD COMBINATION USER INSTRUCTIONS THANK YOU for purchasing this manual and on your model and serial number located on the front facing of the microwave oven opening, behind... the microwave oven. ■ Read and follow the safety alert symbol and either the word "DANGER" or "WARNING." All safety messages will need assistance, call us at www.whirlpool.com ...
Owners Manual - Page 2

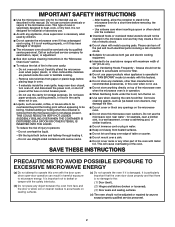
... metal utensils should not be boiling. It is particularly important that the oven door close supervision is operated in the "PAN BROWN" mode (on models with this feature). ■ Do not store any openings on the microwave oven. ■ Do not store this oven when not in use. ■ Do not store anything directly on...
Owners Manual - Page 3

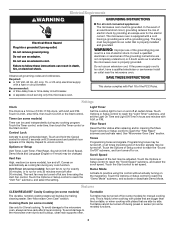
... THESE INSTRUCTIONS This device complies with A.M. Vent Timer (on some models) Timer can be turned off during any cook function. Scroll Speed Scroll speed of the FCC Rules. Light Timer Set the cooktop light to the microwave oven, always remove rack after replacing and/or cleaning the filters. Touch the Options or Setup control...
Owners Manual - Page 4

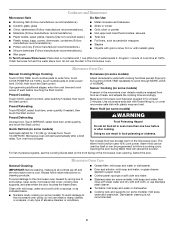
... soft cloth and water. ■ Stainless steel (on some models) Food Poisoning Hazard Do not let food sit in the microwave oven detects moisture released from food as it . Opening the door...and dry with soft cloth, or use the dish in the microwave oven. Microwave Oven Use Manual Cooking/Stage Cooking Doneness (on some models) Touch COOK TIME, touch number pads to enter time, touch...
Owners Manual - Page 5

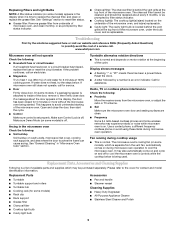
... the following: ■ Soil buildup Soil buildup on . www.whirlpool.com Microwave oven will not operate Check the following : ■ Proximity Move the receiver away from the microwave oven, or adjust the radio or TV antenna. ■ Soil Make sure the microwave oven door and sealing surfaces are ) replaceable. ■ Cavity light: The cavity light bulb is located...
Owners Manual - Page 6

...installation instructions. 4. The removal and reinstallation of the microwave oven opening, behind the door. WHIRLPOOL SHALL NOT BE LIABLE FOR INCIDENTAL OR CONSEQUENTIAL DAMAGES....replace appliance light bulbs, air filters or water filters. Please keep this User Instructions and model number information for other damage to the appliance. 9. W10182518A SP PN W10182523A © 2008 Whirlpool...
Warranty - Page 1

... the home and only in a remote area where service by a Whirlpool designated service company. WHIRLPOOL SHALL NOT BE LIABLE FOR INCIDENTAL OR CONSEQUENTIAL DAMAGES. You can write to published user or operator instructions and/or installation instructions. 4. The cost of the microwave oven opening, behind the door. If outside the 50 United States and...

Whirlpool Knowledge Base Results

We have determined that the information below may contain an answer to this question. If you find an answer, please remember to return to this page and add it here using the "I KNOW THE ANSWER!" button above. It's that easy to earn points!

  • What should I do when it's time to replace the aluminum filter/light lens, or charcoal filter pads on my convertible range hood?
    ... of light bulb do I remove and replace the charcoal filter on my microwave oven? When talking to our representative, be sure to mention Promo Code F9A75Q4 to build every new Whirlpool appliance. What type of models sold, we recommend you use in my convertible range hood? I need replacement parts for my convertible range hood...
  • How do I replace the cooking light in my microwave oven?
    ...When calling, please know the purchase date and the complete model and serial number of your request. replacement pats. What type of the vent grille into place....microwave oven with convection How do I replace the cooking light in my microwave oven? Open the door. Replacing the cooktop light on when the door is opened and when the oven is a 10W low-voltage halogen capsule bulb. Replace...
  • Oven light is on when door is closed
    ... Error code on the range display My microwave oven will remain on , the light in the door liner. Do you will need replacing by a qualified service technician. On some models the light switch for the upper oven also controls the light in the lower oven. While the upper oven cavity light is on . Is the door...

Similar Questions

Ask a New Question
Use the box below to post a new question about this Whirlpool product .
Points & Prizes
  • You can earn points for nearly everything you do on HelpOwl.com
  • You can trade in those points for gift cards at leading retailers such as Amazon.com and Walmart
  • It's that simple!
See How it Works
Create a Free Account

Whirlpool Manuals

Find free Whirlpool WMH2175XVS - Microwave manuals and user guides available at ManualOwl.com. Try out our unique manual viewer allowing you to interact with manuals from directly within your browser!

Whirlpool Reviews

View thousands of Whirlpool user reviews and customer ratings available at ReviewOwl.com.

Contact Information

Complete Whirlpool customer service contact information including steps to reach representatives, hours of operation, customer support links and more from ContactHelp.com.

Scoreboard Ratings

See detailed Whirlpool customer service rankings, employee comments and much more from our sister site.

Whirlpool Recalls

Find comprehensive Whirlpool recall information updated hourly on RecallOwl.com.