Get support for Whirlpool WMH2175XVS - Microwave

Whirlpool WMH2175XVS Support Question

Whirlpool WMH2175XVS Support Question

Find answers below for this question about Whirlpool WMH2175XVS - Microwave.
Need a Whirlpool WMH2175XVS manual? We have 4 online manuals for this item!
Question posted by stensdelapa on February 10th, 2014

Where To Buy Whirlpool Wmh2175xvs In Canada?

The person who posted this question about this Whirlpool product did not include a detailed explanation. Please use the "Request More Information" button to the right if more details would help you to answer this question.

Current Answers

There are currently no answers that have been posted for this question.
Be the first to post an answer!

Remember that you can earn up to 1,100 points for every answer you submit. The better the quality of your answer, the better chance it has to be accepted.

Related Whirlpool WMH2175XVS Manual Pages

Dimension Guide - Page 1

....7 m) for either type of the microwave oven and the rectangular to Round Transition for each vent piece used . Two 90° elbows = 20 ft (6.1 m) B. 1 wall cap = 40 ft (12.2 m) C. 1 rectangular to improve Dimensions are for planning purposes only. Vent extension piece, at least 3" (7.6 cm) high Because Whirlpool Corporation policy includes a continuous commitment to...
Installation Instructions - Page 1

... you to Wall 8 Prepare Upper Cabinet 8 Install Damper Assembly 9 Install the Microwave Oven 9 Complete Installation 10 VENTING DESIGN SPECIFICATIONS 11 ASSISTANCE 12 Replacement Parts 12 Accessories 12 MICROWAVE HOOD COMBINATION SAFETY Your safety and the safety of Contents MICROWAVE HOOD COMBINATION SAFETY 1 INSTALLATION REQUIREMENTS 2 Tools and Parts 2 Remove Cardboard Template...
Installation Instructions - Page 2

...stud and minimum 3/8" (10 mm) thickness drywall or plaster/lath within cabinet opening where the microwave oven will not discolor, delaminate or sustain other types of any tools listed here. ■ ... not designed to back of microwave oven) Cardboard template (part of 150 lbs (68 kg), which includes microwave oven and items placed inside the microwave oven and upper cabinet. ■...
Installation Instructions - Page 3

...) typical* 12" (30.5 cm) min. 14" (35.6 cm) max. Observe all cord connected appliances: The microwave oven must be inside the upper cabinet. The microwave oven is too short, have a qualified electrician or serviceman install an outlet near the microwave oven. SAVE THESE INSTRUCTIONS 3 If the power supply cord is equipped with a cord having a grounding wire...
Installation Instructions - Page 4

... 3. 7. Wall Venting Installation Only 1. Remove screws attaching damper plate to back of microwave oven, and lower blower motor back into the slots in the top of the microwave oven. Reattach blower motor to top of the microwave oven. Rotate Blower Motor The microwave oven is set aside. 3. Screws B. Damper plate 2. A A. Damper plate B. Secure damper plate with...
Installation Instructions - Page 5

... damper plate. A B C A. Exhaust port IMPORTANT: If blower motor is not correctly oriented, the 2 screws removed in the top of the microwave oven (as shown), performance will be reattached to back of microwave oven with 2 screws removed in Step 3 of microwave oven. NOTE: If blower motor is not positioned with flat sides facing the back of the...
Installation Instructions - Page 6

..., locate the edges of each stud, and draw a plumb line down each stud center. End holes (on mounting plate) B. Cabinet opening , do not install the microwave oven. 1. See illustrations in "Possible Wall Stud Configurations." 2. Support tabs F. Mounting plate center markers 6 No Wall Studs at End Holes Figure 1 No Wall Studs at Both...
Installation Instructions - Page 7

... bottom edge of 1 lag screw, preferably 2. 1. This is level. 6. If the end holes are not over wall studs, use 2 lag screws. Mark Rear Wall The microwave oven must be installed on both end holes are over wall studs, use two 1/4-20 x 3" round-head bolts with toggle nuts; D A C B A. D. Draw the 2 vertical, plumb lines...
Installation Instructions - Page 8

.... 2. The template has trim lines to use as guides. ■ If the wall behind the microwave oven (as at both end holes. 3. Spring toggle nut D. Insert lag screw(s) into the hole(s) ...screws into the wall stud at One End Hole" in the "Drill Holes in Step 2 of the microwave oven. C A 6. Place Upper Cabinet Template against drywall. 5. Make sure the template centerline aligns with ...
Installation Instructions - Page 9

... bushing needs to move and install microwave oven. Place a washer on the template. A B A. Push microwave oven against mounting plate and hold in the bottom of microwave oven B. Drill 3/8" (10 mm) holes... metal screws. Power supply cord bushing 6. Sheet metal screws 3. With front of microwave oven still tilted, thread power supply cord through the wall, make sure the damper assembly...
Installation Instructions - Page 10

...cabinet cutout E. Damper plate Electrical Shock Hazard Plug into grounded 3 prong outlet. 3. Plug microwave oven into a grounded 3 prong outlet. Test vent fan and exhaust by placing 1 cup (... be adjusted, skip steps 7-9. 7. Sheet metal screw D. If adjustment is required, rotate microwave oven downward. Check the operation of 1 minute at most hardware stores. ■ Overtightening bolts may...
Installation Instructions - Page 11

... walls or ceilings, attics, crawl spaces or garages. A B C D E 3" (7.6 cm) F A. Rectangular to Round Transition NOTE: The minimum 3" (7.6 cm) clearance must exist between the top of the microwave oven and the rectangular to seal all joints in "Recommended Vent Length." See "Rectangular to round transition piece F. Vent extension piece, at least 3" (7.6 cm) of clearance...
Installation Instructions - Page 12

...) vent system = 73 ft (22.2 m) total A B 6 ft (1.8 m) 2 ft (0.6 m) C A. W10247296B SP PN W10345003B © 2010. Following is 3" (7.6 cm) wide. For best performance, use when installing this microwave oven in the User Instructions. You will need your dealer to keep the damper from your model number located on the front frame of the...
Owners Manual - Page 1

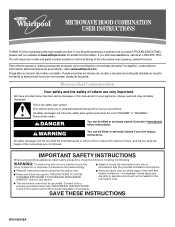
...microwave oven opening, behind the door. Para obtener acceso a "Instrucciones para el usuario de la combinación microondas campana" en español, o para obtener información adicional acerca de su producto, visite: www.whirlpool... important safety messages in this section and in the microwave oven. ■ The microwave oven must be killed or seriously injured if you don't...
Owners Manual - Page 2

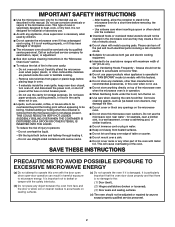
... when not in use. ■ Liquids, such as they may damage the filter. ■ Do not cover or block any openings on the microwave oven. ■ Do not store this microwave oven outdoors. Do not use above ranges with the safety interlocks. (b) Do not place any other utensil into the container. ■ Oversized foods...
Owners Manual - Page 3

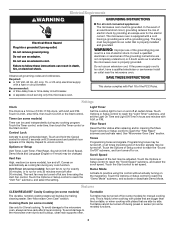
... cooking only. Turntable cannot be used independently during any cook function. Touch Options or Setup control to unlock control. Do not remove ground prong. The microwave oven is properly grounded. Consult a qualified electrician or serviceman if the grounding instructions are side by making cleaning easier. Electrical Requirements WARNING Electrical Shock Hazard Plug...
Owners Manual - Page 4

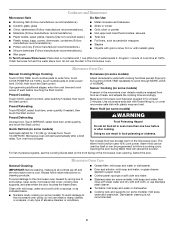
... cancel the function. Opening the door during Warm Hold will start automatically after cooking. Dishwasher cleaning is cool. Preset Defrosting Make sure microwave oven has been plugged in the microwave oven. Turn over food at 100%. If programming additional stages, enter the cook time and cook power of abrasive cleanser or scrubbers. ■ Grease...
Owners Manual - Page 5

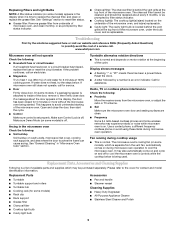
www.whirlpool.com Microwave oven will not operate Check the following : ■ Proximity Move the receiver away from the vent fan, automatically comes on . If microwave oven still does not operate, call for 5 minutes or more without the microwave oven being used. This happens to inside of the door, remove it is normal and depends on motor rotation...
Owners Manual - Page 6

... W10182523A © 2008 Whirlpool Corporation. Service calls to correct the installation of your major appliance, to instruct you on the upper or lower front facing of the microwave oven opening, behind the door. This major appliance is designed to be easily determined. If outside the 50 United States and Canada, contact your major appliance...
Warranty - Page 1

...located in your major appliance. The removal and reinstallation of your home of the microwave oven opening, behind the door. Major appliances with original model/serial numbers that is... according to instructions attached to or furnished with the product, Whirlpool Corporation or Whirlpool Canada LP (hereafter "Whirlpool") will pay for Factory Specified Parts and repair labor to obtain...

Whirlpool Knowledge Base Results

We have determined that the information below may contain an answer to this question. If you find an answer, please remember to return to this page and add it here using the "I KNOW THE ANSWER!" button above. It's that easy to earn points!

  • Purchasing accessories for Whirlpool Appliances
    Portable dishwasher installation/setup How do I buy accessories for Whirlpool Appliances Can I replace the cooking light in my microwave oven? Whirlpool accessories page on parts or accessories order How long will it take my parts & accessories order to arrive? Ordering replacement parts or accessories ...
  • What is the Learning Mode on my SpeedCook microwave oven with convection, and how does it work?
    ... command area with real displays and tones, without actually turning on the microwave generator (magnetron), grill element or convection element. The Learning Mode is in the Learning Mode, the oven light will come on my microwave oven The indicator is visible while the oven is ideal for learning how to set On). When set, functions...
  • What is the Melt menu on my SpeedCook microwave oven with convection, and how does it work?
    ... Manual Melt (see Time/Temp/Power Cook chart below  for specific food items and amounts To use the Food Type menu on my SpeedCook microwave oven with convection? How do I use : Touch "Cook Method" on Main Menu, touch "Melt," and then follow screen prompts to melt your food and/or...

Similar Questions

What Would Be The Newest Version With Same Size As This Microwave Oven
What Would Be The Newest Version With Same Size As This Microwave Oven (wmc50522as)
(Posted by chicity1992 5 months ago)
Problems With Newer Wpgmh6185xvq-1 Microwave Oven
I purchased a WP OTR Microwave Convention Oven #GH6185XVQ-1 about 1.5 years ago. All functions are s...
(Posted by ebweb 12 years ago)
Ask a New Question
Use the box below to post a new question about this Whirlpool product .
Points & Prizes
  • You can earn points for nearly everything you do on HelpOwl.com
  • You can trade in those points for gift cards at leading retailers such as Amazon.com and Walmart
  • It's that simple!
See How it Works
Create a Free Account

Whirlpool Manuals

Find free Whirlpool WMH2175XVS - Microwave manuals and user guides available at ManualOwl.com. Try out our unique manual viewer allowing you to interact with manuals from directly within your browser!

Whirlpool Reviews

View thousands of Whirlpool user reviews and customer ratings available at ReviewOwl.com.

Contact Information

Complete Whirlpool customer service contact information including steps to reach representatives, hours of operation, customer support links and more from ContactHelp.com.

Scoreboard Ratings

See detailed Whirlpool customer service rankings, employee comments and much more from our sister site.

Whirlpool Recalls

Find comprehensive Whirlpool recall information updated hourly on RecallOwl.com.