Get support for Whirlpool WFE301LVB - 30 Inch Electric Range

Whirlpool WFE301LVB Support Question

Whirlpool WFE301LVB Support Question

Find answers below for this question about Whirlpool WFE301LVB - 30 Inch Electric Range.
Need a Whirlpool WFE301LVB manual? We have 4 online manuals for this item!
Question posted by cdmmsa on December 26th, 2012

Range Won't Display Time

The time display on the clock will disappear. If I push the clock button it reappears, briefly.

Current Answers

There are currently no answers that have been posted for this question.
Be the first to post an answer!

Remember that you can earn up to 1,100 points for every answer you submit. The better the quality of your answer, the better chance it has to be accepted.

Related Whirlpool WFE301LVB Manual Pages

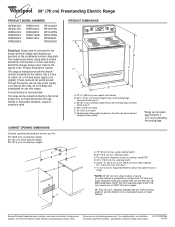
Dimension Guide - Page 1

...or 50 amps and investigated for planning purposes only. 30" (76 cm) Freestanding Electric Range PRODUCT MODEL NUMBERS GFE461LV GFE471LV WFE301LV WFE361LV WFE364LV WFE366LV WFE371LV WFE374LV ...WFE381LV WFE114LW WFE115LX RF110AXS RF111PXS RF114PXS RF212PXS RF263LXT RF264LXS Electrical: Range must be raised approximately 1" (2.5 cm) by not less than 1/4" ...
Installation Instructions - Page 1

... INSTRUCTIONS 30" (76 CM) FREESTANDING ELECTRIC RANGES Table of Contents RANGE SAFETY 2 INSTALLATION REQUIREMENTS 3 Tools and Parts 3 Location Requirements 3 Electrical Requirements - Only 7 Verify Anti-Tip Bracket Location 12 Level Range 12 Storage Drawer 12 Complete Installation 13 Moving the Range 14 ANTI-TIP BRACKET TEMPLATE 15 IMPORTANT: Save for local electrical inspector...
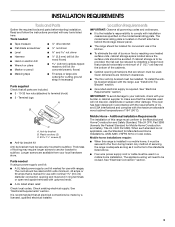
Installation Instructions - Page 3

...-wire power supply cord or cable must be secured to your cabinets, check with the range, see "Install Anti-Tip Bracket" section. ■ Grounded electrical supply is not applicable, use in a mobile home, it conforms to comply with ranges. Check local codes. To install the antitip bracket shipped with your local hardware store...
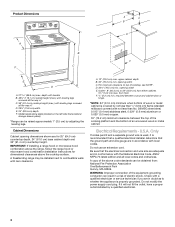
Installation Instructions - Page 4

.... A freestanding range may be raised approximately 1" (2.5 cm) by not less than ¹⁄₄" (0.64 cm) flame retardant millboard covered with the National Electrical Code, ANSI/... NFPA 70-latest edition and all the way in conformance with not less than No. 28 MSG sheet steel, 0.015" (0.4 mm) stainless steel, 0.024" (0.6 mm) aluminum or 0.020" (0.5 mm) copper. 30...
Installation Instructions - Page 5

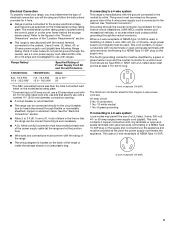
... located behind the storage drawer panel. This cord contains 3 copper conductors with ring terminals or open -end spade terminals with ranges. The model/serial number rating plate is used . See the "Electrical Connection" section. ■ Allow 2 to 3 ft (61.0 cm to 91.4 cm) of slack in the line so that specify use...
Installation Instructions - Page 6

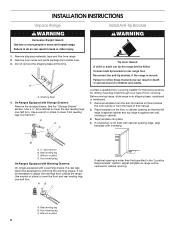
...qualified floor covering installer for the best procedure for drilling mounting holes through your type of this time. B A. ¼" drive ratchet B. It will be killed. AB C If cabinet opening ...Connect anti-tip bracket to move and install range. Wrench or pliers D. Use a ¼" drive ratchet to follow these instructions can tip the range and be centered in cabinet opening edge, align...
Installation Instructions - Page 7

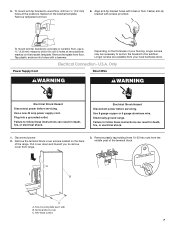
... U.S.A. To mount anti-tip bracket to follow these instructions can result in death, fire, or electrical shock. 1. Use a new 40 amp power supply cord. 5. Fasten anti-tip bracket with screws provided. Electrically ground range. Remove template from floor. 6. Electrical Connection - Remove template from floor. Failure to wood floor, drill two ¹⁄₈" (3.2 mm...
Installation Instructions - Page 8

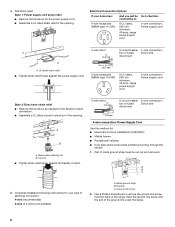
... screw 2. Add strain relief. A B C 5. Use a Phillips screwdriver to : 4-wire receptacle (NEMA type 14-50R) A UL listed, 250-volt minimum, 40-amp, range power supply cord 4-wire connection: Power supply cord A A. Electrical Connection Options If your type of metal ground strap must be Go to Section: connecting to remove the ground-link screw...
Installation Instructions - Page 12

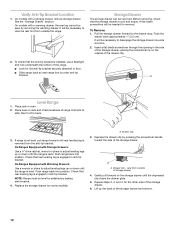
... pressing the screwdriver handle toward the side of the storage drawer. 6. Push range back into position. Push range back into position. To Remove: 1. Place rack in anti-tip bracket... a wrench or pliers to adjust leveling legs up the back of range, first side to disengage the storage drawer one side at a time. 2. Repeat steps 2, 3, and 4, for satisfactory baking performance....
Installation Instructions - Page 13

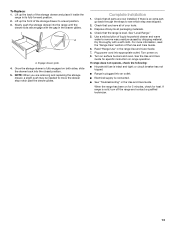
...storage drawer, a slight push may be needed to see which step was skipped. 2. See "Level Range." 5. or circuit breaker has not tripped. ■ Range is plugged into the ...Electrical supply is level. To Replace: 1. Check that the range is connected. ■ See "Troubleshooting" in its fully forward position. 2. Dry thoroughly with the gap in the range Use and Care Guide. 7. If range...
Installation Instructions - Page 14

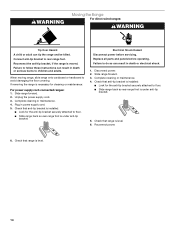
... necessary for cleaning or maintenance: For power supply cord-connected ranges: 1. Reconnect the anti-tip bracket, if the range is level. 6. Replace all parts and panels before servicing. Check that range is moved. Slide range forward. 2. Electrical Shock Hazard Disconnect power before operating. Connect anti-tip bracket to avoid damaging the floor covering. If removing...
Owners Manual - Page 1

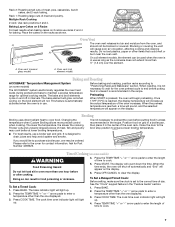
...our website at 1-800-253-1301. ® ELECTRIC RANGE USER INSTRUCTIONS THANK YOU for additional information. Table of Contents RANGE SAFETY 2 The Anti-Tip Bracket 2 FEATURE ...GUIDE 4 COOKTOP USE 5 OVEN USE 6 Electronic Oven Controls 6 Aluminum Foil 6 Positioning Racks and Bakeware 6 Oven Vent 7 Baking and Roasting 7 Broiling 7 Timed...
Owners Manual - Page 3

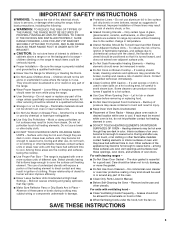
...or use a towel or other servicing should be hot even though they have had sufficient time to cool. Surface units may result in Place - During and after use aluminum foil... Units - IMPORTANT SAFETY INSTRUCTIONS WARNING: To reduce the risk of fire, electrical shock, injury to persons, or damage when using the range. ■ User Servicing - If a wet sponge or cloth is equipped...
Owners Manual - Page 4

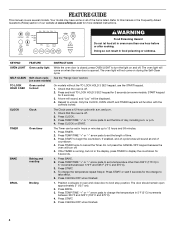
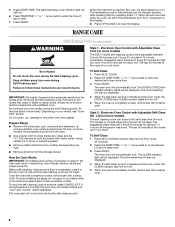
... 3 SEC keypad, use the START keypad. 1. Doing so can be displayed. 4. SELF-CLEAN Self-clean cycle See the "Range Care" section. (on some or all of day, including a.m. CLOCK Clock The Clock uses a 12-hour cycle with the controls locked. Press CLOCK. 3. Press TIMER. 2. Press TEMP/TIME "+" or "-" arrow pads to broil stop position. To change to...
Owners Manual - Page 5

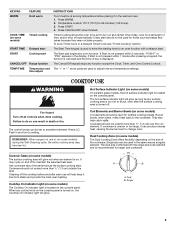
... WARM FEATURE Hold warm COOK TIME (on some models) Timed cooking START TIME Delayed start START Cooking start CANCEL/OFF Range function TEMP/TIME Temperature and time adjust INSTRUCTIONS Food must be ...heat back to adjust time and temperature settings. Cleaning off all controls when done cooking. The control knobs can be used to the cookware. Push in the display. Press START. ...
Owners Manual - Page 6

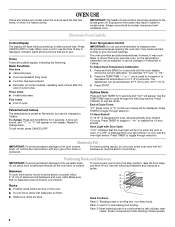
...176;F" will automatically shut off . The oven provides accurate temperatures; It can be set between 30°F (15°C) and -30°F (-15°C). 3. The adjustment can be adjusted. End of foil, liners or ... Odors and smoke are normal when the oven is used the first few times, or when it is displayed. Always move freely. Press CANCEL/OFF to another . Indicator lights show...
Owners Manual - Page 7

... end before or after cooking. 4. Timed Cooking (on the display. To Set a Delayed Timed Cook: Before setting, make sure the clock is reached, the display temperature will appear on some models).... Ask for the oven preheat cycle to the correct time of time to maintain a precise temperature range for baking. See the "Clock" keypad feature in oven more than ½" (1.3 ...
Owners Manual - Page 8

.... Press OFF/CANCEL to enter the desired self-clean cycle time. 3. RANGE CARE Self-Cleaning Cycle (on steel in the oven may ...times are 3 hours 30 minutes for light soil, or 4 hours 30 minutes for cool down . The last 30 minutes of the cycles is for heavy soil. Press the TEMP/TIME "+" or "-" arrow pads to clear the display. The time remaining will also be displayed. 4. The last 30...
Owners Manual - Page 9

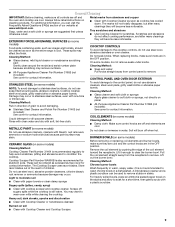
...should be cleaned as soon as the entire range is also recommended for contact information. COOKTOP CONTROLS To avoid damage to soak for a short time, then gently scrub with Cooktop Cleaner and... disappear, but after many cleanings they will become less noticeable. METALLIC PAINT (on soil ■ Clean with a plastic scrubber. Light to remove. Remove the coil element by pushing the...
Owners Manual - Page 10

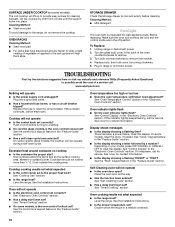
... in a reliable cookbook. 10 Oven indicator lights flash ■ Do the oven indicator lights flash? Level the range. To Replace: 1. Clear the display. See "Clock" keypad feature in knob before cleaning. Replace bulb, then bulb cover by a number? Level the range. See "Timed Cooking" section. ■ On some models, is a standard 40-watt appliance bulb...

Whirlpool Knowledge Base Results

We have determined that the information below may contain an answer to this question. If you find an answer, please remember to return to this page and add it here using the "I KNOW THE ANSWER!" button above. It's that easy to earn points!

  • What are the parts and features on the control panel of my freestanding ceramic glass electric range?
    ... have purchased may not match those of your model. My range is the Control Lockout or Lockout on my electric range? What are the parts and features on my 30-inch gas modular downdraft cooktop? Ordering replacement parts or accessories What is not working at all of the parts and features listed. What are...
  • What are the features on my touch screen display for my 30-inch Built-In High-Speed Microwave Oven?
    What are the features on my touch screen display for my Built-In High-Speed Microwave Oven? My display on my microwave oven is showing messages French Door Refrigerator LCD Touch Screen Dispenser Simulator What are the features on my touch screen display for my 30-inch Built-In High-Speed Microwave Oven?
  • How do I set the clock on my SpeedCook microwave oven with convection?
    ... oven with convection?  How do I set the clock on my electric range? When power is first supplied to the oven, or after a power failure, the "Welcome" screen will take you would like to the Clock screen. If you choose to set the clock at that time, the display will appear, asking whether you directly to set...

Similar Questions

I Have This Whirlpool Gas Range Oven. I Know It Can Be Converted From Mat To Lp.
I just need instructions on what to buy and how to convert the stove from nat to lp??
(Posted by Sheweychristine2 4 years ago)
Oven Not Working, Screen Says 'cool'
We had a power outage and when the power came back on, the stove top works, but the oven does not. Y...
(Posted by misskorilyn 9 years ago)
Cooktop On Light Will Not Go Off!
I have a Whirlpool WFE361LVB 30 inch range and my COOKTOP ON light will not turn off even with all t...
(Posted by schreinerracing10 11 years ago)
Setting The Clock
I just purchased a Whirlpool W10200357C electric range, but for some reason the clock won't stick wh...
(Posted by mslovely1976 12 years ago)
Funny Display
sfter losing power due to storm, it came back on. trying to adjust time to correct time, I must have...
(Posted by BubbaLight 12 years ago)
Ask a New Question
Use the box below to post a new question about this Whirlpool product .
Points & Prizes
  • You can earn points for nearly everything you do on HelpOwl.com
  • You can trade in those points for gift cards at leading retailers such as Amazon.com and Walmart
  • It's that simple!
See How it Works
Create a Free Account

Whirlpool Manuals

Find free Whirlpool WFE301LVB - 30 Inch Electric Range manuals and user guides available at ManualOwl.com. Try out our unique manual viewer allowing you to interact with manuals from directly within your browser!

Whirlpool Reviews

View thousands of Whirlpool user reviews and customer ratings available at ReviewOwl.com.

Contact Information

Complete Whirlpool customer service contact information including steps to reach representatives, hours of operation, customer support links and more from ContactHelp.com.

Scoreboard Ratings

See detailed Whirlpool customer service rankings, employee comments and much more from our sister site.

Whirlpool Recalls

Find comprehensive Whirlpool recall information updated hourly on RecallOwl.com.