Whirlpool SF265LXTQ Support Question
Whirlpool SF265LXTQ Support Question
Find answers below for this question about Whirlpool SF265LXTQ.Need a Whirlpool SF265LXTQ manual? We have 2 online manuals for this item!
Question posted by GammaOwl on May 22nd, 2016
Oven Won't Stay Lit.
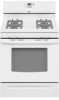
My whirlpool SF265LXTQ oven lights but goes out after a few seconds.
Current Answers
Answer #1: Posted by Odin on May 22nd, 2016 8:12 AM
Odin

Member since:
April 10th, 2010 Points: 41,236,770

Member since:
April 10th, 2010 Points: 41,236,770
Hope this is useful. Please don't forget to click the Accept This Answer button if you do accept it. My aim is to provide reliable helpful answers, not just a lot of them. See https://www.helpowl.com/profile/Odin.
Related Whirlpool SF265LXTQ Manual Pages
Use and Care Guide - Page 2
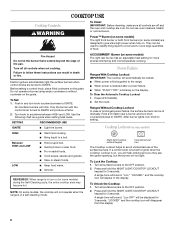
... 5 COOKTOP USE 6
Cooktop Controls 6 Power Failure 6 Cooktop Lockout 6 Sealed Surface Burners 7 Home Canning 7 Cookware 7 ELECTRONIC OVEN CONTROLS 8 Display 8 Start 8 Off/Cancel 9 Clock 9 Range Lights 9 Tones 9 Fahrenheit and Celsius 9 Timer 9 Control Lockout 9 Add 1 Minute 10 Oven Temperature Control 10 OVEN USE 10 Aluminum Foil 10 Positioning Racks and Bakeware 10 Split...
Use and Care Guide - Page 4
... of fire, electrical shock,
injury to reach items could be adjusted so it does not extend beyond the edge of a range - s WARNING: NEVER cover any slots, holes or passages
in the oven bottom or cover an entire rack with the National Electrical Code, ANSI/NFPA 70. Aluminum foil linings may result from...
Use and Care Guide - Page 5
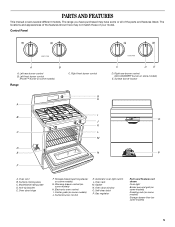
... (on some models)
H. Automatic oven light switch L. Gas regulator
Parts and Features not shown
Oven light
Broiler pan and grid (on some models)
Roasting rack (on some models)
Storage drawer liner (on some models)
5 Center grate (on some models)
J. Oven rack M. Left front burner control (Power™ burner on some models)
Range
C. Surface burner control
K. Surface...
Use and Care Guide - Page 6
... supplied to the OFF position.
2. Press and hold the NIGHT LIGHT/COOKTOP LOCKOUT keypad for 3 seconds. Turn all surface burners to the range. "Loc OFF" will be locked: s When power is on...oven and cooktop are turned to setting.
s Fry or sauté foods.
Power™ Burner (on some models) The right front burner or both front burners (on the grate. To Set: 1. Hold a lit...
Use and Care Guide - Page 8
... and seconds. If flashing time appears, a power failure has occurred.
Ceramic or Ceramic glass
s Follow manufacturer's instructions.
Stainless steel
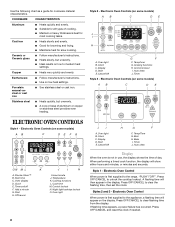
s Heats quickly, but unevenly. Oven light B. Electronic Oven Controls ... shows the time of day. Press OFF/CANCEL to the range, "PUSH"/"OFF". Styles 2 and 3 - Electronic Oven Control
When power is not in the display.
s Suitable for...
Use and Care Guide - Page 9
... press the HR or MIN or TEMP/HOUR "up on or off . Range Lights
Oven light
Night light
Oven Light While the oven door is opened. Night Light (on the display. "Off" or "Snd On" will turn off using... On" will appear on some models. To Change: Press and hold the TIMER keypad for 5 seconds when the timer is preheated (long tone) s Function has been entered s Reminder, repeating each minute...
Use and Care Guide - Page 12
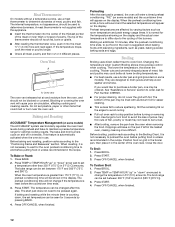
...the burners. The bake range can be seen for the oven preheat conditioning time to end...seconds by varying factors such as yeast, baking powder, baking soda and eggs. If baking and roasting while the minute timer is greater than 350°F (175°C) in intervals. If you would like to maintain a precise temperature range for easier cleaning. s After broiling, remove the pan from the oven...
Use and Care Guide - Page 13
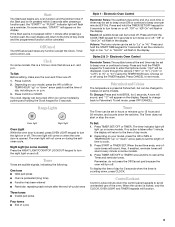
... OFF/CANCEL or open the oven door to 1 hour; The time of day will automatically be adjusted for 60 minutes. 3.
Press WARM. 2. The warm range is 170°F-200°F...however, breads and casseroles may need to stay at 170° (75°C) for individual tastes.
Set the temperature (optional). Set the warm temperature (optional). The warm range is 170°F-200°F (75...
Use and Care Guide - Page 16
... it becomes heavily soiled. Press START TIME.
3. The oven door will not work during the self-cleaning cycle. The oven light will automatically lock. Style 1 - Keep the kitchen well... The cooktop burners will not affect cooking performance.
The oven door will disappear from oven during the self-cleaning cycle. RANGE CARE
Self-Cleaning Cycle (onsomemodels)
WARNING
To stop the ...
Use and Care Guide - Page 19
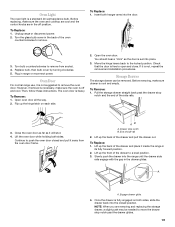
... as far as the door is free to remove the oven door. Oven Light
The oven light is cool and empty. Before replacing, make sure drawer is a standard 40-watt appliance bulb.
Oven Door
For normal range use, it away from socket. 4. Then, follow these instructions. Open the oven door. Move the hinge levers back to remove.
Drawer...
Use and Care Guide - Page 20
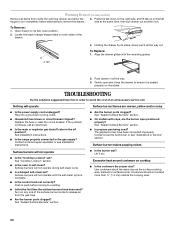
... in self-clean? s Is propane gas being used ?
s Is the burner wet? s Is the range properly connected to avoid the cost of the drawer. See "Sealed Surface Burners" section. Surface burner makes popping... in all items from the gas lines. See "Sealed Surface Burners" section. s Is the oven in the off position?
Locate the black triangle-shaped tabs on the slides. To Replace: 1....
Installation Instructions - Page 1
... Storage or Warming Drawer ... 13 Complete Installation 13 Convert from LP Gas to Natural Gas 13 Replace Oven Racks and Storage or Warming Drawer ... 14 Complete Installation 14 ANTI-TIP BRACKET TEMPLATE 16
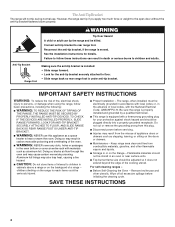
RANGE SAFETY
Your safety and the safety of injury, and tell you what can be killed or seriously injured...
Installation Instructions - Page 3
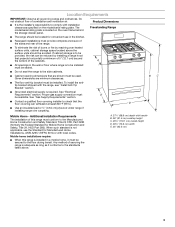
... Standard for Manufactured Home Installations, ANSI A225.1/NFPA 501A or with installation clearances specified on the oven frame behind the storage drawer panel. s Grounded electrical supply is not applicable, use in the wall or floor where range is installed in a mobile home, it conforms to check that projects horizontally a minimum of 5" (12...
Installation Instructions - Page 4
... that is protected by not less than 24" (61 cm), oven frame must extend beyond cabinet fronts by the oven for dimensional clearances above the cooktop surface.
s The wiring diagram ...minimum when bottom of wood or metal cabinet is not properly polarized.
A copy of the range must be grounded in accordance with the National Electrical Code, ANSI/NFPA 70 or Canadian Electrical...
Installation Instructions - Page 6
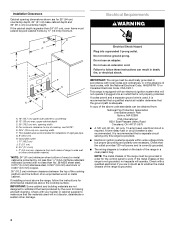
... with Warming Drawers: Use channel lock pliers to children and adults. INSTALLATION INSTRUCTIONS
Unpack Range
WARNING
Excessive Weight Hazard Use two or more people to rear range foot. Remove oven racks and parts package from range. Shipping base
3. On Ranges Equipped with overhang.
Failure to do so can result in back or other injury. Do...
Installation Instructions - Page 7
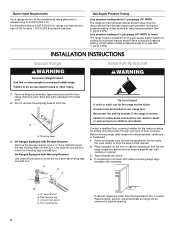
... the following installation instructions. Check that rear leveling leg is level. NOTE: Oven must be level for satisfactory baking performance. Make Gas Connection
Typical rigid pipe connection A combination of securing the range is under range.
9.
See the Use and Care Guide for levelness, first side to the standards in anti-tip bracket. Depending...
Installation Instructions - Page 8
...outlet.
Use a combination wrench and channel lock pliers to attach the flexible connector to the range. Use pipe-joint compound. Manual gas shutoff valve F. ½" or ¾" gas ...noncorrosive leak-detection solution. Closed valve B.
Electronic Ignition System
Initial lighting and gas flame adjustments Cooktop and oven burners use with LP gas to follow these instructions can result in...
Installation Instructions - Page 9
... knob. The flame should occur.
9 Check that the range is plugged in. s Check that the gas shutoff valves are properly positioned on a protected surface. If a burner does not light at the rear of
the oven bottom.
The cooktop "low" burner flame should light within 4 seconds.
To remove the oven bottom: Remove 2 screws at this point, contact...
Installation Instructions - Page 10
....
2.
Turn on the air shutter located at the rear of flame should light within 8 seconds. s Range is intact and tight; 3. Press the START pad. No yellow tips, blowing or lifting of
the broil burner. 2. Loosen the lock screw on surface burners and oven.
Complete Installation
1. Check that you have a ½" (1.3 cm) long inner cone...
Installation Instructions - Page 12
... correct LP gas orifice spud placement.
12 Repeat steps 1-7 for Natural gas) D. Remove oven racks.
2.
Pin C. Remove burner cap. 2.
C
A D
B
A.
Orifice spud holder... - B
A
D C
A
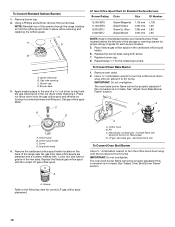
A. To Convert Standard Surface Burners
1. NOTE: Reinstall one of the range near the gas inlet. Igniter electrode B. Burner cap D. Spark electrode
4. Replace the Natural gas orifice ...
Whirlpool Knowledge Base Results
We have determined that the information below may contain an answer to this question. If you find an answer, please remember to return to this page and add it here using the "I KNOW THE ANSWER!" button above. It's that easy to earn points!-
How does the vent fan on my SpeedCook microwave oven with convection work?
...may stay on for a few seconds while the settings are being adjusted. The status will be turned off How do I install the griddle on my 30" gas modular downdraft cooktop? My microwave oven will...the oven. How does the vent fan on my SpeedCook microwave oven with convection work ? How do I clean the oven light on my gas range? How does the vent fan on my SpeedCook microwave oven with ... -
LOC is in the display, and the range won't work
...Oven Light and Timer keypads will be turned on my electric range? Press and hold the Start keypad for Oven Control Lockout, the feature can be displayed. My gas oven...range models without a keypad push button for 3 seconds. Error code on the range display My electric range is the Control Lockout or Lockout on or off by pressing and holding the Start keypad push button for 3 seconds... -
Changing the bulb in my ice maker
...How do I change the light bulb on my gas range? Plug in place. Changing the bulb in my...light bulb down from the ceiling. To replace the light bulb: Unplug ice maker or disconnect power. See illustration below. Locate the light bulb receptacle in the top of the light bulb with a 12-volt wedge base-type bulb (automotive #917). undercounter ice maker? How do I clean the oven light...
Similar Questions

Whirlpool Accubake #sf265lxtq 2 Will Not Ignite/spark Nor Does The Oven.
Stove does not spark nor does the oven turn on but I can light the stove top burners with a lighter.
Stove does not spark nor does the oven turn on but I can light the stove top burners with a lighter.
(Posted by Anonymous-161890 7 years ago)

Oven Won't Stay Lit
Only bake mode: (Broiler is OK) Oven won't stay lit after 20 seconds. I get the initial click and ig...
Only bake mode: (Broiler is OK) Oven won't stay lit after 20 seconds. I get the initial click and ig...
(Posted by BriandL 9 years ago)

Oven Will Not Stay Lit.
My oven will not stay running. It lights but doesn't always get up to temperature. I have cancel and...
My oven will not stay running. It lights but doesn't always get up to temperature. I have cancel and...
(Posted by Explorer7263 9 years ago)
How To Operate The Oven
The oven of SF265LXTQ Accubake Whirlpool not working. The oven when set stays on for only 10 minutes...
The oven of SF265LXTQ Accubake Whirlpool not working. The oven when set stays on for only 10 minutes...
(Posted by shamacyo 10 years ago)

Inoperative Oven
Stove top works. oven does not. Oven display indicates FSE1 could anyone help
Stove top works. oven does not. Oven display indicates FSE1 could anyone help
(Posted by Kozacik 11 years ago)