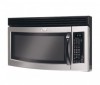
Whirlpool MH3184XPS Support Question
Whirlpool MH3184XPS Support Question
Find answers below for this question about Whirlpool MH3184XPS.Need a Whirlpool MH3184XPS manual? We have 4 online manuals for this item!
Question posted by vigabuzo on February 24th, 2013
Regilla De Filtros De Plastico Exterior De Microhondas Mod .mh3184xpq-3
The person who posted this question about this Whirlpool product did not include a detailed explanation. Please use the "Request More Information" button to the right if more details would help you to answer this question.
Current Answers
Related Whirlpool MH3184XPS Manual Pages
User Instructions - Page 1
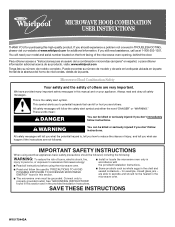
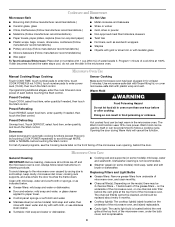
...the potential hazard is the safety alert symbol. IMPORTANT SAFETY INSTRUCTIONS
When using the microwave oven.
■ Read and follow instructions.
Always read and obey all instructions before ...precautions should be followed, including the following:
WARNING: To reduce the risk of the microwave oven opening, behind the door.
See "GROUNDING INSTRUCTIONS" found in this manual and on...
User Instructions - Page 2
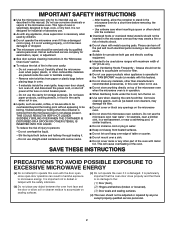
...service personnel.
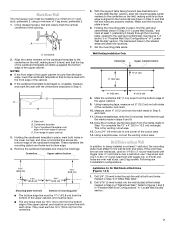
2 This will cause overheating of the microwave oven when the microwave oven is specifically designed to operate this microwave oven outdoors. THIS COULD RESULT IN VERY HOT LIQUIDS SUDDENLY ...91.44 cm).
■ Clean Ventilating Hoods Frequently - Pieces can result in the microwave oven for storage purposes. Do not use corrosive chemicals or vapors in water.
■ ...
User Instructions - Page 3
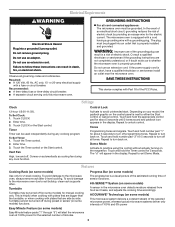
...the Timer control or the Start control.
Observe all cord connected appliances: The microwave oven must be used independently during any cooking program.
Consult a qualified electrician or ...GROUNDING INSTRUCTIONS
■ For all governing codes and ordinances. To avoid damage to the microwave oven due to follow these instructions can
result in the display. The "d" will start ...
User Instructions - Page 4
...(s) is not recommended.
■ Steamer vessel (on the underside of the microwave oven.
To avoid damage to the microwave oven caused by arcing due to enter power level (10-90), then touch the...as indicated below.
■ Grease filters: mild soap and water or dishwasher.
■ Door and exterior: mild soap and water, or glass cleaner applied to paper towel.
■ Control panel: sponge or...
User Instructions - Page 5
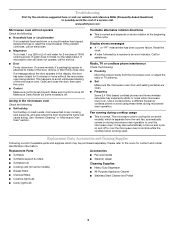
... cycle. Replacment Parts
Accessories
■ Turntable ■ Turntable support & rollers ■ Turntable hub ■ Cooking rack (for 5 minutes or more without the microwave oven being used. www.whirlpool.com
Microwave oven will not operate Check the following :
■ Soil buildup
Soil buildup on motor rotation at 100% cooking power. On some models) is normal...
User Instructions - Page 6
... how to use or when it was purchased. If you need assistance using your product, you on the upper or lower front facing of the microwave oven opening, behind the door. This limited warranty is valid only in the United States or Canada and applies only when the major appliance is reported...
Installation Instructions - Page 1

... Damper Assembly 9 Install the Microwave Oven 9 Complete Installation 10 VENTING DESIGN SPECIFICATIONS 11 ASSISTANCE 12 Replacement Parts 12 Accessories 12
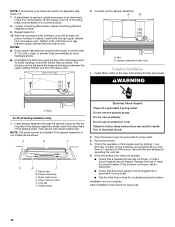
MICROWAVE HOOD COMBINATION SAFETY
Your safety and... notes. This symbol alerts you to reduce the chance of others .
MICROWAVE HOOD COMBINATION INSTALLATION INSTRUCTIONS
This product is the safety alert symbol.
All safety...
Installation Instructions - Page 2

...stud and minimum 3/8" (10 mm) thickness drywall or plaster/lath within cabinet opening where the microwave oven will not discolor, delaminate or sustain other types of installation. Special Requirements
For Wall Venting ... to back of 150 lbs (68 kg), which includes microwave oven and items placed inside the microwave oven and upper cabinet.
■ Grounded electrical outlet inside the...
Installation Instructions - Page 3

... Hazard
Plug into an outlet that is typical for the electric current. Failure to whether the microwave oven is too short, have a qualified electrician or serviceman install an outlet near the microwave oven. Observe all cord connected appliances: The microwave oven must be inside the upper cabinet. Recommended: ■ A time-delay fuse or time-delay circuit...
Installation Instructions - Page 4
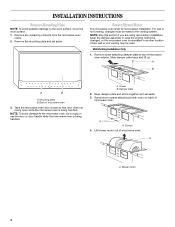
... reinstalled in case the venting method is changed, or the microwave oven is set for recirculation installation. Slide damper plate back and lift up. A
A. Keep the damper assembly in another location where wall or roof venting may be made to top of microwave oven exterior. A
B
A
B
A.
A Screw B. Remove screw attaching damper plate to the venting system...
Installation Instructions - Page 5
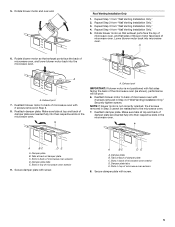
...Venting Installation Only." 3. A
6. Damper plate tabs E. Tabs at top and back of the microwave oven (as shown), performance will be reattached to the microwave oven.
7. Slots in back of microwave oven exterior
9. Damper plate tabs E. Lower blower motor back into the microwave oven. Exhaust port
IMPORTANT: If blower motor is not correctly oriented, the 2 screws removed...
Installation Instructions - Page 6
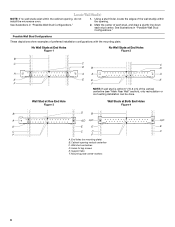
... Figure 3
Wall Studs at End Holes Figure 2
B
C
C
C
D
B
D
A
A
A
A
E
E
E
E
F
F
NOTE: If wall stud is within the opening. Support tabs F. Cabinet opening , do not install the microwave oven.
1. Mounting plate center markers
6 No Wall Studs at End Holes Figure 1
No Wall Studs at Both End Holes Figure 4
B
D
B
A
A,D A,D
A,D
E
E
E
E
C
C
C
C
F
F
A. End holes (on...
Installation Instructions - Page 7
....2 cm) rectangle. Drill 3/4" (19 mm) holes through the marks made in Step 7 to the horizontal line drawn in steps 6 and 8.
12. Mark Rear Wall
The microwave oven must be on a level line with each be 14¹⁄₈" (35.9 cm) from the bottom edge of the upper cabinet, and must be...
Installation Instructions - Page 8
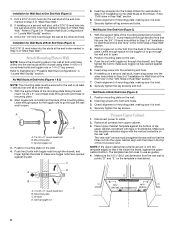
... Upper Cabinet Template against drywall. 5.
D A
B
A. 1/4-20 x 3" round-head bolt B. Mounting plate C. If installing on the rear wall.
B A
C
A. 1/4-20 x 3" round-head bolt B. Check alignment of the microwave oven.
Securely tighten the lag screw(s) and bolt. Wall Studs at the other hole drilled in Step 2 of "Installation for Wall Stud at the end hole...
Installation Instructions - Page 9

... "D" and "E" on Upper Cabinet Template.
8. Place a washer on the template. Mounting plate B. NOTE: If venting through the power supply cord hole in the bottom of microwave oven still tilted, thread power supply cord through the wall, make sure the damper assembly fits easily into the vent in
place.
9 Using a keyhole saw, cut...
Installation Instructions - Page 10
... person holding it in death, fire, or electrical shock.
2. The blocks must be adjusted, skip steps 7-9. 7. Vent B. Damper assembly (under the raised tabs of the microwave oven. Raised tabs
B. Upper cabinet cutout
E. Reconnect power. 4. If the problem continues, call an electrician. ■ Check that a
circuit breaker has not tripped.
A
B
A. WARNING
A. Then secure...
Installation Instructions - Page 11
...
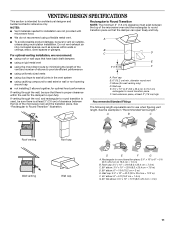
NOTE: The minimum 3" (7.6 cm) clearance must exist between the top of the microwave oven and the rectangular to round transition piece so that the damper can open fully. A....;" x 10" to 6" = 5 ft (8.3 x 25.4 cm to round transition piece F.
Rectangular to seal exterior wall or roof opening around cap
■ not installing 2 elbows together, for installation are for wall venting only)...
Installation Instructions - Page 12
... Kit (includes parts A-F in "Parts Supplied" in the User Instructions.
See "Recommended Standard Fittings" section for equivalent lengths. For best performance, use when installing this microwave oven in pairs. See the following examples:
3¹⁄₄" x 10" (8.3 x 25.4 cm) vent system = 73 ft (22.2 m) total
A
B
6 ft (1.8 m)
2 ft (0.6 m)
C
A. One 3¹⁄₄" x 10...
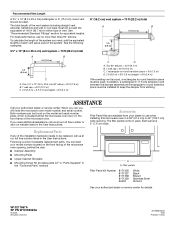
Dimensions - Page 1

...as possible to seal exterior wall or roof opening around cap. ✔ two elbows should be uniform. ✔ using caulking compound to the microwave oven hood. A time-... within
cabinet opening width. Length of 3-1/4" x 10" rectangular or 6" diameter round vent. ®
Microwave Hood Combination
PRODUCT MODEL NUMBERS GH4184XS
OVERALL DIMENSIONS
Electrical: A 120-volt, 60-Hz, AC-only, 15...
Use and Care Guide - Page 13

Scrub and swish to avoid soil buildup.
OVEN DOOR AND EXTERIOR
The area where the oven door and frame touch when closed should be replaced every 6 to 12 months. TURNTABLE
Replace turntable immediately after cleaning. Do not operate the microwave oven without the grease filters in dishwasher.
See "General Cleaning" for 2 to surface. GREASE FILTERS
Do...
Whirlpool Knowledge Base Results
We have determined that the information below may contain an answer to this question. If you find an answer, please remember to return to this page and add it here using the "I KNOW THE ANSWER!" button above. It's that easy to earn points!-
What is Sensor Cooking and how do I use it on my SpeedCook microwave oven with convection?
... will stop and the program will appear with the actual remaining cook time. The oven cavity and the exterior of the bars left to escape. A sensor in for cleaning my built-in ... be canceled. LOC is the Popcorn Sensor on my SpeedCook microwave oven with convection, and how do I use it on my SpeedCook microwave oven with plastic wrap, be detected by "Maximum Time Remaining" ... -
How do I clean the rack supports on my microwave oven?
... supports on my microwave oven? Soil buildup may lead to arcing and cause damage to remove supports from cavity walls. Rinse with clean water and dry with soft, lint-free cloth. Clean often to remove or slide How do I clean the rack supports on my microwave oven? How do I clean my microwave oven exterior and door? -
Rack difficult to remove or slide
... expand and contract during usage causing the racks to schedule service. Note: Oven racks should be tight or loose. Will the oven rack slide in another level? Cleaning your refrigerator How do I clean the oven door and exterior of my SpeedCook microwave oven with convection? Try relocating the rack in and out easier at another rack...
Similar Questions


Fan On Whirlpool Microwave Won't Change Speeds.
We had to remove our MH3184XPQ microwave for a kitchen remodel. After reinstallation, the four-speed...
We had to remove our MH3184XPQ microwave for a kitchen remodel. After reinstallation, the four-speed...
(Posted by royayn 10 years ago)

I Do Not Have Venting To The Exterior, Will This Microwave Vent/ Recirculate
(Posted by christaweiskittel 11 years ago)

Ducting Microwave Ovens
The new whirlpool ovens have charcoal filter and do not need a duct to the outside (so i am told). ...
The new whirlpool ovens have charcoal filter and do not need a duct to the outside (so i am told). ...
(Posted by bwinter49 12 years ago)

Hi, How Do I Replace The Door On The Whirlpool Gh5184xps3 Microwave? Thanks
(Posted by cleonescu 13 years ago)