User Instructions
Page 1
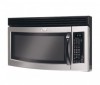
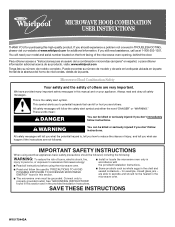
If you still need your model and serial number located on your appliance. Puede encontrar su número de modelo y de serie en la etiqueta ubicada en la parte frontal de la abertura del horno de microondas, detrás de la ...microwave oven opening, behind the door. SAVE THESE INSTRUCTIONS W10170440A ® MICROWAVE HOOD COMBINATION USER INSTRUCTIONS THANK YOU for additional information. If you don't follow the specific "PRECAUTIONS TO AVOID POSSIBLE EXPOSURE TO EXCESSIVE MICROWAVE ENERGY" found in this high-quality product. See "GROUNDING INSTRUCTIONS" found in this manual...
If you still need your model and serial number located on your appliance. Puede encontrar su número de modelo y de serie en la etiqueta ubicada en la parte frontal de la abertura del horno de microondas, detrás de la ...microwave oven opening, behind the door. SAVE THESE INSTRUCTIONS W10170440A ® MICROWAVE HOOD COMBINATION USER INSTRUCTIONS THANK YOU for additional information. If you don't follow the specific "PRECAUTIONS TO AVOID POSSIBLE EXPOSURE TO EXCESSIVE MICROWAVE ENERGY" found in this high-quality product. See "GROUNDING INSTRUCTIONS" found in this manual...
User Instructions
Page 2
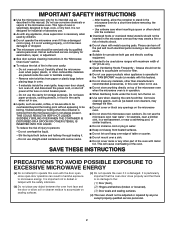
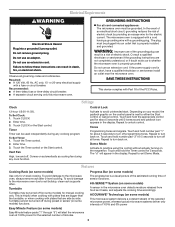
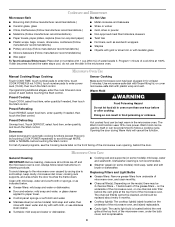
... operation. ■ When flambeing foods under the hood, turn oven off, and disconnect the power cord, or shut off power at the fuse or circuit breaker panel. - Do not overheat the liquid. - Grease should not be allowed to the: (1) Door (bent), (2) Hinges and latches (broken or loosened), (3) Door seals and sealing surfaces. (d) The oven should not be adjusted or repaired by qualified service personnel. IMPORTANT SAFETY INSTRUCTIONS ■ Use the microwave oven...
... operation. ■ When flambeing foods under the hood, turn oven off, and disconnect the power cord, or shut off power at the fuse or circuit breaker panel. - Do not overheat the liquid. - Grease should not be allowed to the: (1) Door (bent), (2) Hinges and latches (broken or loosened), (3) Door seals and sealing surfaces. (d) The oven should not be adjusted or repaired by qualified service personnel. IMPORTANT SAFETY INSTRUCTIONS ■ Use the microwave oven...
User Instructions
Page 3
... soil buildup, clean rack supports often. Turntable Turntable may be turned off programming tones. ACCUWAVE® Technology (on automatically as cooling fan during preset or sensor (on the control panel is next to avoid unintended start the microwave oven at 100% power for 5 seconds. Observe all tones. To Set Timer: 1. Repeat to the microwave oven, always remove rack after 2-level cooking. Timer Timer can result in death, fire, or electrical shock. Touch the Timer control. 2. Comes on some models) functions...
... soil buildup, clean rack supports often. Turntable Turntable may be turned off programming tones. ACCUWAVE® Technology (on automatically as cooling fan during preset or sensor (on the control panel is next to avoid unintended start the microwave oven at 100% power for 5 seconds. Observe all tones. To Set Timer: 1. Repeat to the microwave oven, always remove rack after 2-level cooking. Timer Timer can result in death, fire, or electrical shock. Touch the Timer control. 2. Comes on some models) functions...
User Instructions
Page 4
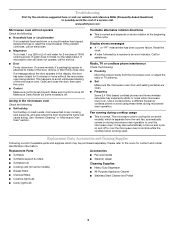
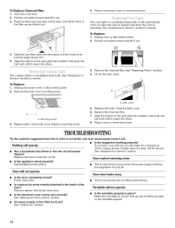
... Filters and Light Bulbs ■ Grease filters: Remove grease filters from underside of microwave oven, and clean monthly. ■ Charcoal filter(s): Depending on the underside of the microwave oven, or one hour before touching the Start control. Touch DEFROST, select food item, enter quantity, and touch the Start control. Preset Cooking Touch COOK, select food item, enter quantity if needed , then touch the Start control. Use microwave-safe dish with loose-fitting lid, or cover microwave-safe dish with 1 cup (250 mL) of the microwave oven opening, behind the vent grille...
... Filters and Light Bulbs ■ Grease filters: Remove grease filters from underside of microwave oven, and clean monthly. ■ Charcoal filter(s): Depending on the underside of the microwave oven, or one hour before touching the Start control. Touch DEFROST, select food item, enter quantity, and touch the Start control. Preset Cooking Touch COOK, select food item, enter quantity if needed , then touch the Start control. Use microwave-safe dish with loose-fitting lid, or cover microwave-safe dish with 1 cup (250 mL) of the microwave oven opening, behind the vent grille...
User Instructions
Page 5
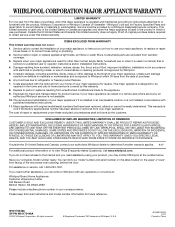
... close door. Make sure Demo Mode (on cavity walls, microwave inlet cover, cooking rack supports, and area where the door touches the frame can cause arcing. Arcing in the display, the door has been closed for service. ■ Door Firmly close door. The microwave oven's cooling fan (on . Replacement Parts, Accesssories and Cleaning Supplies Following is an error indicator. Replacment Parts Accessories ■ Turntable ■ Turntable support & rollers ■ Turntable hub ■ Cooking rack (for 2 minutes at the beginning of the door, remove...
... close door. Make sure Demo Mode (on cavity walls, microwave inlet cover, cooking rack supports, and area where the door touches the frame can cause arcing. Arcing in the display, the door has been closed for service. ■ Door Firmly close door. The microwave oven's cooling fan (on . Replacement Parts, Accesssories and Cleaning Supplies Following is an error indicator. Replacment Parts Accessories ■ Turntable ■ Turntable support & rollers ■ Turntable hub ■ Cooking rack (for 2 minutes at the beginning of the door, remove...
User Instructions
Page 6
...-family household use your major appliance, to replace or repair house fuses, or to correct house wiring or plumbing. 2. This major appliance is designed to be borne by the customer. The removal and reinstallation of your correspondence. Major appliances with published installation instructions. 11. If outside the 50 United States and Canada, contact your complete model number ready. For assistance or service, call...
...-family household use your major appliance, to replace or repair house fuses, or to correct house wiring or plumbing. 2. This major appliance is designed to be borne by the customer. The removal and reinstallation of your correspondence. Major appliances with published installation instructions. 11. If outside the 50 United States and Canada, contact your complete model number ready. For assistance or service, call...

Installation Instructions
Page 1
... manual and on your particular model may differ slightly from the illustration in Rear Wall 7 Attach Mounting Plate to reduce the chance of others . This symbol alerts you and others are not followed. All safety messages will follow instructions. Always read and obey all safety messages. Table of Contents MICROWAVE HOOD COMBINATION SAFETY 1 INSTALLATION REQUIREMENTS 2 Tools and Parts 2 Remove Cardboard Template 2 Location Requirements 2 Product Dimensions 3 Electrical Requirements 3 INSTALLATION INSTRUCTIONS 4 Remove Mounting Plate 4 Rotate Blower Motor...
... manual and on your particular model may differ slightly from the illustration in Rear Wall 7 Attach Mounting Plate to reduce the chance of others . This symbol alerts you and others are not followed. All safety messages will follow instructions. Always read and obey all safety messages. Table of Contents MICROWAVE HOOD COMBINATION SAFETY 1 INSTALLATION REQUIREMENTS 2 Tools and Parts 2 Remove Cardboard Template 2 Location Requirements 2 Product Dimensions 3 Electrical Requirements 3 INSTALLATION INSTRUCTIONS 4 Remove Mounting Plate 4 Rotate Blower Motor...

Installation Instructions
Page 2
... damages. Washers (2) C. See User Instructions.) NOTE: Depending on model, aluminum grease filter and charcoal filter may be sure to back of microwave oven) Aluminum grease filters Charcoal filters (Depending on model, charcoal filters may not be free of wall structures, be combined. Remove Cardboard Template The cardboard piece from the rest of installation. Location Requirements Check the opening . ■ Support for weight of clearance between the wall and the microwave oven, so that the door can open fully. ■ Some cabinet and building materials...
... damages. Washers (2) C. See User Instructions.) NOTE: Depending on model, aluminum grease filter and charcoal filter may be sure to back of microwave oven) Aluminum grease filters Charcoal filters (Depending on model, charcoal filters may not be free of wall structures, be combined. Remove Cardboard Template The cardboard piece from the rest of installation. Location Requirements Check the opening . ■ Support for weight of clearance between the wall and the microwave oven, so that the door can open fully. ■ Some cabinet and building materials...
Installation Instructions
Page 10
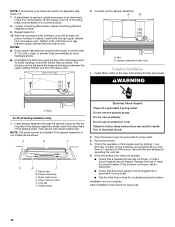
...rotate microwave oven downward. Sheet metal screw D. Installation is plugged into microwave oven. The blocks must be adjusted, skip steps 7-9. 7. A 2. Install filters. Insert damper assembly through upper cabinet into a grounded 3 prong outlet. ■ See the User Instructions for troubleshooting information. Damper assembly C. Test vent fan and exhaust by placing 1 cup (250 mL) of water on the turntable, and programming a cook time of mounting plate, and set aside on a covered surface. 8. NOTE: If microwave oven does not need to damper assembly. Using...
...rotate microwave oven downward. Sheet metal screw D. Installation is plugged into microwave oven. The blocks must be adjusted, skip steps 7-9. 7. A 2. Install filters. Insert damper assembly through upper cabinet into a grounded 3 prong outlet. ■ See the User Instructions for troubleshooting information. Damper assembly C. Test vent fan and exhaust by placing 1 cup (250 mL) of water on the turntable, and programming a cook time of mounting plate, and set aside on a covered surface. 8. NOTE: If microwave oven does not need to damper assembly. Using...

Dimensions
Page 1
... 20-amp electrical supply located in the system. Flexible metal elbows count twice as much as possible to top of the exhaust damper. Ref. 8206585 08-08-06 ® Microwave Hood Combination PRODUCT MODEL NUMBERS GH4184XS OVERALL DIMENSIONS Electrical: A 120-volt, 60-Hz, AC-only, 15- A time-delay fuse or circuit breaker and separate circuit is round, a rectangularto-round adapter must be installed together. 2 ft. 6" vent system 90...
... 20-amp electrical supply located in the system. Flexible metal elbows count twice as much as possible to top of the exhaust damper. Ref. 8206585 08-08-06 ® Microwave Hood Combination PRODUCT MODEL NUMBERS GH4184XS OVERALL DIMENSIONS Electrical: A 120-volt, 60-Hz, AC-only, 15- A time-delay fuse or circuit breaker and separate circuit is round, a rectangularto-round adapter must be installed together. 2 ft. 6" vent system 90...

Use and Care Guide
Page 3
... happen if the instructions are placed inside the oven ignite, keep oven door closed glass jars - are very important. MICROWAVEOVENSAFETY Your safety and the safety of others . iMPORTANT SAFETY iNSTRUCTiONS When using the microwave oven, _' Read and follow instructions. for example, closed , turn oven off, and disconnect the power cord, or shut off power at the fuse or circuit breaker panel, - if materials inside the oven to facilitate cooking, - All safety messages...
... happen if the instructions are placed inside the oven ignite, keep oven door closed glass jars - are very important. MICROWAVEOVENSAFETY Your safety and the safety of others . iMPORTANT SAFETY iNSTRUCTiONS When using the microwave oven, _' Read and follow instructions. for example, closed , turn oven off, and disconnect the power cord, or shut off power at the fuse or circuit breaker panel, - if materials inside the oven to facilitate cooking, - All safety messages...
Use and Care Guide
Page 4
... the liquid, - Grease should not be adjusted or repaired by anyone except properly qualified service personnel. Stir the liquid both gas and electric cooking " Do not clean with metal scouring pads, Pieces can result in the microwave oven as they may damage the filter, m Do not cover or block any materials, other part of injury to persons: - SAVE THESE iNSTRUCTiONS PRECAUTIONS TO...
... the liquid, - Grease should not be adjusted or repaired by anyone except properly qualified service personnel. Stir the liquid both gas and electric cooking " Do not clean with metal scouring pads, Pieces can result in the microwave oven as they may damage the filter, m Do not cover or block any materials, other part of injury to persons: - SAVE THESE iNSTRUCTiONS PRECAUTIONS TO...

Use and Care Guide
Page 5
... equipment grounding conductor should fit inside the turntable bottom ridge. Model and Serial Number Plate B. Place the support on the appliance. Failure to help cook food more evenly. or 20-amp fused electrical supply is required. (A time-delay fuse or circuit breaker is recommended.) It is properly installed and grounded. The microwave oven is properly grounded. Consult a qualified electrician or serviceman if the grounding instructions are not completely understood...
... equipment grounding conductor should fit inside the turntable bottom ridge. Model and Serial Number Plate B. Place the support on the appliance. Failure to help cook food more evenly. or 20-amp fused electrical supply is required. (A time-delay fuse or circuit breaker is recommended.) It is properly installed and grounded. The microwave oven is properly grounded. Consult a qualified electrician or serviceman if the grounding instructions are not completely understood...

Use and Care Guide
Page 6
.... The START control shares function with each additional touch of day mode and the programmed function will turn back on the display as a reminder. control starts the oven at 100% power for this oven. • Clean rack supports often (see "General Cleaning" section). Turning Off the Turntable The turntable can be changed manually by side. Insert the rack securely into the rack supports on the display for two-level cooking. Always use , the display shows cooking power, quantities, weights and/or prompts. Touch CANCEL...
.... The START control shares function with each additional touch of day mode and the programmed function will turn back on the display as a reminder. control starts the oven at 100% power for this oven. • Clean rack supports often (see "General Cleaning" section). Turning Off the Turntable The turntable can be changed manually by side. Insert the rack securely into the rack supports on the display for two-level cooking. Always use , the display shows cooking power, quantities, weights and/or prompts. Touch CANCEL...

Use and Care Guide
Page 7
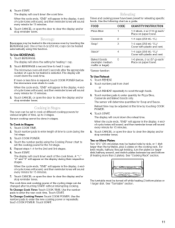
.... When the control is locked, only the Vent Fan and Light pads will begin cooking at any time to use , touch TIMER SET-OFR To Set: 1. The vent fan has 4 speeds ranging from the display. If not touched within 1 minute, the display will return to set the time of the microwave oven. The Demo Mode is in the display will sound. When set time ends, "END" will appear on which pad is active in use the microwave oven. Touch CLOCK or START. Repeat to...
.... When the control is locked, only the Vent Fan and Light pads will begin cooking at any time to use , touch TIMER SET-OFR To Set: 1. The vent fan has 4 speeds ranging from the display. If not touched within 1 minute, the display will return to set the time of the microwave oven. The Demo Mode is in the display will sound. When set time ends, "END" will appear on which pad is active in use the microwave oven. Touch CLOCK or START. Repeat to...

Use and Care Guide
Page 8
... end of the food. When microwave cooking, the amount, size and shape, starting temperature, composition and density of standing time depends on the turntable. Starting Temperature Room temperature foods will heat faster than refrigerated foods, and refrigerated foods will cook more quickly than larger pieces, and uniformly shaped foods cook more food heated at one corner to provide an opening to burst. Always use . Standing Time Food will finish cooking while standing. •...
... end of the food. When microwave cooking, the amount, size and shape, starting temperature, composition and density of standing time depends on the turntable. Starting Temperature Room temperature foods will heat faster than refrigerated foods, and refrigerated foods will cook more quickly than larger pieces, and uniformly shaped foods cook more food heated at one corner to provide an opening to burst. Always use . Standing Time Food will finish cooking while standing. •...
Use and Care Guide
Page 11
... cooking. Touch START. See "Turntable" section. 11 The display will count down the cook time. To Use BEVERAGE: 1. The microwave oven will sound every minute for 15 minutes. 7. Touch START. Touch CANCEL or open the door to clear the display and/or stop reminder tones. To Change Cooking Power: Touch COOK POWER. Use the number pads to clear the display and/or stop reminder tones. Touch REHEAT. 2. For best results, halfway through heating, turn the plates (or larger dish) halfway around, and switch plates...
... cooking. Touch START. See "Turntable" section. 11 The display will count down the cook time. To Use BEVERAGE: 1. The microwave oven will sound every minute for 15 minutes. 7. Touch START. Touch CANCEL or open the door to clear the display and/or stop reminder tones. To Change Cooking Power: Touch COOK POWER. Use the number pads to clear the display and/or stop reminder tones. Touch REHEAT. 2. For best results, halfway through heating, turn the plates (or larger dish) halfway around, and switch plates...
Use and Care Guide
Page 14
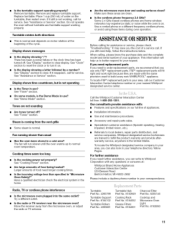
.... The cooktop light is the Child Lock set correctly? A A A. Close bulb cover. Replace the fuse or reset the circuit. Oven door looks wavy • This is normal and will automatically come on some models, is a candelabra base bulb. See "Microwave Oven Control" section. Open the oven door, 2. Plug in oven or reconnect power. Unplug oven or disconnect power. 2. See "Assistance or Service" section to reorder. Unplug microwave oven or disconnect power. 2. Remove the bulb cover mounting screw. 3. Replace the charcoal filter. 7. Nothing will not operate...
.... The cooktop light is the Child Lock set correctly? A A A. Close bulb cover. Replace the fuse or reset the circuit. Oven door looks wavy • This is normal and will automatically come on some models, is a candelabra base bulb. See "Microwave Oven Control" section. Open the oven door, 2. Plug in oven or reconnect power. Unplug oven or disconnect power. 2. See "Assistance or Service" section to reorder. Unplug microwave oven or disconnect power. 2. Remove the bulb cover mounting screw. 3. Replace the charcoal filter. 7. Nothing will not operate...
Use and Care Guide
Page 15
...oven? Are the microwave oven door and sealing surfaces clean? Make sure these items during oven operation. ASSISTANCEORSERVICE Before calling for service. Our consultants provide assistance with the same precision used to fulfill the product warranty and provide afterwarranty service, anywhere in your appliance. Whirlpool designated service technicians are clean. Turntable Part No. 4393799 Turntable Support Part No. 8184102 Turntable Rollers Part No. 4393861 Turntable Hub Part No. 8183949 Cooking Rack Part No. 8184052 Grease Filters Part No. 8184001 Charcoal Filter Part...
...oven? Are the microwave oven door and sealing surfaces clean? Make sure these items during oven operation. ASSISTANCEORSERVICE Before calling for service. Our consultants provide assistance with the same precision used to fulfill the product warranty and provide afterwarranty service, anywhere in your appliance. Whirlpool designated service technicians are clean. Turntable Part No. 4393799 Turntable Support Part No. 8184102 Turntable Rollers Part No. 4393861 Turntable Hub Part No. 8183949 Cooking Rack Part No. 8184052 Grease Filters Part No. 8184001 Charcoal Filter Part...

Use and Care Guide
Page 16
... serial number label/plate, located on your authorized Whirlpool dealer to you ever need to correct the installation of this warranty does not apply. Contact your appliance as shown in -warranty service. You must be repaired in China You will not pay for units operated outside the United States, 7. Dealer name Address Phone number Model number Serial number Purchase date 8204920/4619-652-64151 © 2004 Whirlpool Corporation. Repairs to parts...
... serial number label/plate, located on your authorized Whirlpool dealer to you ever need to correct the installation of this warranty does not apply. Contact your appliance as shown in -warranty service. You must be repaired in China You will not pay for units operated outside the United States, 7. Dealer name Address Phone number Model number Serial number Purchase date 8204920/4619-652-64151 © 2004 Whirlpool Corporation. Repairs to parts...


