Get support for Whirlpool WMH1163XVS

Whirlpool WMH1163XVS Support Question

Whirlpool WMH1163XVS Support Question

Find answers below for this question about Whirlpool WMH1163XVS.
Need a Whirlpool WMH1163XVS manual? We have 4 online manuals for this item!
Question posted by bwinter49 on November 22nd, 2011

Ducting Microwave Ovens

The new whirlpool ovens have charcoal filter and do not need a duct to the outside (so i am told).  If you still wanted to have an exterior vent can one be installed.  My wife does not like the interior type.  We would rather add an exterior ducting system.

Current Answers

Answer #1: Posted by kcmjr on November 22nd, 2011 1:55 PM
This answer was accepted by the poster of the original question.
kcmjr

Member since:
May 5th, 2011

Points: 4,254,255
1,100
points
The installation manual is here:

http://www.helpowl.com/manuals/Whirlpool/WMH1163XVS/91800

According to the manual it would appear to require that it be vented outside.  Read it and see if you agree.


Licenses & Certifications: Microsoft, Cisco, VMware, Novell, FCC RF & Amateur Radio licensed.
Answer #2: Posted by crazyredhead87 on November 22nd, 2011 2:56 PM
crazyredhead87

Member since:
May 28th, 2011

Points: 626,240
100
points
The filter is mostly for odors (like fish) however I do not believe you can vent them to the outside if they are built to vent themselves.

Related Whirlpool WMH1163XVS Manual Pages

Dimension Guide - Page 1

... range/cooktop below. Roof cap B. 6" (15.2 cm) min. A 2 ft (0.6 m) C A. diameter round vent C. Exact dimensions may vary depending on type of the system you need, add the equivalent length for either type of the microwave oven and the rectangular to improve Dimensions are for wall venting only) E D. See the following examples: A B C PRODUCT DIMENSIONS 17 " (43.8 cm) 16 " (41...
Installation Instructions - Page 1

... is the safety alert symbol. All safety messages will tell you how to Wall 8 Prepare Upper Cabinet 8 Install Damper Assembly 9 Install the Microwave Oven 9 Complete Installation 10 VENTING DESIGN SPECIFICATIONS 11 ASSISTANCE 12 Replacement Parts 12 Accessories 12 MICROWAVE HOOD COMBINATION SAFETY Your safety and the safety of others . This is , tell you what can be killed...
Installation Instructions - Page 2

...Venting Installation Only: ■ If you are not designed to separate the template from the top of the microwave oven packaging is at least 6" (15.2 cm) of packaging) Aluminum grease filters Charcoal filters (Depending on model, aluminum grease filter and charcoal filter... Caulking gun and weatherproof caulking compound ■ Duct tape Parts Supplied For reorder information, see "...
Installation Instructions - Page 3

.... Recommended: ■ A time-delay fuse or time-delay circuit breaker. ■ A separate circuit serving only this microwave oven. Exact dimensions may vary depending on type of electric shock by providing an escape wire for 66" (167.6 cm) installation height. The plug must be grounded. Required: ■ A 120 Volt, 60 Hz, AC only, 15- A B Electrical...
Installation Instructions - Page 4

...3. 7. A A. Secure damper plate with 2 screws removed in the top of microwave oven exterior. A A. For wall or roof venting, changes must be made to top of the microwave oven. A Keep the damper assembly in case the venting method is changed, or the microwave oven is attached to back of the microwave oven. A B A. Screws (in the foam packaging, or it aside. 3. Rotate blower...
Installation Instructions - Page 5

... is not correctly oriented, the 2 screws removed in the top of the microwave oven. Repeat Step 2 from "Wall Venting Installation Only." 5. Reattach blower motor to the microwave oven. 7. Repeat Step 4 from "Wall Venting Installation Only." 3. A B C A. D A. Repeat Step 3 from "Wall Venting Installation Only." 2. NOTE: If blower motor is not positioned with 2 screws removed in...
Installation Instructions - Page 6

...Wall Stud Configurations." Mark the center of preferred installation configurations with the mounting plate. Possible Wall Stud ...End Holes Figure 4 B D B A A,D A,D A,D E E E E C C C C F F A. Cabinet opening , do not install the microwave oven. 1. Support tabs F. End holes (on mounting plate) B. Locate Wall Stud(s) NOTE: If no wall studs exist within the opening. Using a...
Installation Instructions - Page 7

...with front edge of cabinet. With the support tabs facing forward (see illustrations in Step 4. Wall Venting Installation Only Upper cabinet bottom ³⁄₈" (1 cm) 4" (10.2 cm) Centerline 6" (...Step 9 to the horizontal line drawn in Step 2 of "Mark Rear Wall." Mark Rear Wall The microwave oven must be 14¹⁄₈" (35.9 cm) from the centerline. 5. A A. D. Remove ...
Installation Instructions - Page 8

...installing on bolts from the back of "Mark Rear Wall." Check alignment of mounting plate, making sure it is level. 8. The template has trim lines to use as guides. ■ If the wall behind the microwave oven...cabinet. 3. No Wall Studs at both end holes. 3. Check alignment of the microwave oven. Disconnect power to Figure 3 in "Possible Wall Stud Configurations" in Step 3 ...
Installation Instructions - Page 9

... bushing needs to the microwave oven, do so can result in place. 9 Drill 3/8" (10 mm) holes at the bottom of the microwave oven so that damper blade moves freely, and opens fully. 2. Check that the damper blade hinge is being handled. Using 2 or more people to move and install microwave oven. A. Rotate microwave oven up toward upper cabinet. NOTE: If venting...
Installation Instructions - Page 10

.... Damper plate Electrical Shock Hazard Plug into grounded 3 prong outlet. 3. Do not use . 10 Reconnect power. 4. NOTE: If microwave oven does not need to damper assembly. Bolts For Roof Venting Installation Only 1. Sheet metal screw D. If the microwave oven does not operate: ■ Check that a household fuse has not blown, or that the long tab of the...
Installation Instructions - Page 11

... Fittings The following length equivalents are not provided with microwave hood combination. ■ We do not recommend using a flexible metal vent. ■ To avoid possible product damage, be sure to vent air outside, unless using duct tape to seal all joints in "Recommended Vent Length." For optimal venting installation, we recommend: ■ using roof or wall caps that...
Installation Instructions - Page 12

... type of vent. Both numbers can be used. Each panel is a list of the installation hardware needs to...installing this microwave oven in a 36" (91.4 cm) or 42" (106.7 cm) wide opening , behind the microwave oven door on the front facing of the system you need the microwave oven model number and serial number. ASSISTANCE Call your model number located on the front frame of each vent...
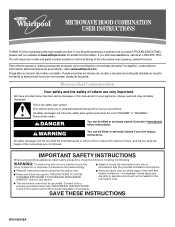
Owners Manual - Page 1

...microwave oven. ■ Read and follow instructions. Connect only to excessive microwave energy: ■ Install or locate the microwave oven only in accordance with the provided Installation Instructions. ■ Read all safety messages. If you still need... información adicional acerca de su producto, visite: www.whirlpool.com Tenga listo su número de modelo completo. Always...
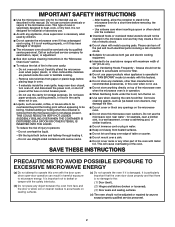
Owners Manual - Page 2

... when cleaning the vent-hood filter. Use extreme care when inserting a spoon or other utensil into the container. ■ Oversized foods or oversized metal utensils should not be boiling. It is particularly important that the oven door close supervision is necessary when used by children. ■ Do not operate the microwave oven if it has...
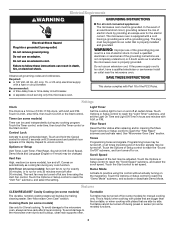
Owners Manual - Page 3

... or Setup control to whether the microwave oven is properly installed and grounded. Touch the Options or...microwave oven, always remove rack after replacing and/or cleaning the filters. Recommended: ■ A time-delay fuse or time-delay circuit breaker. ■ A separate circuit serving only this microwave oven. Do not use of electric shock. Control Lock Activate to reach the "Vent...
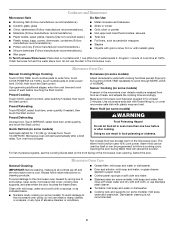
Owners Manual - Page 4

...if needed , then touch the Start control. Touch 1lb DEFROST. To avoid damage to the microwave oven ...type of abrasive cleanser or scrubbers. ■ Grease filter: mild soap and water or dishwasher. ■ Door and exterior: mild soap and water, or glass cleaner applied to enter power level (10-90), then touch the Start control. Doing so can result in the microwave oven...
Owners Manual - Page 5

... prompted by a number is attached to avoid unintended starting of the microwave oven, under the bulb cover, and is located behind the vent grille at 100% cooking power. Reset the clock. ■ A letter followed by filter status indicator. ■ Charcoal filter: The charcoal filter is behind the vent grille at the beginning of available parts and supplies which is...
Owners Manual - Page 6

...installation, installation not in your major appliance for repairs. Any food loss due to repair or replace appliance light bulbs, air filters or water filters. WHIRLPOOL...Whirlpool with published installation instructions. 11. If you need assistance using your product, you on the upper or lower front facing of the microwave oven... of purchase. 6. If outside the 50 United States and...
Warranty - Page 1

... the upper or lower front facing of the microwave oven opening, behind the door. Repairs when your major appliance is used for other damage to the finish of your major appliance, unless such damage results from defects in materials or workmanship and is reported to Whirlpool within 30 days from the date of...

Whirlpool Knowledge Base Results

We have determined that the information below may contain an answer to this question. If you find an answer, please remember to return to this page and add it here using the "I KNOW THE ANSWER!" button above. It's that easy to earn points!

  • What type of light bulb do I use in my convertible range hood?
    ... do I do when it's time to replace the aluminum filter/light lens, or charcoal filter pads on my microwave oven? Light bulb is not included. What should I use a bulb larger than 75 watts in my microwave oven? What type of your convertible range hood. How do I remove and replace the charcoal filter on my convertible range hood? How do I operate...
  • What is the vent fan on my microwave for and how do I operate it?
    ...;four times for and how do I operate it ? To protect the microwave oven, if the temperature from the range or cooktop below the microwave oven gets too hot, the vent fan will remain on my microwave oven for up to 1 hour to cool the microwave oven. It may stay on at medium speed when any sensor cooking function...
  • How do I operate the cooktop light on my microwave oven?
    ... I replace the cooking light in my convertible range hood? What type of light bulb do when it's time to turn light On/Off: Touch Light pad once for high, twice for low, or three times to replace the aluminum filter/light lens, or charcoal filter pads on my microwave oven? To turn  off .

Similar Questions

Ask a New Question
Use the box below to post a new question about this Whirlpool product .
Points & Prizes
  • You can earn points for nearly everything you do on HelpOwl.com
  • You can trade in those points for gift cards at leading retailers such as Amazon.com and Walmart
  • It's that simple!
See How it Works
Create a Free Account

Whirlpool Manuals

Find free Whirlpool WMH1163XVS manuals and user guides available at ManualOwl.com. Try out our unique manual viewer allowing you to interact with manuals from directly within your browser!

Whirlpool Reviews

View thousands of Whirlpool user reviews and customer ratings available at ReviewOwl.com.

Contact Information

Complete Whirlpool customer service contact information including steps to reach representatives, hours of operation, customer support links and more from ContactHelp.com.

Scoreboard Ratings

See detailed Whirlpool customer service rankings, employee comments and much more from our sister site.

Whirlpool Recalls

Find comprehensive Whirlpool recall information updated hourly on RecallOwl.com.