Whirlpool GR563LXSQ Support Question
Whirlpool GR563LXSQ Support Question
Find answers below for this question about Whirlpool GR563LXSQ.Need a Whirlpool GR563LXSQ manual? We have 1 online manual for this item!
Question posted by fvkendrick on February 18th, 2013
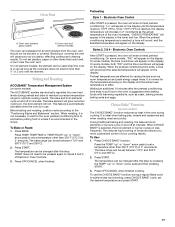
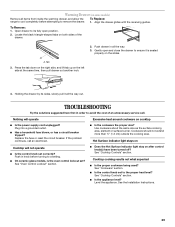
How To Replace The Hidden Bake Element
part number w10308474 already purchased
Current Answers
Related Whirlpool GR563LXSQ Manual Pages
Use and Care Guide - Page 2
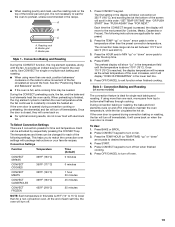
...Coil Elements and Burner Bowls (on some models 9 Lift-up Cooktop (on some models 10 Home Canning 10 Cookware 10
ELECTRONIC OVEN CONTROLS 11 Display 13 Start 13 Off/Cancel 13 Clock 13 Range Lights...Oven Rack (on some models 16 Bakeware 16 Meat Thermometer 16 Oven Vent 17 Baking and Roasting 17 Choice Bake® Function (on some models 17 Broiling 18 Convection Cooking 18 Hold Warm ...
Use and Care Guide - Page 4
... hot enough to avoid steam burn. Heating elements may be positioned so that may result in temperature.
■ Utensil Handles Should Be Turned Inward and Not Extend Over Adjacent Surface Units -
For self-cleaning ranges -
■ Do Not Clean Door Gasket - Do not repair or replace any part of the oven.
■ Clean...
Use and Care Guide - Page 7
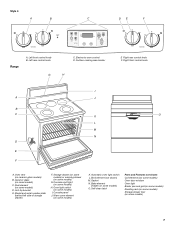
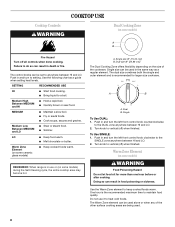
Style 4
A
B
C
DE
F
Range
A. Electronic oven control D. Oven vent (on some models)
C. Surface cooking area locator
H
E Right rear control knob F. Bake element
(hidden on some models)
G. Right front control knob
I . Storage drawer (on some models) or warming drawer (on some models)
H. Warm zone element (on some models) O. Left front control knob B. Console ...
Use and Care Guide - Page 8
... Cooking Zone
(on the size of the other surface cooking areas are being used.
8
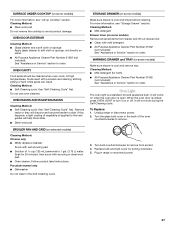
Warm Zone Element (on some ceramic glass models)
■ Keep cooked foods warm. Turn knob to heat cold foods.
REMEMBER: When range is the recommended maximum time to anywhere between HI and LO. 2.
Medium High Between MEDIUM and...
Use and Care Guide - Page 9
... return to activate. For more information, see the "General Cleaning" section. When warming baked goods, allow objects that could leave scratches or marks on the cooktop.
■ Do...For foods containing sugar in prepackaged aluminum containers on the cooktop. NOTE: Before removing or replacing coil elements and burner bowls, make sure they can leave deposits when heated.
■ Do ...
Use and Care Guide - Page 10
... grates. Ceramic or Ceramic glass
■ Follow manufacturer's instructions.
■ Heats slowly, but unevenly.
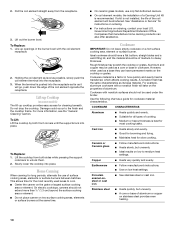
■ A core or base of surface cooking areas, elements or surface burners between batches. To Replace: 1. To Lift: Lift the cooktop by both sides while pressing the support
rods back to medium heat settings. Rough finishes may be...
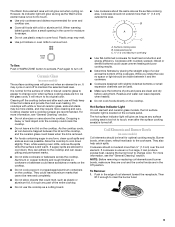
Use and Care Guide - Page 13

...and holding CLOCK. or "PUSH?"
Depending on some models)
AB
C
DE
J
I .
Range Lights
Oven Light While the oven door is closed, press OVEN LIGHT to set time of ... & 4 - and p.m. To Set: Before setting, make sure the oven and Timer are off
G
F
F. Bake
I
H
A.
indicator light will appear on some models, clock display can be canceled. The oven light will appear on...
Use and Care Guide - Page 15

..., quick breads, pies
1 or 2
Yeast breads, casseroles, meat and 2 poultry
Cookies, biscuits, muffins, cakes 2 or 3
Convection Cooking
FUNCTION
NUMBER OF RACK RACKS USED POSITION(S)
Convection baking or
1
roasting
1, 2 or 3
Convection baking
2
2 and 4
Convection baking
3
1, 3 and 5
15
This will appear on the display. however, it may cause burner cycling to
move freely for...
Use and Care Guide - Page 16
... slightly staggered.
3 or 4
Opposite corners on the counter for Part Number 4396927. Follow manufacturer's recommendations and use a meat thermometer to increase baking time.
■ Little or no bakeware piece is a space maximizer....left side of meat, poultry and fish. Removable insert
If you would like to purchase a split-oven rack, one may be able to order. Place deeper, covered ...
Use and Care Guide - Page 17
... desired temperature and press START.
17 During traditional baking and roasting, the bake and broil elements or burners cycle on some models, "PrE" will appear on the display. When CHOICE BAKE® is ideal when baking pies, breads and casseroles and when roasting meat and poultry.
The bake range can be pressed again on the display. Press...
Use and Care Guide - Page 18

... To Broil: 1. The broil range can be shortened by as much as using multiple racks, you would like to purchase a broiler pan, one may need...rack(s) according to reduce spattering. Food cooks more from the broil element. By using a toothpick.
■ Use a meat thermometer to...heated air around the food.
■ Test baked goods for Part Number 4396923. ■ For proper draining, do not...
Use and Care Guide - Page 19
... broil elements heat the oven cavity. To Select Convection Settings There are applicable for single or multiple rack baking and roasting.
■ When using more than one rack, position bakeware/ cookware on the racks to preheat, unless recommended in the recipe.
Press CONVECT keypad.
The convection bake range can be set time, the oven...
Use and Care Guide - Page 21
...
To Use: 1.
To Add to the End of time to cook. 5.
The warm range is reached, the oven will shut off automatically. 6.
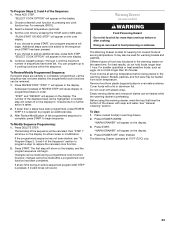
Electronic Oven Control
To Set a ...set cook
time. 5. Style 2 - Set the temperature (optional). The warm range is set length of time to cook. 5. Press START. 4.
Press BAKE. 2. Set the temperature (optional). Press COOK TIME. 4. Press the HOUR/...
Use and Care Guide - Page 23
..., wash the tray that lines the bottom of the Sequence" section to program a step to replace the canceled cook function.
2. Press DRAWER WARM. Press DRAWER OFF when finished.
"STEP 1" will... STEP. For example, BROIL.
3. If you choose to 4 cooking functions within the sequence. The number of programmed steps in order. Press START. Set the cook time by pressing any time during a ...
Use and Care Guide - Page 24
... performance. Press any of times the oven has been used since the last self-cleaning cycle. RANGE CARE
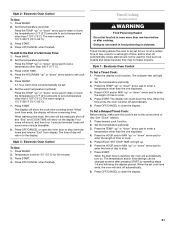
Self-Cleaning Cycle (on some models)
WARNING
Burn Hazard Do not touch the oven during ... Do not block the oven vent(s) during the Self-Cleaning cycle. Electronic Oven Control (on the number of the inside oven cavity frame, being certain not to help get hot enough during the Self-...
Use and Care Guide - Page 26
.... Continue rubbing until white film disappears. COOKTOP CONTROLS
Cleaning Method: When replacing knobs, make sure knobs are cool. COIL ELEMENTS (on some models)
Cleaning Method: ■ Damp cloth: Make sure.... Do not use steel wool, abrasive cleansers or oven cleaner. Cooktop Cleaner Part Number 31464 is also recommended for stubborn spots. See "Assistance or Service" section to order...
Use and Care Guide - Page 27
... out drawer liner. ■ Clean with mild detergent. ■ All-Purpose Appliance Cleaner Part Number 31662
(not included): See "Assistance or Service" section to order.
Do not use oven cleaners... OVEN CAVITY
Food spills should be cleaned when oven cools. To Replace: 1. Porcelain enamel only ■ Dishwasher Do not clean in range or reconnect power.
27 Remove
racks or they will not work...
Use and Care Guide - Page 28
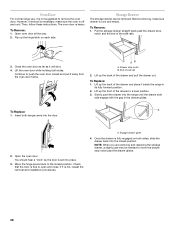
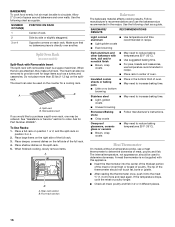
...Drawer stop
notch and the end of side rail
2. End of the side rails.
3.
A To Replace: 1. A. The oven door is cool and empty. Pull the storage drawer straight back past the drawer...Lift the oven door while holding both hanger arms into place.
3. To Replace: 1.
You should hear a "click" as it inside the range in the drawer glides. Lift up the front of the drawer and pull ...
Use and Care Guide - Page 29
To Replace: 1. To Remove: 1.
A
A.
If the problem continues, call . Push in order to remove the drawer. Use cookware about the same size as the surface cooking area, element or surface burner. Cookware ... slides.
4. Push drawer in all items from inside the warming drawer, and allow the range to cool completely before turning to its sides, slowly pull it is the oven control lockout...
Use and Care Guide - Page 31
... afterwarranty service, anywhere in your correspondence.
31 To locate FSP® replacement parts in your request. ASSISTANCE OR SERVICE
Before calling for assistance or service, please check "Troubleshooting." When calling, please know the purchase date and the complete model and serial number of a service call the Whirlpool Customer eXperience Center toll free at...
Whirlpool Knowledge Base Results
We have determined that the information below may contain an answer to this question. If you find an answer, please remember to return to this page and add it here using the "I KNOW THE ANSWER!" button above. It's that easy to earn points!-
Hidden Bake element
... very well with Hidden Bake element: Place bakeware closer to maintain the oven temperature. Temperature Management System on racks 1 or 2. and more heat and does a nice job of browning the bottom of the oven. Dense items like breads, pies and pound cakes should be placed on my electric range? Not cooked or... -
Hidden Bake element
...; During baking and roasting, the hidden element and broil element will cycle on some models) is opened during baking or roasting, the broil element will turn off immediately and the hidden element will both come back on the bottom What is a Hidden Bake element? Dense items like breads, pies and pound cakes should be placed on my electric range? Preparing... -
What is the difference between AccuBake® and more traditional baking systems?
... for browning. Hidden Bake element My oven is the AccuBake® Other baking systems use a mechanical system in Sabbath Mode? Baked goods undercooked in the center How do I set or change temperature in which allows the bake and broil elements to heat up together. Temperature Management System on my electric range? and more traditional baking systems? What...
Similar Questions

Removing Bake Element
How do you get to the bake element in this stove?
How do you get to the bake element in this stove?
(Posted by Anonymous-169483 2 years ago)

Bake Element Burned . Replaced But Not Heating ?
Bake element sparked and arched when turned on . Element burned through . Replaced part and will not...
Bake element sparked and arched when turned on . Element burned through . Replaced part and will not...
(Posted by tpatriziosr1 5 years ago)
My Back (r) Burner Is Not Working - C
My back (R) burner is not working - best buy said that they could not fix it because they cannot get...
My back (R) burner is not working - best buy said that they could not fix it because they cannot get...
(Posted by B713L 10 years ago)

Whirlpool Model Gr563lxsq Dis[lay Problem
Our Whirlpool GR563LXSQ continually displays E1-F1-. It will not reset even if I unplug the power co...
Our Whirlpool GR563LXSQ continually displays E1-F1-. It will not reset even if I unplug the power co...
(Posted by keknak 10 years ago)

Change Hidden Bake Element
Mod# Wfe374lvs0 Ser# Ro1522522, How Do I Replace The Bake Element Hidden. I Cant Figure How To Get T...
Mod# Wfe374lvs0 Ser# Ro1522522, How Do I Replace The Bake Element Hidden. I Cant Figure How To Get T...
(Posted by cebert 11 years ago)