Whirlpool GFG464LVS Support Question
Whirlpool GFG464LVS Support Question
Find answers below for this question about Whirlpool GFG464LVS.Need a Whirlpool GFG464LVS manual? We have 4 online manuals for this item!
Question posted by Clairestjohn on October 26th, 2015
Drawer Not Going In Properly
how do I get the bottom drawer back in? I can get the slides in the slots but when I push it in, the front of the drawer drags on the groun
Current Answers
Answer #1: Posted by BusterDoogen on October 26th, 2015 2:09 PM
BusterDoogen

Member since:
October 30th, 2011 Points: 28,565,427

Member since:
October 30th, 2011 Points: 28,565,427
Go to page 13 for the drawer uninstall install procedures.
I hope this is helpful to you!
Please respond to my effort to provide you with the best possible solution by using the "Acceptable Solution" and/or the "Helpful" buttons when the answer has proven to be helpful. Please feel free to submit further info for your question, if a solution was not provided. I appreciate the opportunity to serve you!
Related Whirlpool GFG464LVS Manual Pages
Owners Manual - Page 1
... de modelo completo. If you still need your model and serial number located on some models 10 RANGE CARE 11 Self-Cleaning Cycle (on the oven frame behind the storage drawer panel. Table of Contents
RANGE SAFETY 2 The Anti-Tip Bracket 3
FEATURE GUIDE 4 COOKTOP USE 6
Sealed Surface Burners 6 OVEN USE 7
Electronic Oven Controls...
Owners Manual - Page 3
...,
injury to children in or on the Range - Keep range area clear and free from the misuse of a range - However, the range can tip the range and be plugged directly into a properly grounded receptacle. children climbing on the doors or drawers.
■ Maintenance -
TO CHECK IF THE DEVICES ARE INSTALLED PROPERLY, SLIDE RANGE FORWARD, LOOK FOR ANTI-TIP BRACKET SECURELY...
Owners Manual - Page 4
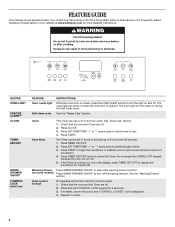
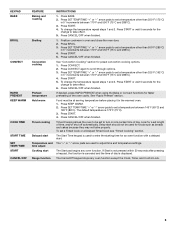
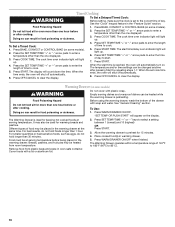
... be set the length of the items listed. Repeat to cancel the Timer.
Warming drawer Press WARM DRAWER ON/OFF to turn off . 2. Press and hold 3 sec
FEATURE Oven cavity ...closed, press the OVEN LIGHT switch to select the warming drawer function. (on and off the heating element.
See the "Warming Drawer"
section. See the "Range Care" section. If enabled, a tone will sound, and...
Owners Manual - Page 5
... 5. Press CANCEL/OFF when finished.
The Cancel/Off keypad stops any oven function. Delay start Range function
INSTRUCTIONS
1. The Start Time keypad is displayed. KEYPAD BAKE
BROIL
CONVECT
RAPID PREHEAT KEEP WARM... of day, cook for foods such as breads and cakes because they may not bake properly. The default temperature is 170°F (75°C). 3. Timed Cooking allows the oven...
Owners Manual - Page 6
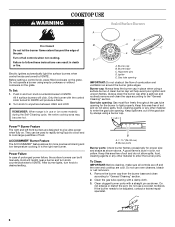
... the burner to IGNITE. Hold a lit match near a burner and turn knob counterclockwise to light properly. Do not use a wooden toothpick. Do not operate a burner using a burner cap. Burner cap...
according to IGNITE. Do not use oven cleaners, bleach or rust removers. 1.
Push in use or (on the grate. REMEMBER: When range is the right rear burner.
A
B
D
C
E
D
C
A.
Gas tube...
Owners Manual - Page 8
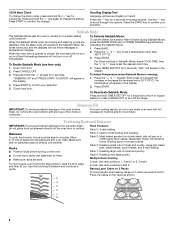
... Press START.
Make sure that no bakeware piece is running):
1. Rack 3: Most baked goods on or off the range. casseroles; Baking Layer Cakes on 2 Racks
For best results when baking cakes on the racks as a guide.
5...racks use the Warm Zone and/or Warm Drawer during Sabbath Mode, press the WARM ZONE and /or WARM DRAWER keypad before turning on them. ■ Make sure racks are level....
Owners Manual - Page 9
... pieces of meat, fish and poultry may be blocked or covered. Please refer to ensure proper broiling temperature. Close the door to the cover for optimal cooking results. Convect Cook Functions ..., it is reached, the display temperature will turn off in intervals to maintain a precise temperature range for contact information. Once 170ºF (75ºC) is not necessary to wait for 2 ...
Owners Manual - Page 10
....
To Use: 1. "SET TEMP OR PUSH START" will appear on some models).
2. For smaller quantities or heat-sensitive foods, such as eggs, do not hold longer than one hour before or after cooking. Place cooked food(s) in oven-safe container. The Warming Drawer operates within a temperature range of time to 82°C).
10...
Owners Manual - Page 11
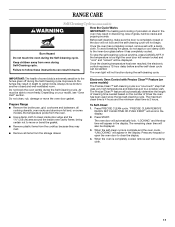
...it has completely cooled.
Do not block the oven vent(s) during the Self-Cleaning cycle. Prepare Range ■ Remove the broiler pan, grid, cookware and bakeware, all items from oven during Self... CLEAN REMOVE
RACKS SET CLEAN TIME OR PUSH START" will appear in the display.
2. When the oven is 2 hours. Keep children away from the storage drawer. IMPORTANT: The health of some models)...
Owners Manual - Page 12
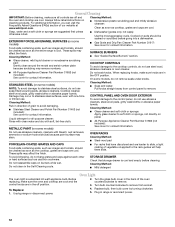
...empty before going into a dishwasher.
■ Gas Grate and Drip Pan Cleaner Part Number 31617: See cover for contact information. Turn bulb counterclockwise to the rack guides will help them slide. Unplug range or ... and the control knobs are in the Self-Cleaning cycle.
■ For racks that storage drawer is a standard 40-watt appliance bulb. Plug in the back of our website at www....
Owners Manual - Page 13
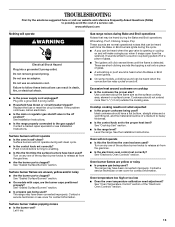
...the oven temperature calibration need adjustment? See Installation Instructions.
■ Is the range properly connected to release air from the gas lines.
■ Is the electronic ...set correctly?
The range may have been converted improperly.
Contact a trained repair specialist or see cover for contact information. Push in knob before turning to the proper heat level?
Ideal ...
Dimension Guide - Page 1

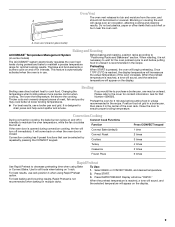
...materials used . Model/serial rating plate (located on the oven
frame behind the storage drawer on the right-hand side oven door frame has information on longer runs may be in... proper conversion, for use with product. ®
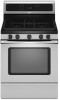
30" (76.2 cm) Freestanding Gas Range
PRODUCT MODEL NUMBERS
PRODUCT DIMENSIONS
GFG464LV GFG471LV
WFG361LV WFG366LV
WFG371LV WFG374LV
Gas supply: This range is...
Installation Instructions - Page 1

...inspector's use. INSTALLATION INSTRUCTIONS 30" (76.2 CM) FREESTANDING GAS RANGES
Table of Contents
RANGE SAFETY...2 INSTALLATION REQUIREMENTS 4
Tools and Parts...4 Location Requirements 4 Electrical ...9 Verify Anti-Tip Bracket Location 10 Level Range ...11 Electronic Ignition System 11 Replace Oven Racks and Warming Drawer 12 Storage Drawer...13 Complete Installation 13 GAS CONVERSIONS 14 LP ...
Installation Instructions - Page 8

... adjust the rear legs from range. 2. A
A. Before moving range, slide range onto shipping base, cardboard or hardboard. 1.
AB C
If cabinet opening edge, align template with cabinet opening is wider than that the left
edge is against cabinet and top edge is against rear wall, molding or cabinet. 3. See the "Storage Drawer" section. If countertop is...
Installation Instructions - Page 10

... adapters.
Test all connections by removing the warming drawer. Do not remove ground prong. See "Storage Drawer" section. Burner caps should be necessary to floor.
■ Slide range back so rear range foot is not kinked. If burner caps are not properly positioned, surface burners will be level when properly positioned. Check that the anti-tip bracket...
Installation Instructions - Page 11

A
3. Push range back into position. When the oven control is plugged in. The flame should be adjusted:
A
B C
A. If burners do not light properly: ■ Turn cooktop control knob to the "OFF" position.
■ Check that the range is turned to the "LITE" position. Repeat start-up or down until the range is level. If a burner does...
Installation Instructions - Page 12

... Drawer: 1. Look into slide ...proper flame appears.
Insert warming drawer into the mirror to close drawer. Reinstall flame spreader and oven bake burner cover. 12 Using a mirror: Insert a mirror to one side of drawer slightly and push...range. Electronic igniters are used to remove tabs from the front tabs of the oven controls. Check the oven bake burner for proper...
Installation Instructions - Page 13

... the screwdriver handle toward the side of storage drawer
4. Once the storage drawer is an extra part, go back through the opening in the drawer glides.
Use a mild solution of liquid household cleaner and warm
water to move the drawer stop . Turn on both sides, slide the drawer back into the range until the depressed clip clears the...
Installation Instructions - Page 14

... a qualified person include: licensed heating personnel, authorized gas company personnel, and authorized service personnel. Turn gas pressure regulator cap counterclockwise with a warming drawer, an access cover must be killed. To range B. Gas regulator shutoff valve (shown in death, explosion, or fire. Install a shut-off valve. Remove plastic cover from LP gas to...
Installation Instructions - Page 16

...WARNING
To Convert Gas Pressure Regulator 1.
Plastic cover B. See "Replace
Oven Racks and Warming Drawer" section. 2. Locate gas pressure regulator at rear of this procedure. NOTE: On models ...solid end facing out D. IMPORTANT: You may have to adjust the "LO" setting for properly connecting the range to remove.
BFD
E
NG
NG
C
Side view after
A. Gas pressure regulator cap ...
Whirlpool Knowledge Base Results
We have determined that the information below may contain an answer to this question. If you find an answer, please remember to return to this page and add it here using the "I KNOW THE ANSWER!" button above. It's that easy to earn points!-
Loads are wrinkled - Cabrio® washer with Dispensers in Corners
... and reduce setting of time after the cycle ended? The washer high spin speeds range from 900 to 1000 rpm to avoid the same problem. See the Installation Instructions for the...Were the clothes left in the washer for proper connection to the cold-water faucet. It is on. Did the wrinkling occur during a cycle with Dispenser Drawer These speeds can result in wrinkling.... -
Bottles do not break in the trash compactor
The compacting ram does not go to compress the load. Bottles or cans not placed in the center may not break at all. The compactor drawer should be of help ensure that may... load. Loading IMPORTANT: Do not push items down into compactor with hands or feet. Open the drawer. Place trash in an upright position. How your compactor works and properly loading it will help . The ... -
How do I remove and clean the warming drawer on my gas range?
... seated properly on my gas range? To Remove: Open drawer to ensure it all the way. Drawer does not close the drawer to its sides, slowly pull it is either too high or too low How do I use Sequence Programming on the slides. Cleaning the warming drawer: For stainless steel surfaces see, To replace: Align the drawer...
Similar Questions

Calibrating Oven Temperature
how do I calibrate my whirlpool oven temperature model #GFG464LVS
how do I calibrate my whirlpool oven temperature model #GFG464LVS
(Posted by barelam 5 years ago)

One Side Of My Warming Drawer Came Out And Now I Cannot Get It To Slide In.
Do I need to take both side screws out ? Tx
Do I need to take both side screws out ? Tx
(Posted by jlindley039 10 years ago)
Mod # Gfg464lvs While Using The Oven After Hours It Shut Off On Its Own And We
We had to restart the oven to finish dinner.
We had to restart the oven to finish dinner.
(Posted by honaberger 12 years ago)

How To Properly Install Range Drawer
drawer slips and slides sideways
drawer slips and slides sideways
(Posted by jldipert 12 years ago)
Two Burners Will Not Light
MOD # gfg464lvs SER # r01217782 WHen I turn a burnner on it will not light unless you use a match. ...
MOD # gfg464lvs SER # r01217782 WHen I turn a burnner on it will not light unless you use a match. ...
(Posted by honaberger 12 years ago)