Get support for Singer Futura Quartet

Singer Futura Quartet Support Question

Singer Futura Quartet Support Question

Find answers below for this question about Singer Futura Quartet.
Need a Singer Futura Quartet manual? We have 1 online manual for this item!
Question posted by rechellemuros0430 on October 21st, 2023

Error Ea

what is error EA in my singer futura ce 250? What is the solution to the error?

Current Answers

Answer #1: Posted by SonuKumar on October 23rd, 2023 12:53 AM
This answer was accepted by the poster of the original question.
SonuKumar

Member since:
May 9th, 2021

Points: 16,621,300
1,100
points
Error code EA on a Singer Futura CE 250 sewing and embroidery machine indicates that the embroidery design is too large for the hoop, or that the hoop is not attached properly. The solution is to:

Make sure that you are using the correct size hoop for the embroidery design.

Check that the hoop is attached properly to the machine.

If you are using the large hoop, make sure that the feed dogs are lowered.

Make sure that the first color block of the embroidery design has been sent to the machine.

If you have checked all of the above and you are still getting error code EA, then there may be a problem with the machine itself. In this case, you will need to contact Singer customer support for assistance.

Here is a summary of the steps to resolve error code EA on a Singer Futura CE 250:

Check the size of the embroidery design and make sure that it is compatible with the size of the hoop that you are using.

Check that the hoop is attached properly to the machine.

If you are using the large hoop, make sure that the feed dogs are lowered.

Make sure that the first color block of the embroidery design has been sent to the machine.

If you have checked all of the above and you are still getting error code EA, then contact Singer customer support for assistance.

Please note that error code EA can also be caused by a problem with the embroidery design itself. If you have checked all of the above and you are still getting the error, then you may need to try a different design.


Please respond to my effort to provide you with the best possible solution by using the "Acceptable Solution" and/or the "Helpful" buttons when the answer has proven to be helpful.

Regards,
Sonu
Your search handyman for all e-support needs!!

Related Singer Futura Quartet Manual Pages

Instruction Manual - Page 1

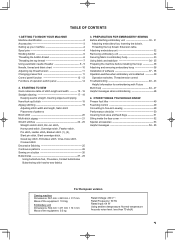
... Decorative Stitching 25 Continuous patterns 26 Sewing on a button 26 Buttonholes 27 - 29 Using buttonhole foot, Procedure, Corded buttonholes Buttonholing with Futura Multi hoop 44 - 47 Helpful messages when embroidering 48 4. TABLE OF CONTENTS 1.GETTING TO KNOW YOUR MACHINE Machine identification 2 Accessories 3 Setting up your machine 4 Spool pins 4 Winding bobbin 5 Threading the...
Instruction Manual - Page 3

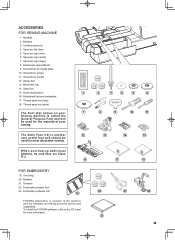
... information. 2 3 4 5 6 8 9 10 11 13 14 15 17 18 20 21 22 23 3 Screwdriver (large) 11. Embroidery presser foot 23. ACCESSORIES FOR SEWING MACHINE 1. Spool pin cap (small) 7. Embroidery software CD 19 FUTURA embroidery is called the General Purpose Foot and will be sure they are Class I5 J. 16 FOR EMBROIDERY 19. Spool pin...
Instruction Manual - Page 4

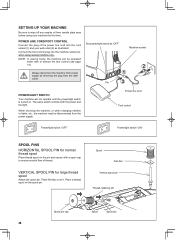
... be operated either with a spool cap to wipe off any surplus oil from needle plate area before using sewing machine only. Connect the foot control plug into the cord socket (1) and your machine the first time. Power line cord Foot control XL-550-P04-1.eps Power/light switch "OFF" Power/light switch "ON...
Instruction Manual - Page 9

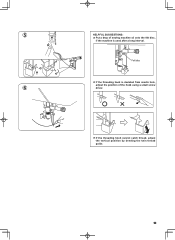
5 HELPFUL SUGGESTIONS:  Put a drop of the hook using a small screw 6 driver.  If the threading hook cannot catch thread, adjust the vertical position by bending the twin thread guide. 9 Felt disc  If the threading hook is deviated from needle hole, adjust the position of sewing machine oil onto the felt disc, if the machine is used after a long interval.
Instruction Manual - Page 10

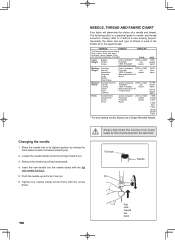
...needle and thread. Remove the needle by removing the plug from the wall-outlet. Always disconnect the machine from power supply by pulling it toward you . 3. NEEDLE, THREAD AND FABRIC CHART Your fabric .../80 orange band 14/90 blue band 16/100 purple band * For best sewing results, always use a Singer Branded Needle. Raise the needle bar to needle and thread selection. Generally, the...
Instruction Manual - Page 11

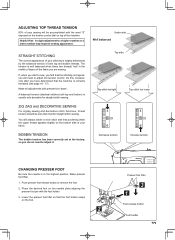
...sewing will be less than that the machine is in the middle of layers of your stitching is irregular, you will always obtain a nicer stitch and less puckering when the upper thread appears slightly on the bottom side of the fabric you are sewing... have determined that for straight stitch sewing. ZIG ZAG and DECORATIVE SEWING For zigzag sewing and decorative stitch functions, thread tension...
Instruction Manual - Page 13

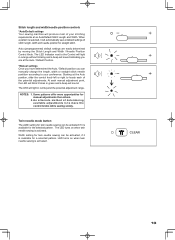
Stitch length and width/needle position controls *Auto/Default settings Your sewing machine will produce most of the potential adjustments. Starting at the Auto ... will blink 3 times in green and a beep will light in orange without blinking and a beep will automatically sew at the Auto / Default Position. *Manual settings Once you have determined the Auto / Default position you are easily...
Instruction Manual - Page 14

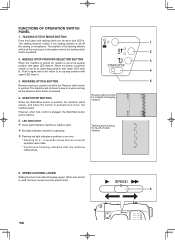
... that an incorrect operation was made. * Continuous flashing indicates that the machine malfunctions. 6. SPEED CONTROL LEVER Sliding the lever sets desired sewing speed. FUNCTIONS OF OPERATION SWITCH PANEL 1. The position of other stitches  Flashing red light indicates a problem or an error. * Flashing for straight and zigzag stitches However, when foot control is...
Instruction Manual - Page 17

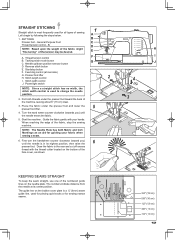
... Thread tension control - Power/light switch F G 2 H I . KEEPING SEAMS STRAIGHT To keep the seam straight, use one of the tension may be desired. 1 A B C D E A. Start/stop the sewing machine. STRAIGHT STITCHING Straight stitch is most frequently used for sewing narrow seams. 3/4" (19 mm) 5/8" (16 mm) 1/2" (13 mm) 3/8" ( 9 mm) 1/4" ( 6 mm) 17
Instruction Manual - Page 28

While holding the top thread, start the machine. When sewing is finished, use a buttonhole opener to cut any of the ...following order. 1 2 3 4 5 6 7 Fabric marking 9. Place the fabric under the foot. Fabric marking mark * Sewing will be completed automatically in the center of the bartack threads. 28 Buttonhole foot alignment position Pull out the bobbin thread underneath...
Instruction Manual - Page 30

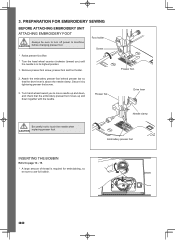
PREPARATION FOR EMBROIDERY SEWING BEFORE ATTACHING EMBROIDERY UNIT ATTACHING EMBROIDERY FOOT Always be sure to page 14 - 15. * A large amount of thread is in its highest position. 1. Secure it by tightening presser foot screw. 3. Presser bar Presser foot Drive lever Be careful not to machine CAUTION before changing presser foot. Remove presser foot...
Instruction Manual - Page 38

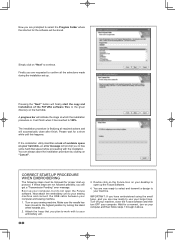
... -up protocol. If the installation utility identifies a lack of the FUTURA software files to the given directory on your computer and sewing machine. 1. If these steps are not followed precisely, you are now ready to your sewing machine and connect the USB cable between your sewing machine. Now you are prompted to select the Program Folder where...
Instruction Manual - Page 39

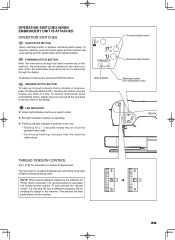
...machine malfunctions. REVERSE STITCH BUTTON To back up through the design. LED indicator Forward stitch button Reverse stitch button Start/stop sewing and the needle stops at a time. NOTE: When sewing...START/STOP BUTTON When start .  Red light indicates machine is operating.  Flashing red light indicates a problem or an error. * Flashing for 2 - 3 seconds shows that an ...
Instruction Manual - Page 41

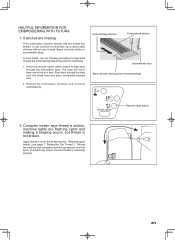
... not in the thread tension. In such cases, use the following procedure to step back through the embroidery data. Restart the embroidery machine and continue embroidering. HELPFUL INFORMATION FOR EMBROIDERING WITH FUTURA 1. The hoop will move back one stitch at a time. Upper thread is not broken. Computer screen says thread is broken...
Instruction Manual - Page 42

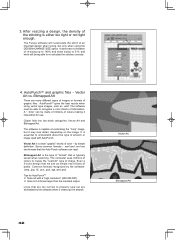
... cleans up to 149% and down sizing to 51% and while still being able to properly sew out are two formats that we see as .wmf. AutoPunchTM and graphic files - Clipart falls ...millions of color - Lines that are too narrow to re-calculate the stitches correctly. 4. The Futura software will recalculate the stitch of information. Some common formats - .wmf and .emf are eliminated ...
Instruction Manual - Page 43

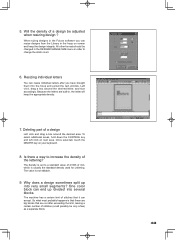
...Library in order to a standard value of 4/10th of stitches that are built-in the Futura software you have brought them into several blocks. Because the letters are cut after you can...change the stitch count. 6. When sizing designs in , the letter will keep the design integrity. The machine has a certain limit of mm, which is not editable. 9. Resizing individual letters You can end ...
Instruction Manual - Page 44

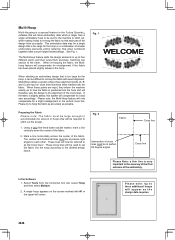
...Futura QuartetTM software that will allow embroidery data which is slightly askew, this system will compensate for it and sew accordingly. Multi-Hoop utilizes a system where three alignment points (A, B, and C) are input, they inform the machine...exact alignment. Fig. 2 Fabric Intersection of the embroidery. and then sews them precisely, matching one section to the accuracy of the final ...
Instruction Manual - Page 51

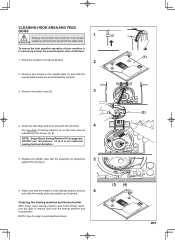
...-outlet. Remove two screws on the hook race as illustrated for sewing machine lubrication. 5. CLEANING HOOK AREA AND FEED DOGS 1 Always disconnect the machine from power CAUTION supply by the arrows. (A, B) NOTE: Singer Brand Sewing Machine Oil is suggested. To ensure the best possible operation of sewing machine oil on the needle plate (1) and slide the needle plate...
Instruction Manual - Page 52

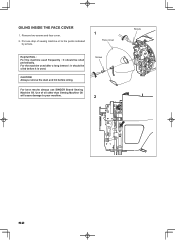
... should be oiled before oiling.  For best results always use SINGER Brand Sewing Machine Oil. Remove two screws and face cover. 2. CAUTION: Always remove the dust and lint before it is used frequently : It should be oiled periodically. Use of sewing machine oil to your machine. OILING INSIDE THE FACE COVER 1. Screw 2 Screw 52 Put one...
Instruction Manual - Page 60

... (USA & Canada only) Use Model YC-485 EC or Model JF-1000 with a damaged needle plate as this sewing machine." To reduce the risk of The Singer Company Limited or its affiliates. ©2010 The Singer Company Limited or its service agent or similarly qualified persons in order to avoid a hazard." 6. "Do not allow...

Similar Questions

I Get E7 Error Message On My Singer Model 7258 Sewing Machine. There Is No Refe
Error message E7 is up on my Singer Stylist model 7258 sewing machine. It is not working at all. I t...
(Posted by ebellamybellamy9 5 years ago)
Connection Error--futura Quartet
when I try to open the program I get the error message that my cables aren't connected or machine is...
(Posted by MelissaAllison 6 years ago)
Beeping From Singer Sewing Machine Stylist Ii 5625
My sewing machine will beep and stop sewing after three inches of sewing. I have taken it to be repa...
(Posted by arusheria 9 years ago)
Ask a New Question
Use the box below to post a new question about this Singer product .
Points & Prizes
  • You can earn points for nearly everything you do on HelpOwl.com
  • You can trade in those points for gift cards at leading retailers such as Amazon.com and Walmart
  • It's that simple!
See How it Works
Create a Free Account

Singer Manuals

Find free Singer Futura Quartet manuals and user guides available at ManualOwl.com. Try out our unique manual viewer allowing you to interact with manuals from directly within your browser!

Singer Reviews

View thousands of Singer user reviews and customer ratings available at ReviewOwl.com.

Contact Information

Complete Singer customer service contact information including steps to reach representatives, hours of operation, customer support links and more from ContactHelp.com.

Scoreboard Ratings

See detailed Singer customer service rankings, employee comments and much more from our sister site.