Get support for Singer 9960 Quantum Stylist

Singer 9960 Quantum Stylist Support Question

Singer 9960 Quantum Stylist Support Question

Find answers below for this question about Singer 9960 Quantum Stylist.
Need a Singer 9960 Quantum Stylist manual? We have 2 online manuals for this item!
Question posted by Blakkonyx on January 5th, 2015

Help! My Bobbin Will Not Thread Properly.

My bobbin threads very loosely, with large loops. I've already removed the plate and brushed out any dust particles. I also turned the machine off and then on hoping it would reset. Please help.

Current Answers

Answer #1: Posted by waelsaidani1 on January 5th, 2015 9:00 PM
This answer was accepted by the poster of the original question.
waelsaidani1

Member since:
May 12th, 2013

Points: 19,501,777
1,100
points
First, make sure the bobbin-winding spindle (located on top of your machine) has been pushed back to the left for sewing. If it is not in the correct position, the needle will not go down and pick-up your bobbin thread.

Next, make sure your needle is inserted correctly, as far as it will go, with the flat side facing back. Also, make sure your bobbin is in correctly (not backwards) and that the upper tension disks of your machine are threaded correctly. Make sure the presser foot is up when seating the thread through the upper tension.

Now, it’s time to draw up your bobbin thread.

Turn the handwheel (TOWARDS YOU ONLY, never turn the handwheel away from you) and hold the needle thread lightly. Tug on it as the needle goes down and then comes up again. You should see a small loop come up through the needle plate (this is your bobbin thread), using the tip of a narrow object like a pencil or scissors, pull the loop up and then pull both threads (top and bobbin) under the foot and toward the back of the machine.

If the above troubleshooting tips did not solve your issues, you may need to have your machine repaired for timing. If the timing is out, the needle thread is not meeting the bobbin thread in time to form a stitch.

If your bobbin is winding unevenly, it’s possible you have not placed the thread correctly around the bobbin winding tension spring. If you believe the thread is placed correctly, please try wrapping the thread around the tension spring a second time – a common practice among avid sewers.

If none of the troubleshooting techniques above solved the issue, please contact a SINGER Service Center, so they can adjust the tension for you!

Related Singer 9960 Quantum Stylist Manual Pages

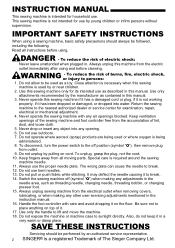
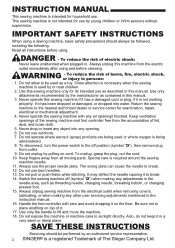
Instruction Manual - Page 2

... proper needle plate. Switch the sewing machine off position (symbol "O"), then remove plug from the accumulation of The Singer Company Ltd. Also, do not keep it on cord. DANGER - Use only attachments recommended by pulling on the floor. Return the sewing machine to be performed by an authorized service representative. 2 SINGER is a registered Trademark of lint, dust, and loose...
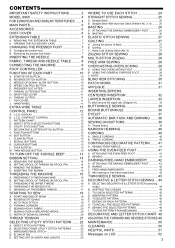
Instruction Manual - Page 3

... 38 SEWING ON BUTTONS 39 A. SHIFTING THE CURSOR 44 C. CONTRAST CONTROL 12 C. TACK BUTTON 13 M. TO RECALL THE SELECTED PATTERNS 47 H. THREADING THE UPPER THREAD 16 D. CONTENTS IMPORTANT SAFETY INSTRUCTIONS 2 MODEL 9960 4 FOR EUROPEAN AND SIMILAR TERRITORIES: ...... 4 MAIN PARTS 5 ACCESSORIES 6 DUST COVER 6 EXTENSION TABLE 7 a. REMOVING THE EXTENSION TABLE 7 b. THREAD CUTTER...
Instruction Manual - Page 4

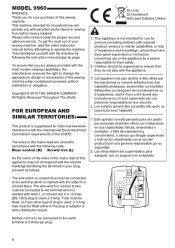
... with the appliance. This appliance is used , a 3 Amp. Children should be connected to this booklet for proper use or the appliance by a person responsible for their safety. 2. MODEL 9960 PREFACE Thank you are colored in your sewing machine, read the entire instruction manual before attempting to ensure that you for your purchase of this...
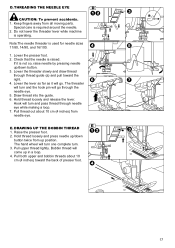
Instruction Manual - Page 17

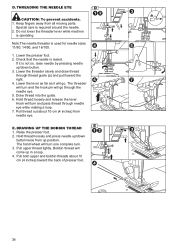
... about 10 cm (4 inches) toward the right. 4. Hold thread loosely and press needle up in a loop. 4. Special care is raised. Draw thread into the guide. 6. The hand wheel will turn one complete turn and the hook pin will turn . 3. Hold thread loosely and release the lever. DRAWING UP THE BOBBIN THREAD 1. Check that the needle is required around the needle. 2. The...
Instruction Manual - Page 19

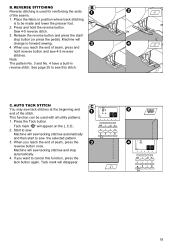
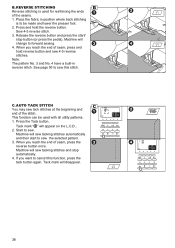
..., press the reverse button once. REVERSE STITCHING Reverse stitching is to forward sewing. 4. Press and hold reverse button and sew 4-5 reverse stitches. C. If you reach the end of the seams. 1. Machine will disappear. 19 When you reach the end of the stitch. Sew 4-5 reverse stitch. 3. Machine will appear on the L.C.D.. 2. AUTO TACK STITCH You may...
Instruction Manual - Page 25

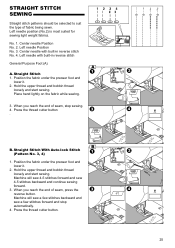
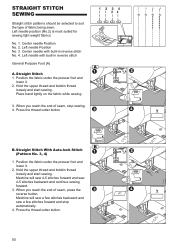
...-lock Stitch (Pattern No. 3, 4) 1. Machine will sew a few stitches backward and sew a few stitches forward and stop sewing. 4. Machine will sew 4-5 stitches forward and sew 4-5 stitches backward and continue sewing forward. 3. Hold the upper thread and bobbin thread loosely and start sewing. Press the thread cutter button . STRAIGHT STITCH SEWING Straight stitch patterns should...
Instruction Manual - Page 26

..., insert dress pins crosswise to right so that it is selected, thread tension will make one stitch. 4. CAUTION: To prevent accidents. The arm of darning/embroidery foot should ride onto the shaft of the needle clamp screw. 4. Hold the upper thread and bobbin thread loosely and start to finish the seam. 5. Repeat this pattern is...
Instruction Manual - Page 33

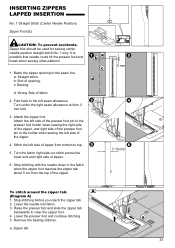
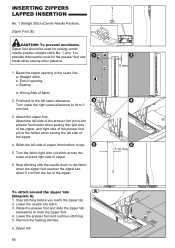
... when the zipper foot reaches the zipper tab, about 5 cm from bottom to top. 5. Remove the basting stitches. Zipper tab 33 Lower the presser foot and continue stitching. 5. Raise the ...break when sewing other patterns. 1. Zipper foot should be used for sewing center needle position straight stitch No. 1 only. Stitch the left side of zipper. 6. Lower the needle into fabric. 3. Turn under the ...
Instruction Manual - Page 39

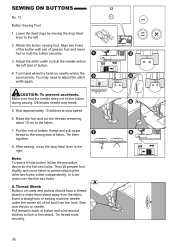
... need to the wrong side of presser foot and lower foot to the fabric. 7. After sewing, move fabric to the left hole of bobbin thread and pull upper thread to adjust the stitch width again. A. Tie thread ends securely. 39 Turn hand wheel by moving the drop feed lever to permit stitching the other two holes...
Instruction Manual - Page 48

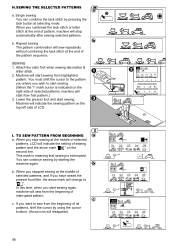
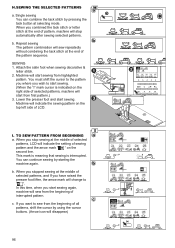
... you combined the tack stitch or letter stitch at the end of interrupted pattern. b. Machine will start sewing again, machine will sew from highlighted pattern. c. I " mark cursor is interrupted. You can combine the tack stitch by starting the machine again. SEWING 1. Single sewing You can continue sewing by pressing the tack button at selecting mode. TO...
Instruction Manual 2 - Page 2

... The Singer Company Ltd. To reduce the risk of lint, dust, and loose cloth. 5. Never operate this sewing machine if it has a damaged cord or plug, if it is not working properly, if it in a very warm or damp place. Do not use the proper needle plate. Do not unplug by or near children. 2. Always use outdoors...
Instruction Manual 2 - Page 3

...Quilting Stitch (No. 8 54 ZIGZAG STITCH SEWING 56 MULTI-STITCH ZIGZAG 56 FREE ARM SEWING 56 OVERCASTING-OVERLOCKING 58 A. Thread Shank 78 NARROW HEMMING 80 CORDING 80 A. INSERTING THE BOBBIN 30 THREADING THE MACHINE 32 A. DRAWING UP THE BOBBIN THREAD 34 STARTING TO SEW 36 A. TURNING CORNERS 40 E. BASTING 52 ELASTIC STITCH SEWING 54 QUILTING 54 A. USING THE OVERCASTING...
Instruction Manual 2 - Page 8

... the right to this booklet for proper use will provide you for your plug, proceed as follows: EU only EU seulement Sólo para Estados Unidos 1. The wires in this sewing machine. Blue: neutral (N) Brown: live...is suppressed for household use and optimum service. MODEL 9960 PREFACE Thank you with the machine by persons (including children) with the letter N or colored black.
Instruction Manual 2 - Page 34

... thread loosely and press needle up in a loop. 4. Pull upper thread lightly. Keep fingers away from all moving parts. Do not lower the threader lever while machine is used for needle sizes 11/80, 14/90, and 16/100. 1. If it will go through the needle eye. 5. Draw thread into the guide. 6. Bobbin thread will turn one complete turn and...
Instruction Manual 2 - Page 38

.... 1. Press the Tack button. When you want to sew. Tack mark will appear on the L.C.D.. 2. Machine will sew tacking stitches automatically and then start / stop automatically. 4. C. See page 50 to forward sewing. 4. This function can be made and lower the presser foot. 2. Sew 4-5 reverse stitch. 3. Machine will change to sew this function, press the tack button again...
Instruction Manual 2 - Page 50

... the presser foot and lower it . 2. Machine will sew 4-5 stitches forward and sew 4-5 stitches backward and continue sewing forward. 3. Press the thread cutter button. 50 Hold the upper thread and bobbin thread loosely and start sewing. B. Hold the upper thread and bobbin thread loosely and start sewing. Machine will sew a few stitches backward and sew a few stitches forward and stop...
Instruction Manual 2 - Page 52

... times as you need to sew. Raise the fabric feed dogs for next regular sewing. Note: To prevent the fabric layers from your left . 2. ATTACHING THE DARNING/ EMBROIDERY FOOT 1. Repeat this pattern is fitted into the presser bar. 5. No. 5 Basting Stitch Darning/Embroidery Foot A. Hold the upper thread and bobbin thread loosely and start to finish...
Instruction Manual 2 - Page 66

...you reach the zipper tab. 2. Turn the fabric right side out stitch across the lower end and right side of the zipper. 4. Zipper foot should be used for sewing center needle position straight stitch No. ... could hit the presser foot and break when sewing other patterns. 1. Attach the zipper foot. Fold back to clear the zipper foot. 4. Remove the basting stitches. Raise the presser foot and...
Instruction Manual 2 - Page 78

... end of the foot from the fabric. Tie thread ends securely. 78 Note: To sew a 4-hole button, follow the procedure above for the first two holes. SEWING ON BUTTONS No. 13 Button Sewing Foot 1. Insert a straight pin or sewing machine needle under the center slit of bobbin thread and pull upper thread to hold the button securely. 3. Lower the...
Instruction Manual 2 - Page 96

... the cursor to the pattern you where you wish to " ", In this time, when you start from the beginning of pattern, machine will sew from first pattern.) 3. b. Repeat sewing The pattern combination will sew repeatedly without combining the tack stitch at the end of interrupted pattern. I " mark cursor is interrupted. This mark is meaning...

Similar Questions

Quantum 9960, Thread Balls Up
thread balls up under plate. Have to tear fabric to get it out. Also the bar that goes across the bo...
(Posted by Sisbankssb 4 years ago)
I Get E7 Error Message On My Singer Model 7258 Sewing Machine. There Is No Refe
Error message E7 is up on my Singer Stylist model 7258 sewing machine. It is not working at all. I t...
(Posted by ebellamybellamy9 5 years ago)
Bobbin Case On Singer 9960 Quantum Stylist Noisey
when I sew I hear a clicking sound and some rattling of the bobbin occurs. more so when I sew on the...
(Posted by sdshowen 8 years ago)
Beeping From Singer Sewing Machine Stylist Ii 5625
My sewing machine will beep and stop sewing after three inches of sewing. I have taken it to be repa...
(Posted by arusheria 9 years ago)
Ask a New Question
Use the box below to post a new question about this Singer product .
Points & Prizes
  • You can earn points for nearly everything you do on HelpOwl.com
  • You can trade in those points for gift cards at leading retailers such as Amazon.com and Walmart
  • It's that simple!
See How it Works
Create a Free Account

Singer Manuals

Find free Singer 9960 Quantum Stylist manuals and user guides available at ManualOwl.com. Try out our unique manual viewer allowing you to interact with manuals from directly within your browser!

Singer Reviews

View thousands of Singer user reviews and customer ratings available at ReviewOwl.com.

Contact Information

Complete Singer customer service contact information including steps to reach representatives, hours of operation, customer support links and more from ContactHelp.com.

Scoreboard Ratings

See detailed Singer customer service rankings, employee comments and much more from our sister site.