Singer 5554 and 14HD854 HEAVY DUTY COMBO Support Question
Singer 5554 and 14HD854 HEAVY DUTY COMBO Support Question
Find answers below for this question about Singer 5554 and 14HD854 HEAVY DUTY COMBO.Need a Singer 5554 and 14HD854 HEAVY DUTY COMBO manual? We have 1 online manual for this item!
Question posted by lynnebennett on July 28th, 2015
Sews In Reverse Only.
I have used the machine very little, and it was working just fine. Now it only sews in reverse. Want to straight stitch only and have the machine sew forward.
Current Answers
Answer #1: Posted by TechSupport101 on July 28th, 2015 5:21 PM
TechSupport101

Member since:
May 24th, 2013 Points: 12,171,315

Member since:
May 24th, 2013 Points: 12,171,315
Check the "Reverse Sewing Lever" - may be engaged or simply stuck (possibly due to little oil). Page 9 of the Instruction Manual.
Related Singer 5554 and 14HD854 HEAVY DUTY COMBO Manual Pages
Instruction Manual - Page 2

... with the appliance. Always use of lint, dust, and loose cloth. 5. Do not unplug by or near children. 2. Always unplug before cleaning. 3. Never operate the appliance with any opening. 12. Do not pull or push fabric while stitching. Special care is not working properly, if it is required around the sewing machine needle. 6. Never operate...
Instruction Manual - Page 6

......10
Threading the Machine Winding the Bobbin...12 Inserting the Bobbin ...14 Threading the Upper Thread...16 Automatic Needle Threader ...18 Raising the Bobbin Thread ...20 Thread Tension ...22
Sewing How to Choose Your Pattern...24 Three Needle Position Dial ...26 Stitch Width Dial & Stitch Length Dial ...28 Sewing Straight Stitch...30 Reverse Sewing/ Removing the Work/ Cutting the Thread...
Instruction Manual - Page 9

... accessory storage
5
13
9. Bobbin stopper
11. Needle plate cover
8. Reverse sewing lever
11
3
5. Presser foot
4
12
7. One step buttonhole lever
14
15
2 Thread take-up lever 2
10
4. Stitch width dial
7
12. Stitch length dial
13. Presser foot pressure adjustment
1
9
3. EN Principal Parts of the Machine
1. Automatic threader 15. Pattern selector dial
8
14.
Instruction Manual - Page 13

... in doubt of electric shock, this plug is not in use .
If it does not
fit fully in the outlet, reverse the plug. Sewing light Press main switch (A) to install the proper outlet. Polarized attachment plug b.
EN Connecting Machine to Power Source
Connect the machine to a power source as illustrated. (1) This appliance is equipped with...
Instruction Manual - Page 15

... for heavy fabric, tighten by turning it clockwise.
For sewing very thin fabric, loosen the pressure by turning the screw counter clockwise, and for easy positioning of fabric (light-or-heavy weight...Presser Foot Pressure
The presser foot pressure of the machine has been pre-set and requires no particular readjustment according to the type of the work. (A)
A The presser foot will drop back ...
Instruction Manual - Page 17

... are , however, available for purchase from your authorized retailer.) n. Overcasting foot p. Quilting/ straight stitch foot t. Buttonhole foot d. Button sewing foot e. Auxiliary Spool Pin l. Satin stitch foot o. Cording foot r. All purpose foot b. they are not supplied with this machine; Gathering foot u. Bobbin (3x) j. Even Feed foot w. Spool holders (2x) i. Spool pin...
Instruction Manual - Page 19

...& then continue winding
until bobbin is in "bobbin winding" position, the machine will not sew and the handwheel turn. Please Note: When the bobbin winder spindle is full...- Wind thread clockwise around bobbin winder tension discs. (4)
- To start sewing, push the bobbin winder spindle to left 4 (sewing position).
3
5
6
7
8
9
10
12 Push bobbin spindle to spool pin. (1/2)
- ...
Instruction Manual - Page 25

...swinging it away from left to off ("O")! The needle threader is equipped with a size 14 needle.
Set Stitch Width Dial (see item # 9 on page 2 of the manual) to work best with a standard size 14 needle at the factory.
2
18
A C
B D
A Attention:...inside the threader will go, then push it back up to Straight Stitch.
- Your machine is designed to center position.
-
Instruction Manual - Page 29

... the next number down. Correct thread tension is important for straight stitch construction sewing. - 90% of fabric. Proper tension setting is when a small amount of the upper
thread appears on the top of the fabric, this is an indication that the upper machine tension is an indication that the bobbin thread has not been...
Instruction Manual - Page 31

... stitch width with the gray color, turn the pattern selector dial. (e) For top row stitches B, C, D, E, I JK
S2 If you the widest stitch.
Stitches in gray. Set the Three Needle Position Dial (b) to 6. Set the Stitch Width Dial (c) to the Center. -
You can adjust the density by moving the Stitch Length Dial to 1 to make it longer. Reverse sewing...
Instruction Manual - Page 35

... between "0" and "6", you can position the needle where you can alter the width from 1mm to zig zag or any other decorative pattern. Generally speaking, use this function your manual) is also the control for when straight stitching
For straight stitch sewing, turn the Pattern Selector Dial to the right and then by moving the...
Instruction Manual - Page 37

Place the fabric under the presser foot with the fabric edge lined up with the desired seam guide line on the needle plate. (2)
Lower the presser foot lifter, and then step on the foot controller to between 2 and 3. EN Sewing Straight Stitch
To begin sewing, set the machine for straight stitch. (1)
Set the stitch length to start sewing. (3)
1
2
3
30
Instruction Manual - Page 39

.... (2)
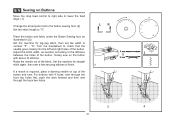
Cutting the Thread
Pull the threads under and behind the presser foot.
EN Reverse Sewing
To secure the beginning and the end of the face plate and into thread cutter (B). A
Release the lever and the machine will sew forward again. (1)
Removing the Work
Turn the handwheel toward you (counterclockwise) to bring
the thread take up lever...
Instruction Manual - Page 41
... two examples:
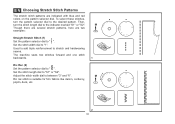
Straight Stretch Stitch (1) Set the pattern selector dial to " ". Though there are several stretch patterns, here are indicated with blue and red colors on the pattern selector dial. Used to add triple reinforcement to " ".
M
1 M
2 34
Ric Rac (2) Set the pattern selector dial to stretch and hardwearing seams. The machine sews two stitches forward and one...
Instruction Manual - Page 43

...appropriate for part number)
36 Generally, a narrower stitch is used for heavier weight fabrics. Blind Hem:
Turn up the hem to sew slowly along the fold, so that the needle ...machine settings are normally sewn
with
the top edge of the hem extending about 7 mm (1/4") to the
right side of the fold. (2)
Unfold the fabric when hemming is used for lighter weight
fabrics, and a wider stitch...
Instruction Manual - Page 45
... be used when making
buttonholes.
a
b
A
PUSH
B
C
Making a Buttonhole on Stretch Fabrics (E)
When sewing buttonholes ...stitching is completed, gently pull the heavy thread to
E
remove any slack, then trim off the excess.
38
3 4
2
1
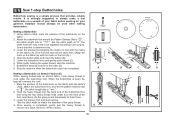
D EN Sew 1-step Buttonholes
Buttonhole sewing is strongly suggested to always make a test
M
buttonhole on a sample of your fabric before working...
Instruction Manual - Page 49
Set the machine for straight
a
2
ba b
stitch again, then sew a few securing stitches to finish.
1
If a shank is required, place a darning needle on the button with 4 holes, sew through the front two holes first, push the work forward and then sew through the back two holes.
3
4
42 "6". Set the machine for zig-zag stitch, then set the width to check that the...
Instruction Manual - Page 55

...needle often (approximately every other garment ) and/ or at first thread breakage or skipped stitches.
48 EN Needle/ Fabric/ Thread Chart
NEEDLE, FABRIC, THREAD SELECTION GUIDE
NEEDLE SIZE... (110)
Heavy woolen, overcoat fabrics, upholstery fabrics, some Heavy duty thread in the bobbin.
Natural and synthetic woven fabrics, polyester blends. For best sewing results always use the same thread...
Instruction Manual - Page 68

14HD854 (2 . 3 . 4 THREAD HEAVY DUTY OVERLOCK MACHINE)
Instruction Manual
Instruction Manual - Page 98

... thread tail under the presser foot and then to begin sewing. Start sewing.
Note: * For heavy or thick fabrics, it is in front of the machine. Hold the thread tail and step on the feed dogs... of the fabric is recommended to use SINGER needles #2022 size 100/16.
* Heavy or thick fabrics may be more difficult to the blade.
* Lower the presser foot and sew. Place the notch so that the...
Similar Questions

My Stitches Are Too Loose, How Do I Adjust Them? Nk
When i am sewing a straight stitch they are do loose they come right out, I have adjusted stitch siz...
When i am sewing a straight stitch they are do loose they come right out, I have adjusted stitch siz...
(Posted by reillyclan01 6 years ago)

Stitch Selection Dial Will Not 'seat' On Straight-stitch.
The selection dial will "seat" on corresponding special stitches, but not in the "gray" selections w...
The selection dial will "seat" on corresponding special stitches, but not in the "gray" selections w...
(Posted by lynnebennett 8 years ago)

The Only Stitch That My New Machine Will Do Is A Straight Stitch
(Posted by justshea 9 years ago)

How Do I Set Up The Machine To Correctly Sew On Jersey And Stretch Materials?
I tried the S1 and S2 and it didn't continue sewing but got stuck.
I tried the S1 and S2 and it didn't continue sewing but got stuck.
(Posted by shirlblissj 9 years ago)

Model 5554 Threading The Needle Automatically
(Posted by jpcaden 10 years ago)