
Samsung UN46ES7100F Support Question
Samsung UN46ES7100F Support Question
Find answers below for this question about Samsung UN46ES7100F.Need a Samsung UN46ES7100F manual? We have 3 online manuals for this item!
Question posted by robertleekim on February 5th, 2013
What Are The Calibration Settings For The Un46es7100f?
The person who posted this question about this Samsung product did not include a detailed explanation. Please use the "Request More Information" button to the right if more details would help you to answer this question.
Current Answers
Related Samsung UN46ES7100F Manual Pages
User Manual Ver.1.0 (English) - Page 2
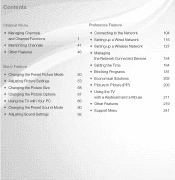
... Time
164
• Blocking Programs
181
• Changing the Preset Picture Mode
50
• Economical Solutions
202
• Adjusting Picture Settings
53
• Picture In Picture (PIP)
206
• Changing the Picture Size
58
• Changing the Picture Options
• Using the TV
67
with a Keyboard ...
User Manual Ver.1.0 (English) - Page 7
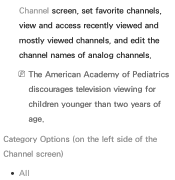
Category Options (on the left side of analog channels. Channel screen, set favorite channels, view and access recently viewed and mostly viewed channels, and edit the channel names of the Channel screen)
●● All
NNThe American Academy of Pediatrics discourages television viewing for children younger than two years of age.
User Manual Ver.1.0 (English) - Page 20
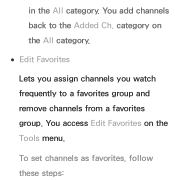
category on the Tools menu. To set channels as favorites, follow these steps:
You access Edit Favorites on the All category.
●● Edit Favorites
Lets you assign channels you watch frequently to the Added Ch. You add channels back to a favorites group and remove channels from a favorites group. in the All category.
User Manual Ver.1.0 (English) - Page 30
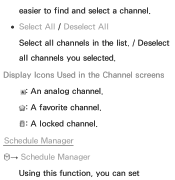
easier to find and select a channel. ●● Select All / Deselect All
Select all channels in the Channel screens
: An analog channel. : A favorite channel. : A locked channel. Display Icons Used in the list. / Deselect all channels you can set Schedule Manager ™→ Schedule Manager Using this function, you selected.
User Manual Ver.1.0 (English) - Page 31
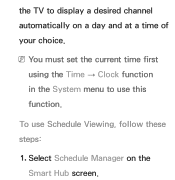
To use this function. NNYou must set the current time first using the Time → Clock function in the System menu to display a desired channel automatically on the Smart Hub screen. the TV to use Schedule Viewing, follow these steps:
1.
Select Schedule Manager on a day and at a time of your choice.
User Manual Ver.1.0 (English) - Page 32
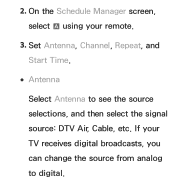
If your remote.
3. 2. On the Schedule Manager screen, select a using your TV receives digital broadcasts, you can change the source from analog to see the source selections, and then select the signal source: DTV Air, Cable, etc. Set Antenna, Channel, Repeat, and Start Time.
●● Antenna
Select Antenna to digital.
User Manual Ver.1.0 (English) - Page 34

When done, select OK. The selected
channel is available only when you
select Once in Repeat. ●● Start Time
You can set the start time you want . NNThe c mark indicates a day you'
ve selected. Date: You can set the day you want . 3. NNDate is scheduled for viewing. Manual, you can set a desired date.
User Manual Ver.1.0 (English) - Page 57
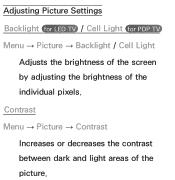
Contrast Menu → Picture → Contrast Increases or decreases the contrast between dark and light areas of the individual pixels. Adjusting Picture Settings Backlight for LED TV / Cell Light for PDP TV Menu → Picture → Backlight / Cell Light
Adjusts the brightness of the screen by adjusting the brightness of the picture.
User Manual Ver.1.0 (English) - Page 59
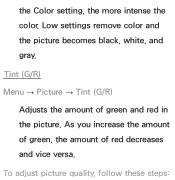
Low settings remove color and the picture becomes black, white, and gray. As you increase the amount of green, the amount of green and red in the picture. Tint (G/R) Menu → Picture → Tint (G/R)
Adjusts the amount of red decreases and vice versa.
the Color setting, the more intense the color. To adjust picture quality, follow these steps:
User Manual Ver.1.0 (English) - Page 61
NNYou can adjust and store settings for each external device connected to the TV.
NNLowering picture brightness reduces power consumption.
User Manual Ver.1.0 (English) - Page 62

However, we highly recommend you have a cable box or satellite receiver, it may have its own set of screen sizes as well. Changing the Picture Size
Screen Adjustment Menu → Picture → Screen Adjustment
Using this function, you can select various picture size and aspect ratio options. ●● Picture Size If you use your TV's
User Manual Ver.1.0 (English) - Page 63
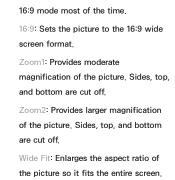
Zoom2: Provides larger magnification of the picture. Sides, top, and bottom are cut off . Sides, top, and bottom are cut off . Zoom1: Provides moderate magnification of the picture. Wide Fit: Enlarges the aspect ratio of the time. 16:9: Sets the picture to the 16:9 wide screen format. 16:9 mode most of the picture so it fits the entire screen.
User Manual Ver.1.0 (English) - Page 64
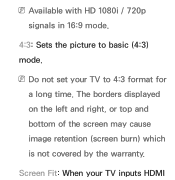
The borders displayed on the left and right, or top and bottom of the screen may cause image retention (screen burn) which is not covered by the warranty. NNDo not set your TV inputs HDMI
Screen Fit: When your TV to basic (4:3) mode. NNAvailable with HD 1080i / 720p signals in 16:9 mode.
4:3: Sets the picture to 4:3 format for a long time.
User Manual Ver.1.0 (English) - Page 66
Position is only available if Picture Size is set to Screen Fit. NNIn DTV mode, Position is not available when Picture Size is set to Zoom1, Zoom2, Wide Fit, or Screen Fit.
NNThe picture size can vary when you play content from Videos in AllShare Play depending on the input resolution.
●● Position
Adjusts the picture position.
User Manual Ver.1.0 (English) - Page 70
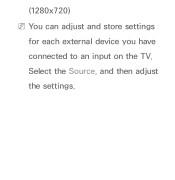
Select the Source, and then adjust the settings. (1280x720) NNYou can adjust and store settings
for each external device you have connected to an input on the TV.
User Manual Ver.1.0 (English) - Page 71

NNAdvanced Settings is available only
when the Picture Mode is set to create your preferred picture. NNWhen connecting a PC using an HDMI to DVI cable, you can only Changing the Picture Options
Advanced Settings Menu → Picture → Advanced Settings
Using this function, you can configure advanced picture settings to Standard or Movie mode.
User Manual Ver.1.0 (English) - Page 75
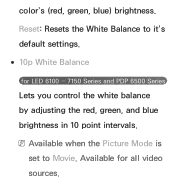
NNAvailable when the Picture Mode is
set to it's default settings. ●● 10p White Balance
for all video sources. color's (red, green, blue) brightness. Reset: Resets the White Balance to Movie. Available for LED 6100 ― 7150 Series and PDP 6500 Series
Lets you control the white balance by adjusting the red, green, and blue brightness in 10 point intervals.
User Manual Ver.1.0 (English) - Page 77
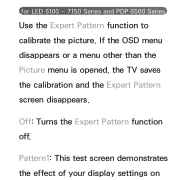
If the OSD menu disappears or a menu other than the Picture menu is opened, the TV saves the calibration and the Expert Pattern screen disappears. Off: Turns the Expert Pattern function off. for LED 6100 ― 7150 Series and PDP 6500 Series
Use the Expert Pattern function to calibrate the picture.
Pattern1: This test screen demonstrates the effect of your display settings on
User Manual Ver.1.0 (English) - Page 457
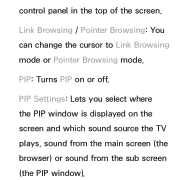
PIP Settings: Lets you select where the PIP window is displayed on or off. Link Browsing / Pointer Browsing: You can change the cursor to Link Browsing mode or Pointer Browsing mode.
PIP: Turns PIP on the screen and which sound source the TV plays, sound from the main screen (the browser) or sound from the sub screen (the PIP window). control panel in the top of the screen.
User Manual Ver.1.0 (English) - Page 480
If you move the pointer to the top of the screen.
Encoding: You can set the Encoding setting for web pages to their factory defaults.
-- Hide Menu: Turns the control panel auto-hide on the top will be hidden and only appear when you select on, the control panel on or off. browser settings to Automatic or Manual.
Samsung Knowledge Base Results
We have determined that the information below may contain an answer to this question. If you find an answer, please remember to return to this page and add it here using the "I KNOW THE ANSWER!" button above. It's that easy to earn points!-
General Support
... a DVI cable, follow these steps: Make sure your TV, and then click OK. The TVs use an HDMI/DVI cable. Control Panel. Click the Settings tab in Windows Display Settings window, click Advanced Settings. In the dialog box that has a mini-stereo jack next to your Windows computer (and in A. On the next window... -
General Support
Settings > Control Panel > Add New Hardware For more information on the CD included with your unit or can be downloaded from: Once these items are connected or ... -
General Support
... that the camcorder is connected and working properly. is in the device manager. Device Manager ). Settings > With Windows 98SE the files are located on Start Menu > Follow the steps ...below : Highlight the device by Microsoft and is already loaded on Hardware > Control Panel > Under the device heading called 'Samsung DV Camera' or 'DV Camcorder'. My ...
Similar Questions

Best Calibration Settings For A Samsung Un60eh6003f
(Posted by renocas 9 years ago)

Best Calibration Setting For My Samsung Ln32d450g1d Lcd Tv
(Posted by loweryjrd 9 years ago)

What Is The Best Calibration Setting For The 55 Samsung Un55es6100
(Posted by jimwmBulqiz 9 years ago)

What Is The Best Calibration Settings For The Samsung Lcd Tv Model
ln52a650a1fxza
ln52a650a1fxza
(Posted by jdmowe 10 years ago)
