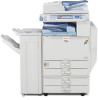
Ricoh Aficio MP C5000 Support Question
Ricoh Aficio MP C5000 Support Question
Find answers below for this question about Ricoh Aficio MP C5000.Need a Ricoh Aficio MP C5000 manual? We have 3 online manuals for this item!
Question posted by safwaZIGSF on February 20th, 2014
Ricoh Aficio Mp 6001 How To Set Up Scanning
Current Answers
Answer #1: Posted by freginold on February 22nd, 2014 5:45 PM

Member since:
December 20th, 2011 Points: 23,254,995

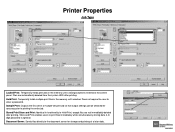
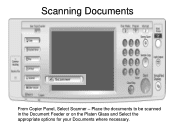
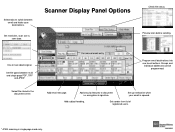
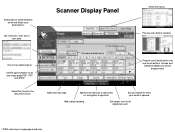
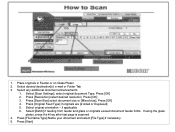
- How to set up scan to email on a Ricoh Aficio MP series copier
This article will help you save email addresses to the address book once you have it set up:
- How to add an email address to a Ricoh Aficio MP series copier
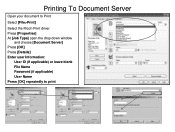
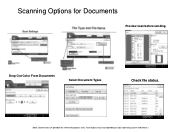
To set up scanning to a folder, you will first need to create a folder on your computer and share it. The steps for doing this vary greatly depending on what operating system you are using (Windows XP, Windows 8, Mac OS X 10.6, etc.).
This article will guide you through setting up a shared folder in Windows XP:
- How to create a shared folder in Windows XP
Once you have created and shared the folder, this article will show you how to link to that folder from the copier:
- How to link to a network share folder from a Ricoh Aficio MP series copier
Related Ricoh Aficio MP C5000 Manual Pages


Similar Questions

Aficio MP C2051how so i set default scan settings to scan black and white


Why Can't We Print Envelopes On The Ricoh Aficio Mp 6001 Printer? All Directions Followed To The T.