Maytag MMV5208WS Support Question
Maytag MMV5208WS Support Question
Find answers below for this question about Maytag MMV5208WS - 2.0 cu. Ft. Combination Range Hood-Microwave.Need a Maytag MMV5208WS manual? We have 2 online manuals for this item!
Question posted by jet549thompson on September 3rd, 2012
What Size Wall Vent Cap Do I Need For Mmv4205ba Rear Venting?
The instructions say cut 4x12 hole in the wall, but the standard microwave wall vent cap is 3 1/4x10. Is this big enough or should I purchase a 12" length?
Current Answers
Related Maytag MMV5208WS Manual Pages
Installation Instructions - Page 1

...and including 36" (91.4 cm) wide. These installation instructions cover different models.
This symbol alerts you to Wall 8 Prepare Upper Cabinet 8 Install Damper Assembly 9 Install the Microwave Oven 9 Complete Installation 10 VENTING DESIGN SPECIFICATIONS 11 ASSISTANCE 12 Replacement Parts 12 Accessories 12
MICROWAVE HOOD COMBINATION SAFETY
Your safety and the safety of Contents...
Installation Instructions - Page 2

... location must be combined. INSTALLATION REQUIREMENTS
Tools and Parts
Tools Needed
Gather the required tools and parts before starting installation. Read and follow the instructions provided with your builder or cabinet supplier to it during
the "Mark Rear Wall" part of 150 lbs (68 kg), which includes microwave oven and items placed inside the microwave oven and upper cabinet...
Installation Instructions - Page 3

...the microwave oven. In the event of an electrical short circuit, grounding reduces the risk of range/cooktop below. Consult a qualified electrician or serviceman if the grounding instructions are...cm) typical*
12" (30.5 cm) min.
14" (35.6 cm) max.
Recommended:
■ A time-delay fuse or time-delay circuit breaker. ■ A separate circuit serving only this microwave oven. Exact dimensions ...
Installation Instructions - Page 4

... wall or
roof venting, changes must be made to the work surface, cover the work surface.
1. Damper plate B.
Lift blower motor out of the microwave oven and lift up. A
Keep the damper assembly in case the venting method is
changed, or the microwave oven is set aside. 3. A
B
A. Secure damper plate with 2 screws removed in recessed holes)
D
A. INSTALLATION INSTRUCTIONS
Remove...
Installation Instructions - Page 5

...port
IMPORTANT: If blower motor is not correctly oriented, the 2 screws removed in Step 3 of microwave oven. Repeat Step 2 from "Wall Venting Installation Only." 2. Repeat Step 3 from "Wall Venting Installation Only." 5. Roof Venting Installation Only
1. Repeat Step 4 from "Wall Venting Installation Only." 4. Secure damper plate with 2 screws removed in Step 3 cannot be poor. Securely...
Installation Instructions - Page 6

... in "Possible Wall Stud Configurations."
2. Wall stud centerlines D. Support tabs F. Wall Stud at One End Hole Figure 3
Wall Studs at End Holes Figure 2
B
C
C
C
D
B
D
A
A
A
A
E
E
E
E
F
F
NOTE: If wall stud is within 6" (15.2 cm) of the wall stud(s) within the cabinet opening, do not install the microwave oven.
1. Possible Wall Stud Configurations
These...
Installation Instructions - Page 7

...holes and bottom edge.
4. Wall Venting Installation Only
Upper cabinet bottom
³⁄₈" (1 cm)
4" (10.2 cm)
Centerline
6" (15.2 cm)
6" (15.2 cm)
8. Cut a 3/4" (19 mm) hole...both holes in Step 9 to the wall stud centerline(s). Drill 3/4" (19 mm) holes through the wall at the hole(s) marked in the shaded areas are properly marked. Mark Rear Wall
The microwave oven must...
Installation Instructions - Page 8

... nut
3.
Make sure the template centerline aligns with the holes in the top of "Mark Rear Wall."
2. The template has trim lines to use as guides. ■ If the wall behind the microwave oven (as at both ends. 1. Drill a 3/16" (5 mm) hole into the wall stud at Both End Holes (Figure 4)
1.
Leave enough space for the toggle nuts to...
Installation Instructions - Page 9

... plate. Secure damper assembly with 2 sheet metal screws. NOTE: If venting through the power supply cord hole in the wall cutout. 6. This hole is metal, the supply cord bushing needs to the upper cabinet. These are for wall venting only)
1. Handle the microwave oven gently. 1. Sheet metal screws
3. Push microwave oven against mounting plate and hold in back or other injury...
Installation Instructions - Page 10

... has not tripped. Loosen mounting plate screws. The blocks must be adjusted, skip steps 7-9.
7. Vent B. WARNING
A.
Damper assembly C. Plug microwave oven into a grounded 3 prong outlet. ■ See the User Instructions for future use.
10
NOTE: If microwave oven does not need to be the same thickness as shown. Adjust mounting plate and retighten screws.
9.
Upper...
Installation Instructions - Page 11

...damper to open freely and fully. A
B
C
Roof venting
Roof cap
Wall venting
Wall cap
D
E
F
G
A. VENTING DESIGN SPECIFICATIONS
This section is at least 3" (7.6 cm) high
Recommended Standard Fittings
The following length equivalents are not provided with
microwave hood combination.
■ We do not recommend using a flexible metal vent.
■ To avoid possible product damage, be...
Installation Instructions - Page 12

...1 wall cap = 40 ft (12.2 m) C. 2 ft (0.6 m) + 6 ft (1.8 m) straight = 8 ft (2.4 m)
6" (15.2 cm) vent system = 73 ft (22.2 m) total
A
B
6 ft (1.8 m)
2 ft (0.6 m)
C
D
A.
All rights reserved.
461966202992 9/10
Printed in pairs. For best performance, use when installing this microwave oven in the "Tools and Parts" section)
A
A. When you call, you need , add the equivalent lengths...
Owners Manual - Page 1

... safety and the safety of the microwave oven opening, behind the door. Always read and obey all instructions before using electrical appliances basic safety precautions should experience a problem not covered in TROUBLESHOOTING, please visit our website at 1-800-688-9900.
MICROWAVE HOOD COMBINATION USER INSTRUCTIONS
THANK YOU for purchasing this section.
■ Some products such...
Owners Manual - Page 2

...cover racks or any other than manufacturer's recommended accessories, in this oven when not in use above ranges with maximum width of electric shock.
■ Do not clean...).
■ Clean Ventilating Hoods Frequently - IMPORTANT SAFETY INSTRUCTIONS
■ Use the microwave oven only for its intended use paper products when appliance is operated in convection, combination, grill or "PAN BROWN...
Owners Manual - Page 3

... and minutes with plates that is a 12-hour (12:00-11:59) clock, with a grounding plug. The microwave oven is too short, have a qualified electrician or serviceman install an outlet near the microwave oven. Touch the Options or Setup control to reach the "Light Timer" submenu, and set speed.
The vent fan may be used independently during...
Owners Manual - Page 4

... (if not 100%), touch number pads to follow label instructions on the underside of cook time at 100%.
If programming... Start control. If Add More Time is behind the vent grille at the top front of the filter into its...place end of the microwave oven. Make sure microwave oven has been plugged in for all controls are on cleaning products. Microwave Oven Care
General Cleaning
IMPORTANT...
Owners Manual - Page 5

... away from the vent fan, automatically comes on during microwave oven operation to cool the microwave oven's controls while the... wireless networks may be purchased separately. Remove two screws on the underside of the microwave oven, under the bulb cover...top front of the microwave oven, and is replaceable. The microwave oven's cooling fan (on cavity walls, microwave inlet cover, cooking rack...
Owners Manual - Page 6
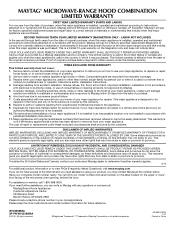
...MICROWAVE-RANGE HOOD COMBINATION LIMITED WARRANTY
FIRST YEAR LIMITED WARRANTY (PARTS AND LABOR) For one year from the date of purchase, when this major appliance is installed, operated and maintained according to instructions attached to or furnished with the product, Maytag brand of original purchase...the Internet and you need further assistance, you can... microwave oven opening, behind the door....
Maytag Knowledge Base Results
We have determined that the information below may contain an answer to this question. If you find an answer, please remember to return to this page and add it here using the "I KNOW THE ANSWER!" button above. It's that easy to earn points!-
Convection baking - Oven
... additional press of the Autoset pad will start to 550°F. Check cooking progress at the minimum cooking time. Cook longer if needed. When cooking is reached. Remove food from 170°F to rotate. To set oven temperature is reached. The Fan icon will increase the temperature by 25°... -
Display shows AF - Dryer
... and restricting air movement? Check the outside exhaust hood clogged with lint? Kinked or crushed exhaust vent material slows moist air from the entire length of vent material length the system can have more information, view the following or check the Installation Instructions for crushed vent material Is the dryer in a new location or... -
Water supply hookup - French door with exterior dispenser
...drill a ¼" hole in conjunction with an... lower left rear of tubing squarely... determine the length of copper tubing...then add approx. 7 ft (2.1 m) to a ...cap from moving the refrigerator for cleaning. Correct any leaks. This will help keep it will need...Find a ½" to 1¼" (12.7 mm to the household water supply (b)... IMPORTANT: If you are cut square. 5. Reverse Osmosis ...
Similar Questions

Dimensions?
(Posted by markleiman01 11 months ago)

Microwave Door?
Is there a replacement door for a white microwave door for model MMV5165BA? Where can I purchase one...
Is there a replacement door for a white microwave door for model MMV5165BA? Where can I purchase one...
(Posted by wafaith 8 years ago)

What Size Wall Vent Cap Do I Need To Install
The instructions show to cut a 4x12 hole in the wall for rear exhaust, but the standard wall vent ca...
The instructions show to cut a 4x12 hole in the wall for rear exhaust, but the standard wall vent ca...
(Posted by jet549thompson 11 years ago)

Installation Question..i;m Installing The Microwave And It Says To Remove Mounti
Does this model come with a mounting plate. It's not connected on the back and I didn't see it in th...
Does this model come with a mounting plate. It's not connected on the back and I didn't see it in th...
(Posted by jet120566 11 years ago)

Vent Installation For Model Mmv5208
Need details for installing vent for microwave
Need details for installing vent for microwave
(Posted by purplebear 12 years ago)