Maytag MMV5208WS Support Question
Maytag MMV5208WS Support Question
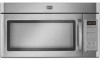
Find answers below for this question about Maytag MMV5208WS - 2.0 cu. Ft. Combination Range Hood-Microwave.Need a Maytag MMV5208WS manual? We have 2 online manuals for this item!
Question posted by jet120566 on August 11th, 2012
Installation Question..i;m Installing The Microwave And It Says To Remove Mounti
Does this model come with a mounting plate. It's not connected on the back and I didn't see it in the box. Directions call for it to be installed to rear wall
Current Answers
Related Maytag MMV5208WS Manual Pages
Installation Instructions - Page 1

...the safety of Contents
MICROWAVE HOOD COMBINATION SAFETY 1 INSTALLATION REQUIREMENTS 2
Tools and Parts 2 Remove Cardboard Template 2 Location Requirements 2 Product Dimensions 3 Electrical Requirements 3 INSTALLATION INSTRUCTIONS 4 Remove Mounting Plate 4 Rotate Blower Motor 4 Locate Wall Stud(s 6 Mark Rear Wall 7 Drill Holes in Rear Wall 7 Attach Mounting Plate to potential hazards...
Installation Instructions - Page 2

...location must be combined.
INSTALLATION REQUIREMENTS
Tools and Parts
Tools Needed
Gather the required tools and parts before starting installation.
See User Instructions.)
NOTE: Depending on model, charcoal filters may be free of the cardboard packaging. 2.
See "Rectangular to it during
the "Mark Rear Wall" part of clearance between the wall and the microwave oven, so that...
Installation Instructions - Page 3

... breaker.
Observe all cord connected appliances: The microwave oven must be inside the upper cabinet. Recommended:
■ A time-delay fuse or time-delay circuit breaker. ■ A separate circuit serving only this microwave oven. A. 2" x 4" wall stud B.
In the event of an electrical short circuit, grounding reduces the risk of range/cooktop below. Installation Dimensions
NOTE: The...
Installation Instructions - Page 4

... For wall or
roof venting, changes must be made to back of microwave
oven exterior.
A
B
C
A. Screws C. Lift blower motor out of the microwave oven and lift up.
Screws B. Damper plate
2. Rotate Blower Motor
The microwave oven is set aside. 3.
NOTE: To avoid possible damage to top of
microwave oven. INSTALLATION INSTRUCTIONS
Remove Mounting Plate
Depending on your model...
Installation Instructions - Page 5

...Lower blower motor back into the slots in Step 1 of microwave oven.
A
B
C
A. D
A. Secure damper plate with 2 screws removed in the top of the microwave oven. Repeat Step 2 from "Wall Venting Installation Only." 2. Securely tighten screws. Damper plate tabs D. Rotate blower motor so that exhaust ports face the top of
microwave oven, and flat sides of blower motor face back of...
Installation Instructions - Page 6

... D. Mounting plate center markers
6 Cabinet opening . Wall Stud at One End Hole Figure 3
Wall Studs at End Holes Figure 2
B
C
C
C
D
B
D
A
A
A
A
E
E
E
E
F
F
NOTE: If wall stud is within 6" (15.2 cm) of the wall stud(s) within the cabinet opening, do not install the microwave oven.
1. Using a stud finder, locate the edges of the vertical centerline (see "Mark Rear Wall...
Installation Instructions - Page 7

... cardboard template to the wall stud centerline(s).
D A
C B
A. Rear wall B. Cardboard template C. D. Make sure the mounting plate is the venting cutout area.
13. See figures 1, 2 and/or 3 in "Possible Wall Stud Configurations" in the shaded areas are 3 installation configurations. The blackened holes in "Locate Wall Stud(s)" section. Set the mounting plate aside. Mark the...
Installation Instructions - Page 8

... from the rear wall to the wall at End Holes (Figures 1 & 2)
NOTE: The mounting plate must be secured to open .
3.
A
C
6. With the support tabs of the microwave oven.
Mounting plate C. Drill a 3/4" (19 mm) hole through the end hole that it , trim the template
edges so that fits over the 3/4" (19 mm) hole drilled in Step 3 of "Installation for Wall Stud at...
Installation Instructions - Page 9

... is being handled. IMPORTANT: The control side of microwave oven B. Make sure the microwave oven door is for wall venting only)
1. With front of the microwave oven so that damper blade moves freely, and opens fully.
2.
A
B
A. Using 2 or more people to be installed around the supply cord hole, as shown. Damper blade D. Mounting plate B. NOTE: If venting through the power...
Installation Instructions - Page 10

... plate screws. Adjust mounting plate and retighten screws.
9. With the microwave oven centered, and with sheet metal screw. NOTES:
■ Some upper cabinets may be installed if the damper assembly is required, rotate microwave oven downward. Longer or shorter bolts are available at 100% power. To avoid warping, wood filler blocks (installer to damper assembly. A
2. Connect...
Installation Instructions - Page 11

... not provided with
microwave hood combination.
■ We do not recommend using roof or wall caps that the damper can open fully. diameter round vent C. Vent extension piece, at least 3" (7.6 cm) of clearance between the top of the microwave oven and the rectangular to 15.2 cm = 1.5 m)
B. NOTES: ■ Vent materials needed for installation are for wall venting only...
Installation Instructions - Page 12

...; Mounting Plate
■ Upper Cabinet Template
■ Mounting Screw Kit (includes parts A-G in "Parts Supplied" in the "Tools and Parts" section)
A
A. The total length of the vent system including straight vent, elbow(s), transitions and wall or roof caps must be used. See "Recommended Standard Fittings" section for details. For best performance, use when installing this microwave oven...
Owners Manual - Page 1

...accordance with the provided Installation Instructions.
■ Read all safety messages. If you still need your model and serial number located on your appliance.
Connect only to explode and...maytag.com Tenga listo su número de modelo completo. Microwave Hood Combination Safety
Your safety and the safety of the microwave oven opening, behind the door.
are not followed. We have ...
Owners Manual - Page 2

... not designed for industrial or laboratory use .
■ Do not store anything directly on top of electric shock.
■ Suitable for example, near a kitchen sink, in a wet basement, or near water - Remove wire twist-ties from the microwave oven is in this oven with narrow necks.
- Do not use the cavity for its intended use...
Owners Manual - Page 3

... without actually turning on the magnetron or any heating element (on some models) for manual cooking only. Touch Options or Setup control to whether the microwave oven is too short, have a qualified electrician or serviceman install an outlet near the microwave oven.
This is properly installed and grounded.
Programming tones may be adjusted.
Consult a qualified electrician or...
Owners Manual - Page 4

... soap and water, then
rinse with clean water and dry with plastic wrap and vent. Installing/Replacing Filters and Light Bulbs
NOTE: A filter status indicator (on models with your model. Remove two screws on some models)
Touch COOK TIME, touch number pads to enter time, touch COOK POWER (if not 100%), touch number pads to...
Owners Manual - Page 5

... starting of the door, remove it out. Remove two screws on cavity walls, microwave inlet cover, cooking rack supports, and area where the door touches the frame can cause arcing. Arcing in the display, the door has been closed for contact and model identification information. Fan running during microwave oven operation. If microwave oven still does not operate, call...
Owners Manual - Page 6
...MICROWAVE-RANGE HOOD COMBINATION LIMITED WARRANTY
FIRST YEAR LIMITED WARRANTY (PARTS AND LABOR) For one year from the date of purchase, when this major appliance is installed...installation instructions. 11.
Costs associated with original model/serial numbers that existed when this warranty. 8. Major appliances with the removal...to view FAQs (Frequently Asked Questions), visit www.maytag.com....
Maytag Knowledge Base Results
We have determined that the information below may contain an answer to this question. If you find an answer, please remember to return to this page and add it here using the "I KNOW THE ANSWER!" button above. It's that easy to earn points!-
Connecting the refrigerator to a power source
... by side Do not use an extension cord. When you have the proper electrical connection. Before performing any type of installation or cleaning, or before removing a light bulb, turn the control (Thermostat, Refrigerator or Freezer Control depending on the model) to the desired setting. Side by a switch. It is recommended that cannot be... -
Water supply hookup - French door with exterior dispenser
...leaks. Install copper tubing only in some households. The pressure of the water supply coming out ... power. 2. Now you have questions about 3 to connect the copper tubing. 7. Repeat ...ft (2.1 m) to completely fill the ice container. Allow 24 hours to flow. To connect...directions before you turn on the refrigerator before the water line is connected, turn the nut on the lower left rear... -
Removing and replacing the ice storage bin in the door - side by side refrigerator (select models)
...be stuck or is difficult to remove: Close the freezer door and check... door and push down to the Off position when removing the storage bin. NOTE: It is not necessary to turn the ... control to make sure it on the left wall of the freezer stops the ice maker from producing ice...replace the storage bin, position it is removed. &...
Similar Questions

How To Remove Maytag Microwave Grease Filter
(Posted by luisnicegu 9 years ago)


How Do I Install A Light Bulb For This Microwave?
(Posted by lewalters2 11 years ago)

Microwave Oven Won't Heat
My microwave oven, 2 years old, not used that much has stopped heating up water.
My microwave oven, 2 years old, not used that much has stopped heating up water.
(Posted by MarjorieChowning 11 years ago)

Microwave Shows 'clean Filter' Too Often. Within Weeks Of Installing A New Filt
I do not cook often and only once or twice a week with the cooktop below my microwave. Do not unders...
I do not cook often and only once or twice a week with the cooktop below my microwave. Do not unders...
(Posted by ggjohnston 12 years ago)