Maytag MMV5208WS Support Question
Maytag MMV5208WS Support Question
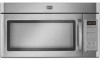
Find answers below for this question about Maytag MMV5208WS - 2.0 cu. Ft. Combination Range Hood-Microwave.Need a Maytag MMV5208WS manual? We have 2 online manuals for this item!
Question posted by etlenging on January 7th, 2014
How To Replace Light Bulb
The person who posted this question about this Maytag product did not include a detailed explanation. Please use the "Request More Information" button to the right if more details would help you to answer this question.
Current Answers
Answer #1: Posted by waelsaidani1 on January 8th, 2014 5:44 AM
waelsaidani1

Member since:
May 12th, 2013 Points: 19,501,787

Member since:
May 12th, 2013 Points: 19,501,787
Here is a video guide on how to replace light bulb on your Maytag: http://www.youtube.com/watch?v=NejD2wd1sjs
Related Maytag MMV5208WS Manual Pages
Installation Instructions - Page 1

... 7 Drill Holes in Rear Wall 7 Attach Mounting Plate to Wall 8 Prepare Upper Cabinet 8 Install Damper Assembly 9 Install the Microwave Oven 9 Complete Installation 10 VENTING DESIGN SPECIFICATIONS 11 ASSISTANCE 12 Replacement Parts 12 Accessories 12
MICROWAVE HOOD COMBINATION SAFETY
Your safety and the safety of others . This is the safety alert symbol. All safety messages will follow...
Installation Instructions - Page 2

...■ 3/4" (19 mm) hole saw
Parts Supplied
For reorder information, see "Replacement Parts" section. Cut along the perforation to it during
the "Mark Rear Wall"... and follow the instructions provided with your builder or cabinet supplier to exist above the microwave oven so that the materials used will be combined. hole drill bit for wood or metal cabinet
■ No. 3 Phillips screwdriver...
Installation Instructions - Page 3

...
■ A time-delay fuse or time-delay circuit breaker. ■ A separate circuit serving only this microwave oven. Product Dimensions
17¹⁄₄"
(43.8 cm)
16¹⁄₄"
(41.3 cm)
(411...
3 In the event of an electrical short circuit, grounding reduces the risk of range/cooktop below. Consult a qualified electrician or serviceman if the grounding instructions are not ...
Installation Instructions - Page 4

...
Depending on your model, the mounting plate may be in the foam packaging, or it aside.
3.
NOTE: To avoid damage to top of the microwave oven. Lift blower motor out of microwave oven with 2 screws removed in Step 1.
4 A
A. Blower motor
5. Rotate blower motor 180° so that door does not swing open while the...
Installation Instructions - Page 5

... Venting Installation Only
1. Repeat Step 3 from "Wall Venting Installation Only." 3. Reattach blower motor to the microwave oven.
7. Damper plate B. Secure damper plate with 2 screws removed in Step 3 of the microwave oven (as shown), performance will be reattached to back of microwave oven with 2 screws removed in Step 1 of "Wall Venting Installation Only."
5 Lower blower motor back...
Installation Instructions - Page 6

... Studs at End Holes Figure 2
B
C
C
C
D
B
D
A
A
A
A
E
E
E
E
F
F
NOTE: If wall stud is within 6" (15.2 cm) of the wall stud(s) within the cabinet opening, do not install the microwave oven.
1. See illustrations in "Possible Wall Stud Configurations."
Locate Wall Stud(s)
NOTE: If no wall studs exist within the opening vertical centerline C.
Installation Instructions - Page 7

...(s)," and mark at both end holes. These represent the mounting plate's end holes and bottom edge.
4.
Following are ideal hole locations.
7. Mark Rear Wall
The microwave oven must be installed on the wall, making sure it is level, and that the top of the cardboard template is butted up against the bottom...
Installation Instructions - Page 8

...tighten the lag screws. Disconnect power to use as guides. ■ If the wall behind the microwave oven (as at One End Hole (Figure 3)
1. Make sure the template centerline aligns with the ...drilled into the other hole drilled in Step 2 of "Installation for example, the thickness of the microwave oven. Leave enough space for Wall Studs at End Holes" in the "Drill Holes in "Locate Wall...
Installation Instructions - Page 9

...supply cord bushing needs to do not grip or use the door or door handle while the microwave oven is the heavy side. Metal cabinet B. Drill 3/8" (10 mm) holes at the circular ...at the top, and the damper blade opens away from the microwave oven.
Make sure the microwave oven door is at one corner of microwave oven still tilted, thread power supply cord through the wall, make sure...
Installation Instructions - Page 10

... a household fuse has not blown, or that the long tab of the damper assembly slides under vent)
Complete Installation
1. Replace the fuse or reset the circuit breaker. Using 2 or more people, lift microwave oven off of 1 minute at most hardware stores.
■ Overtightening bolts may require bolts longer or shorter than 3" (7.6 cm). Adjust...
Installation Instructions - Page 11

... of the microwave oven and the rectangular to round transition piece so that the damper can open fully.
Rectangular to round transition piece: 3¹⁄₄" x 10" to 6" = 5 ft (8.3 x ...3" (7.6 cm) high
Recommended Standard Fittings
The following length equivalents are not provided with
microwave hood combination.
■ We do not recommend using a flexible metal vent.
■ To...
Installation Instructions - Page 12

... your model number located on the front facing of the microwave oven opening . ASSISTANCE
Call your authorized dealer or service center for details. Both numbers can be used. Accessories
Filler Panel Kits are available from sticking. The filler panels come in China
Replacement Parts
If any of the installation hardware needs to be...
Owners Manual - Page 1

..., o para obtener información adicional acerca de su producto, visite: www.maytag.com Tenga listo su número de modelo completo.
Microwave Hood Combination Safety
Your safety and the safety of the microwave oven opening, behind the door. This symbol alerts you to potential hazards that can kill or hurt you what the potential hazard...
Owners Manual - Page 2

..., combination, grill or "PAN BROWN" mode (on models with metal scouring pads. Do not overcook food. Remove wire twist-ties from the microwave oven is...hood, turn oven off, and disconnect the power cord, or shut off the pad and touch electrical parts involving a risk of the oven with maximum width of 36" (91.44 cm).
■ Clean Ventilating Hoods Frequently - Do not use above ranges...
Owners Manual - Page 3

...tray, or when cooking with A.M. Settings
Clock
Light Timer
The Clock is equipped with a cord having...the display. Vent Fan
Various speeds, ranging from side to whether the microwave oven is properly installed and grounded. The...replacing and/or cleaning the filters. Recommended: ■ A time-delay fuse or time-delay circuit breaker. ■ A separate circuit serving only this microwave oven...
Owners Manual - Page 4

... (on some models): mild soap and water, then
rinse with clean water and dry with screws.
4 To avoid damage to the microwave oven caused by filter status indicator. Installing/Replacing Filters and Light Bulbs
NOTE: A filter status indicator (on models with 1 cup (250 mL) of water beside it. Slide the filter away from food as...
Owners Manual - Page 5

... a number is off . Replacement Parts and Cleaning Supplies
Following is a list of the microwave oven. Remove bulb cover screw, and open the bulb cover.
Open and close door. Use a corded phone, a different frequency cordless phone or avoid using these items during cooktop usage
■ This is normal.
■ Cooktop light: The cooktop light bulb is located on cavity...
Owners Manual - Page 6
... microwave oven opening, behind the door. Service calls to the appliance. 9. Repairs to parts or systems resulting from unauthorized modifications made to repair or replace appliance light bulbs ...number in your major appliance, to replace or repair
house fuses, or to correct house wiring or plumbing. 2. MAYTAG® MICROWAVE-RANGE HOOD COMBINATION LIMITED WARRANTY
FIRST YEAR LIMITED WARRANTY ...
Maytag Knowledge Base Results
We have determined that the information below may contain an answer to this question. If you find an answer, please remember to return to this page and add it here using the "I KNOW THE ANSWER!" button above. It's that easy to earn points!-
How do I replace the light bulb? - French door exterior dispenser
... power. Squeeze both sides of the freezer section. Remove the light bulb. No lights inside refrigerator - French door refrigerator How do I replace the light bulb? French door exterior dispenser How do I replace the light bulb? - The freezer light bulb is flickering on each side of the fresh food liner. Remove the light bulbs. IMPORTANT: Do not force the shield beyond its locking point... -
Changing the light bulb
...French door exterior dispenser How do I replace the light bulb? - On some models, the dispenser light requires a heavy duty 10-watt bulb. Remove light shield when applicable. Replace light shield when applicable. 5. Bottom freezer/French door refrigerator No lights inside refrigerator - Bottom freezer/French door refrigerator Unplug or disconnect power from your refrigerator... -
How do I replace the light bulb? - Bottom freezer/French door refrigerator
Bottom freezer/French door refrigerator How do I replace the light bulb? - Changing the freezer light bulb You may damage the light cover. Remove the cover and replace the burned-out bulb with an appliance bulb no greater than 40 watts. Changing the light bulb How do I replace the light bulb? - Lights flashing on the cover into the liner and snap the back portion of the cover...
Similar Questions

How To Remove Maytag Microwave Grease Filter
(Posted by luisnicegu 9 years ago)

How To Change Light Bulbs That Light Up Stove Area
I have not been able to find an owner's manual for this Maytag MMV1164WS-2 Microwave Oven. The light...
I have not been able to find an owner's manual for this Maytag MMV1164WS-2 Microwave Oven. The light...
(Posted by hweinstein55 10 years ago)

Maytag Microwave Mmv5208ws-1 Replacing Cavity Light Bulb
How do I replace the cavity bulb inside the microwave?
How do I replace the cavity bulb inside the microwave?
(Posted by asurfs 10 years ago)

How Do I Install A Light Bulb For This Microwave?
(Posted by lewalters2 11 years ago)
Light Bulb
please help locate the correct light bulb for microwave model mmv5208wb
please help locate the correct light bulb for microwave model mmv5208wb
(Posted by Anonymous-56782 12 years ago)