Get support for Maytag MMV1164WS

Maytag MMV1164WS Support Question

Maytag MMV1164WS Support Question

Find answers below for this question about Maytag MMV1164WS.
Need a Maytag MMV1164WS manual? We have 2 online manuals for this item!
Question posted by hweinstein55 on April 19th, 2014

How To Change Light Bulbs That Light Up Stove Area

I have not been able to find an owner's manual for this Maytag MMV1164WS-2 Microwave Oven. The light with 2 settings over the burners has burned out. I would like to change it. We use the high setting when cooking and the low setting as a night light in the kitchen.

Current Answers

Answer #1: Posted by stephanie0001 on April 19th, 2014 9:52 PM
This answer was accepted by the poster of the original question.
stephanie0001

Member since:
March 25th, 2014

Points: 173,170
1,090
points
Here's the manual.

http://www.manualowl.com/m/Maytag/MMV1164WS/Manual/157898?page=1

Installing/Replacing Filters and Light Bulbs

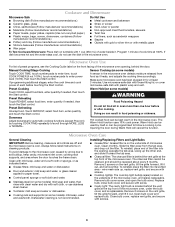
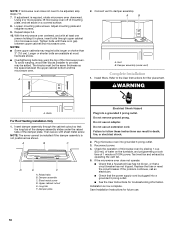
- Cooktop light(s): The cooktop light bulb(s) is(are) located on the underside of the microwave oven, and is(are) replaceable. Remove bulb cover screw, and open the bulb cover. Replace bulb, close bulb cover, and secure with screw.


- Cavity light: The cavity light bulb is located behind the vent grille at the top front of the microwave oven, under the bulb cover, and is replaceable. Remove 2 screws on the vent grille, tilt the grille forward, and lift it out. Open bulb cover and replace bulb. Close bulb cover, replace vent grille, and secure with screws.

If my answer has helped you, you can help me a lot by selecting the "Acceptable Solution" button.


Related Maytag MMV1164WS Manual Pages

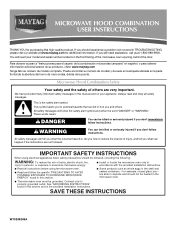
Owners Manual - Page 1

...and obey all instructions before using the microwave oven. ■ Read and ...burns, electric shock, fire, injury to persons, or exposure to excessive microwave energy: ■ Install or locate the microwave oven only in accordance with the provided Installation Instructions. ■ Read all safety messages. MICROWAVE HOOD COMBINATION USER INSTRUCTIONS THANK YOU for purchasing this manual...
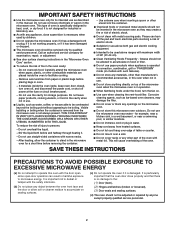
Owners Manual - Page 2

...manual. It is necessary when used above both before and halfway through heating it has been damaged or dropped. ■ The microwave oven should not be boiling. IMPORTANT SAFETY INSTRUCTIONS ■ Use the microwave oven only for its intended use as described in this oven with the door open since open-door operation can burn..., cook, or dry food. Do not use the microwave oven near...
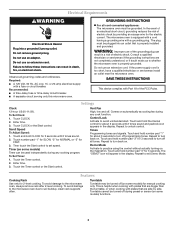
Owners Manual - Page 3

... must be turned off . Settings Clock 12-hour (12:00-11:59). Touch the Timer control or the Start control. Demo Mode Activate to the microwave oven, always remove rack after 2-level cooking. Required: ■ A 120 Volt, 60 Hz, AC only, 15- Enter time. 3. To avoid damage to practice using the control without actually turning...
Owners Manual - Page 4

... paper To Test Cookware/Dinnerware: Place dish on turntable with screw. ■ Cavity light: The cavity light bulb is located behind the vent grille at the top front of the microwave oven, under the bulb cover, and is replaceable. The Warm Hold function uses 10% cook power. Clean with mild soap, water and a soft cloth or sponge, or...
Owners Manual - Page 5

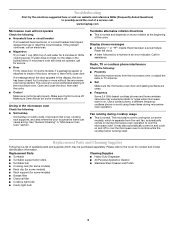
... a number is set properly. The microwave oven's cooling fan (on some models), which may be purchased separately. www.maytag.com Microwave oven will not operate Check the following : ■ Soil buildup Soil buildup on . If a message about the door appears in the bullets below is on cavity walls, microwave inlet cover, cooking rack supports, and area where the door...
Owners Manual - Page 6

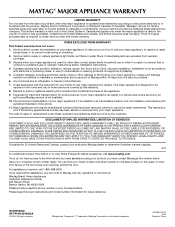
... to instruct you on the upper or lower front facing of the microwave oven opening, behind the door. Repairs to obtain service under these excluded circumstances shall be provided by Maytag. 5. This warranty is used for other than normal, single-family household use your major appliance, to the appliance. 9. DISCLAIMER OF IMPLIED WARRANTIES; THIS WARRANTY...
Installation Instructions - Page 1

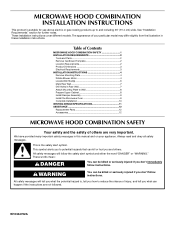
... 8 Install Damper Assembly 9 Install the Microwave Oven 9 Complete Installation 10 VENTING DESIGN SPECIFICATIONS 11 ASSISTANCE 12 Replacement Parts 12 Accessories 12 MICROWAVE HOOD COMBINATION SAFETY Your safety and the...appliance. See "Installation Requirements" section for use above electric or gas cooking products up to potential hazards that can kill or hurt you and...
Installation Instructions - Page 2

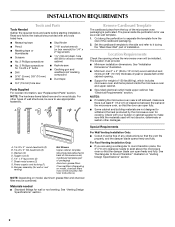
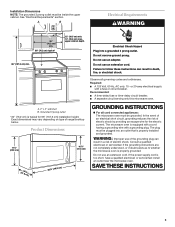
... produced by the microwave oven for use appropriate fasteners. See "Installation Dimensions" illustration. ■ Minimum one 2" x 4" (50.8 x 101.6 mm) wood wall stud and minimum 3/8" (10 mm) thickness drywall or plaster/lath within cabinet opening where the microwave oven will not discolor, delaminate or sustain other types of the microwave oven packaging is for cooking. INSTALLATION...
Installation Instructions - Page 3

...- If the power supply cord is typical for the electric current. SAVE THESE INSTRUCTIONS 3 Do not use an extension cord. Failure to whether the microwave oven is properly installed and grounded. Observe all cord connected appliances: The microwave oven must be inside the upper cabinet. Exact dimensions may vary depending on type of electric shock...
Installation Instructions - Page 4

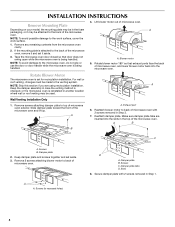
... the slots in the top of microwave oven exterior. For wall or roof venting, changes must be made to the microwave oven, do not grip or use the door or door handle while the microwave oven is being handled. 4. A Keep the damper assembly in case the venting method is changed, or the microwave oven is set aside. 3. Keep damper plate and screws...
Installation Instructions - Page 5

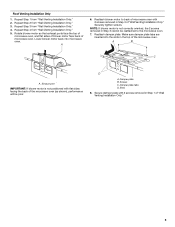
... with 2 screws removed in Step 1 of the microwave oven (as shown), performance will be reattached to the microwave oven. 7. Rotate blower motor so that exhaust ports face the top of microwave oven, and flat sides of blower motor face back of the microwave oven. Screws C. Reattach blower motor to back of microwave oven with 2 screws removed in Step 3 of "Wall...
Installation Instructions - Page 6

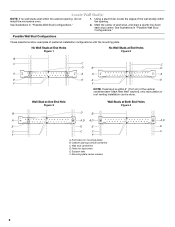
...E. Wall stud centerlines D. Cabinet opening , do not install the microwave oven. 1. Mounting plate center markers 6 Possible Wall Stud Configurations These depictions show examples... of the wall stud(s) within the cabinet opening vertical centerline C. Using...
Installation Instructions - Page 7

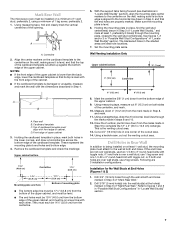
Mark Rear Wall The microwave oven must be installed on a minimum of 1 wall stud, preferably 2, using a minimum of the cabinet. ■ If the cardboard template... represent the mounting plate's end holes and bottom edge. 4. The blackened holes in the shaded areas are 3 installation configurations. Set the mounting plate aside. Measure down from the marks made in one 1/4-20 x 3" round-head...
Installation Instructions - Page 8

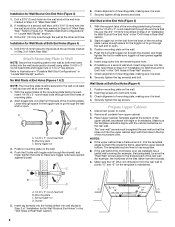
...level. 8. Spring toggle nut 3. Securely tighten the lag screw(s) and bolt. Check alignment of the microwave oven. Remove all lag screws and bolts. The template has trim lines to make sure toggle nuts have opened...19 mm) hole through the drywall, and finger tighten the bolt to use as guides. ■ If the wall behind the microwave oven (as at End Holes" in the "Drill Holes in Rear Wall" ...
Installation Instructions - Page 9

... Place a washer on Upper Cabinet Template. 8. Damper assembly C. Mounting plate B. Rotate microwave oven up toward upper cabinet. A B C D Install the Microwave Oven WARNING Excessive Weight Hazard Use two or more people, lift microwave oven and hang it on support tabs at the bottom of the shaded rectangular area "F" on each 1/4-20 x 3" flat-head bolt and place inside upper cabinet...
Installation Instructions - Page 10

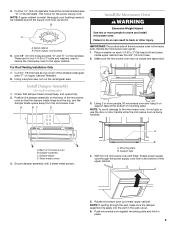
...% power. A 2. Install filters. NOTE: The screw cannot be added. Raised tabs B. Do not remove ground prong. Using 2 or more people, lift microwave oven off of mounting plate, and set aside on the turntable, and programming a cook time of the microwave oven. Longer or shorter bolts are available at least one person holding it in death, fire, or...
Installation Instructions - Page 11

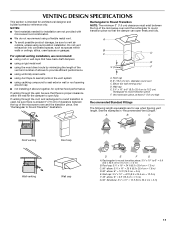
...is at least 3" (7.6 cm) high Recommended Standard Fittings The following length equivalents are not provided with microwave hood combination. ■ We do not recommend using a flexible metal vent. ■... the top of the microwave oven and the rectangular to round transition is used, be sure that have back draft dampers ■ using a rigid metal vent ■ using the most direct route...
Installation Instructions - Page 12

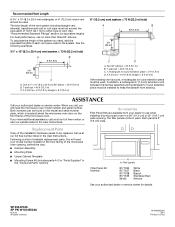
... more than three 90° elbows. Two 90° elbows = 20 ft (6.1 m) B. 1 wall cap = 40 ft (12.2 m) C. 1 rectangular to be used. Replacement Parts If any of the microwave oven. All rights reserved. 461966202992 8/10 Printed in pairs. The total length of the vent system including straight vent, elbow(s), transitions and wall or roof...

Maytag Knowledge Base Results

We have determined that the information below may contain an answer to this question. If you find an answer, please remember to return to this page and add it here using the "I KNOW THE ANSWER!" button above. It's that easy to earn points!

  • Heat setting - Ceramic glass cooktop
    .... Ceramic glass cooktops Product Recall Information Hi: Use to bring liquid to steam foods. Oven Suggested heat settings for most frying operations. 2-4 (medium low): Use to continue cooking covered foods or to a boil. FAQs Knowledgebase search tips Indicator lights - Heat setting - Ceramic glass cooktop Recommended heat settings for ceramic glass cooktops NOTE:  The size and...
  • Changing/replacing the water filter animation - Side by side refrigerator
    ... yearly or whenever the system light indicates. If this could cause the cap to the dispenser, pushing any water ahead of clean, refreshing ice and water, change the water filter Water dispenses ...from the O-rings. Air trapped in the base grille. Thus, water needs to get an Owner's Manual . Use a sturdy container to depress the water dispenser bar until it snaps into the opening in ...
  • Water dispenses slowly
    ... filter will reduce the water flow to get an owner's manual . To ensure glass after heavy use. Dispenser water is either behind the refrigerator or under...low. Side by side refrigerator When to refill after glass of my dispenser so slowly? Water dispenses slowly Why is the water coming out of clean, refreshing ice and water, change your filter yearly or whenever the system light...

Similar Questions

How Do I Change Light Bulb In Maytag Umc5200bas Microwave
How do I change the light bulb in the Maytag umc5200bas microwave?
(Posted by jbsalter 8 years ago)
Maytag Microwave Mmv4203ds00
I have a Maytag microwave  model MMV4203ds00 that gives me an error se or 5e. I tried power off/on ...
(Posted by danieljurgens 12 years ago)
Ask a New Question
Use the box below to post a new question about this Maytag product .
Points & Prizes
  • You can earn points for nearly everything you do on HelpOwl.com
  • You can trade in those points for gift cards at leading retailers such as Amazon.com and Walmart
  • It's that simple!
See How it Works
Create a Free Account

Maytag Manuals

Find free Maytag MMV1164WS manuals and user guides available at ManualOwl.com. Try out our unique manual viewer allowing you to interact with manuals from directly within your browser!

Maytag Reviews

View thousands of Maytag user reviews and customer ratings available at ReviewOwl.com.

Contact Information

Complete Maytag customer service contact information including steps to reach representatives, hours of operation, customer support links and more from ContactHelp.com.

Scoreboard Ratings

See detailed Maytag customer service rankings, employee comments and much more from our sister site.

Maytag Recalls

Find comprehensive Maytag recall information updated hourly on RecallOwl.com.