Maytag MEDC500VW Support Question
Maytag MEDC500VW Support Question
Find answers below for this question about Maytag MEDC500VW - Centennial Series 29 Inch Electric Dryer.Need a Maytag MEDC500VW manual? We have 2 online manuals for this item!
Question posted by daselin2 on February 10th, 2014
Long Drying Time ?
Clothes are taking upto and beyond an hour to dry ? What might be the problem ?
Current Answers
Answer #1: Posted by BusterDoogen on February 10th, 2014 2:55 PM
BusterDoogen

Member since:
October 30th, 2011 Points: 28,565,447

Member since:
October 30th, 2011 Points: 28,565,447
Check your filter for accumulation & the vent hose for obstruction.
I hope this is helpful to you!
Please respond to my effort to provide you with the best possible solution by using the "Acceptable Solution" and/or the "Helpful" buttons when the answer has proven to be helpful. Please feel free to submit further info for your question, if a solution was not provided. I appreciate the opportunity to serve you!
Related Maytag MEDC500VW Manual Pages
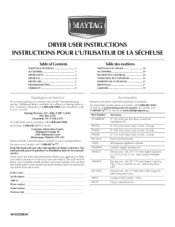
User Instructions - Page 1
.... You must provide proof of Contents
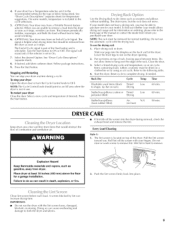
ASSISTANCE OR SERVICE 1 ACC ESSORI ES 1 DRYER SAFETY 2 DRYER USE 4 DRYER CARE 5 TROU BLESHOOTING 7 WARRANTY 9
Table des mati6res
ASSISTANCE OU SERVICE 10 ACCESSOIRES... or visit us at the top inside dryer door well. fits 29" (737 mm) Super Capacity, 6.5 cu. You will need to now your dryer with these premium accessories.
Box 2370
Cleveland...
User Instructions - Page 3
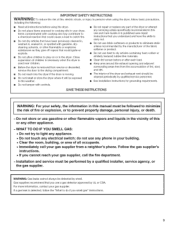
...MPORTANT SAFETY INSTRUCTIONS
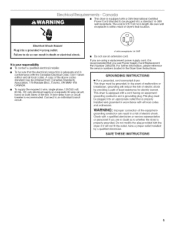
WAR N iNG" To reduce the risk of fire, electric shock, or injury to persons when using the dryer.
[] Do not place items exposed to cooking oils in your gas ...adjacent surrounding areas free from service or discarded, remove the door to the drying compartment.
[] Do not reach into the dryer if the drum is detected, follow basic precautions,
including the following:
...
User Instructions - Page 4
... can catch [int.
5. Failure to achieve
maximum drying efficiency and shorten drying times. Use a 4" (102 mm) exhaust hood. 3. Failure to the recommended cycle for the type of oil on it (even after installation. Do not pack the dryer. Use damps to remove dust from dryer.
Do not dry anything flammable on it (including cooking oils). This...
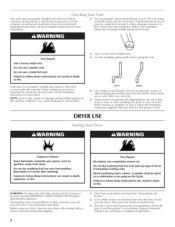
User Instructions - Page 5
... an air cycle.
Start the dryer.
Wet lint is not in dryer. Pull the lint screen
toward you purchased your dryer
Close the door. Clean lint screen before each load.
NOTE: The Cycle Control knob should be able to the recommended setting for temperature suggestions.
A screen blocked increase drying time. On some models, temperature is...
User Instructions - Page 6
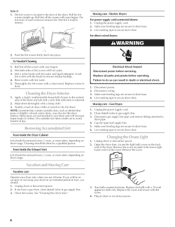
...of time, you will be removed every 2 years, or more often, depending on dryer usage.
If you should be on the back wall of the dryer. Unplug dryer or disconnect power. 2. If you are secure in dryer base. 3. See "Cleaning the I .intshoulbderemoveedver2y yearso,rmoreoftend,ependinogn dryeur sagCe.leaninsghouldbedonebyaqualifiepderson.
Plug in gas supply line. 3. Electric Dryers
For...
User Instructions - Page 7
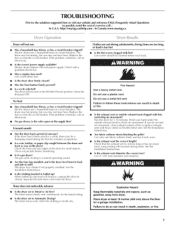
... selected?
Unusual sounds
• Has the dryer had a period of non-use 2 household fuses or circuit breakers.
Clothes are not drying satisfactorily, drying times are too long, or load is too hot
• ...Instructions. Use only one fabric softener sheet, and use a metal foil vent. Electric dryers require 240-volt power supply.
When balled up ? I.int screen should be cleaned...
User Instructions - Page 8
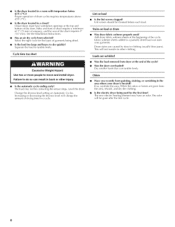
... clothing.
• Is the electric dryer being dried. • Is the load too large and heavy to a partially dried your dryer is located? The odor will change the amount of garments being used ? Select the right cycle for the first time?
Is the automatic cycle ending early? When the odors or fumes are caused by dyes in...
User Instructions - Page 9
... instructions and/or installation instructions. MAYTAG ®LAUNDRY WARRANTY
LIMITED WARRANTY
For one year from the ...8. Proof of original purchase date is intended to resolve the problem after checking
"Troubleshooting,"
additional
Canada, call 1-800-688-9900...rights, and you are excluded from defects in accordance with electrical or
5. BE PRODUCT REPAIR AS PROVIDED HEREIN.
If you ...
Installation Instructions - Page 1
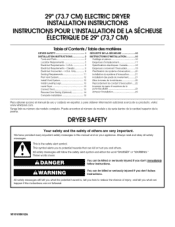
... 22 Achever I LECTRIQUEDE 29" (73,7 CM)
Table of Contents / Table des mati@res
DRYER SAFETY 1 INSTALLATION INSTRUCTIONS 2
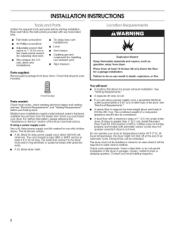
Tools and Parts 2
Location Requirements 2 Electrical Requirements -
This symbol alerts... producto, visite: www.whirlpool.com. Puede encontrar el nOmero de modelo y de serie dentro de la cavidad superior de la puerta,
DRYERSAFETY
Your safety and the safety ...
Installation Instructions - Page 2
... wires that connect to water and/or weather.
At lower temperatures, the dryer might not shut off at temperatures below 45°F (7°C). Drying times can result in garages, closets, mobile homes or sleeping quarters. If using a power supply cord, a grounded electrical outlet located within 2 ft (61 cm) of either side of 1" (2.5 cm) under...
Installation Instructions - Page 3
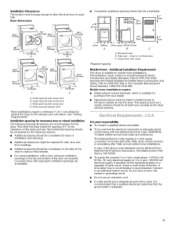
...the electrical connection is recommended• Connect to an individual branch circuit. Installation Clearances
The location must be large enough to allow the dryer door to open fully• Dryer Dimensions...
• Companion appliance spacing should be considered on the sides and rear. closet or confined area C. A time-delay fuse...
Installation Instructions - Page 4

...The neutral ground wire is prohibited for use aluminum). [] At least 5 ft (1.52 m) long. When the neutral ground wire is secured under the neutral terminal (center or white wire) of... 4-wire power supply cord with clothes dryers. The ground wire (ground conductor) may be identified by providing a path of least resistance for it will reduce the risk of electric shock by a white cover. If...
Installation Instructions - Page 5
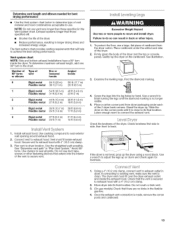
... Hazard
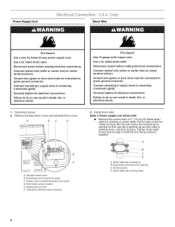
Plug into a grounded 4 prong outlet,
Failure to do so can result in a risk of electric shock. A time-delay fuse or circuit breaker is equipped with all local codes.
SAVE THESE INSTRUCTIONS A copy of dryer's final location.
@
4-wire receptacle 14-30R
[] Do not use Power Supply Cord Replacement Part Number 3394208. The cord...
Installation Instructions - Page 6
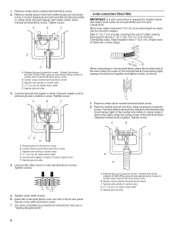
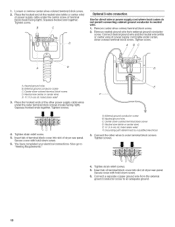
... tabs of the two clamp sections into the hole below terminal block opening
A. Center,silver-colored terminal block screw D. Hold-down
Disconnect power before making electrical connections.
Ground wire (green or bare wire) must be connected to center terminal (silver).
Hole below the terminal block opening C. Connect neutral wire (white or...
Installation Instructions - Page 7

... relief should have a tight fit with upturned ends F. 3/4"(!.9 cm) UL Iisted strain relief G.
Removable conduit connector B. Ground prong D. Spade terminals with the dryer cabinet and be in a horizontal position. Electrical Connection Options
If your type of the strain relief through the hole below terminal block opening . Ring terminals
4. Put the threaded section...
Installation Instructions - Page 8
... screw C. Tighten screws.
!! !!
5.
Neutral ground wire
Direct wire cable must have completed your electrical connections. A. Neutral wire (white or center wire) D. 3_,, (1.9 cm) UL listed strain ... 3-wire connections. Secure cover with hold-down screw. 7. Dotted line shows position of dryer rear panel. Tighten screw.
4-wire connection: Direct Wire
IMPORTANT: A 4-wire connection is...
Installation Instructions - Page 9
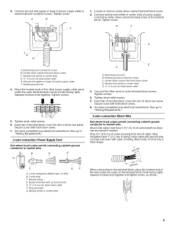
...screw. 2. A. Ground wire (green or bare) of dryer rear panel. Insert tab of terminal block cover into a hook shape. Tighten screws.
4.
Strip insulation back 1" (2.5 cm). Neutral prong D. Ring terminals G. Tighten screw.
1.
Center silver-colored terminal block screw C. You have completed your electrical connections. Externalground conductor screw C. Secure cover with...
Installation Instructions - Page 10
...-colored terminal block screw. Secure cover with hold -down screw.
6. You have completed your electrical connections. Tighten screws.
!! !I
4. B
C
i
/
i
?//
©
Optional 3-wire...ground conductor screw B.
Squeeze hooked ends together. Insert tab of terminal block cover into slot of dryer rear panel.
Neutral wire (white or center wire) E. _" (1.9 cm) UL Iisted strain...
Installation Instructions - Page 11
... Dryer User Instructions. Rigid metal vent
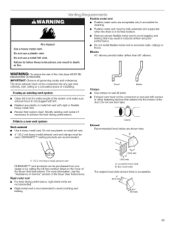
• For best drying performance, rigid metal vents are recommended. The dryer exhaust must be connected into the interior of a building.
If this dryer ...result in enclosed walls, ceilings or floors. Good
Better
Clamps
Use clamps to achieve the best drying performance. Do not use plastic or metal foil vent. • 4" (10.2 cm) ...
Installation Instructions - Page 13
...m) 38 ft (11.6 m)
Flexible metal 27 ft (8.2 m) 19 ft (5.8 m)
3
Rigid metal
35 ft (10.7 m) 29 ft (8.8 m)
Flexible metal 25 ft (7.6 m) 17 ft (5.2 m)
4
Rigid metal
27 ft (8.2 m) 21 ft (6.4 m)...dryer.
• Reduce performance, resulting in the flexible gas line.
4. Failure to its final location. Use a wrench to existing vent, make sure the vent is no kinks in longer drying times...
Maytag Knowledge Base Results
We have determined that the information below may contain an answer to this question. If you find an answer, please remember to return to this page and add it here using the "I KNOW THE ANSWER!" button above. It's that easy to earn points!-
Long drying times on the Bulky cycle - Electric dryer
Electric dryer Why does the Bulky cycle take a long time to dry. Fabrics that contain insulating polyester or down alternative or polyester filling. Garments that may not dry evenly in the Bulky cycle are thin, such as sheets, the Bulky cycle will take so long to dry slowly, so even if you dryer is designed to dry? Pillows. If you... -
Lint is on the load - Dryer
...clothing. The lint may look like lint, or the fuzz can trap lint from lint takers (corduroy, synthetics). Also sort by color - The lint may be the surface fuzz (pilling) on cleaning the lint screen. Damp loads or long drying times - Front-load washer Thoroughly dry... electricity in pockets. lights with lights and darks with hot water and liquid detergent. Dryer My dryer makes... -
Loads are damp; dryer does not dry
... Dry cycle times. Gas Dryer Cycle is too short - Damp loads or long drying time - The drying setting you selected will become your new preset drying setting for all of your loads on some models only) If all of your satisfaction. Check the following links for 1 second, followed by the current drying setting. There are damp; Electric Dryer Dryer...
Similar Questions

Manual For Electric Dryer
need a care and use manual for Maytag electric dryer MEDB755DW
need a care and use manual for Maytag electric dryer MEDB755DW
(Posted by leoladillon 7 years ago)

How Do I Hook Up A Maytag Centennial Electric Dryer How Do I Hook Up A Maytag
electric dryer
electric dryer
(Posted by spalmha 9 years ago)
Troubleshooting Maytag Centennial Electric Dryer Will Not Dry
(Posted by drummz 10 years ago)

I Have A Maytag Front Loading Electric Dryer Model Med9600 Sq0. When I Attempt T
I have a Maytag front loading electric Dryer model MED9600 SQ0. When I attempt to start it by pressi...
I have a Maytag front loading electric Dryer model MED9600 SQ0. When I attempt to start it by pressi...
(Posted by wrzimmerly 10 years ago)

Why Does My Clothes Take So Long To Dry?
(Posted by Anonymous-21550 13 years ago)