User Instructions
Page 1
... your complete model number and serial number. fits 29" (737 mm) Super Capacity, 6.5 cu. side swing or hamper door 3406839 8212450 49971 49572 I )rying rack- DRYER USER INSTRUCTIONS P INSTRUCTIONS POUR L'UTILISATEUR DE LA SECHEUSE Table of purchase or installation date for future reference. PT6001 .... 8212614 31682 1903WH 3404351 4" (102 mm) dryer cord, 3-wire, 30 amp 4" (102 mm) dryer cord, 4-wire, 30 amp 6" (152 mm) dryer cord, 4-wire, 30 amp I)ryer vent lint brush All...
... your complete model number and serial number. fits 29" (737 mm) Super Capacity, 6.5 cu. side swing or hamper door 3406839 8212450 49971 49572 I )rying rack- DRYER USER INSTRUCTIONS P INSTRUCTIONS POUR L'UTILISATEUR DE LA SECHEUSE Table of purchase or installation date for future reference. PT6001 .... 8212614 31682 1903WH 3404351 4" (102 mm) dryer cord, 3-wire, 30 amp 4" (102 mm) dryer cord, 4-wire, 30 amp 6" (152 mm) dryer cord, 4-wire, 30 amp I)ryer vent lint brush All...
User Instructions
Page 2
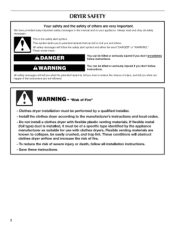
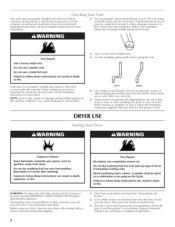
..., and trap lint. All safety messages will follow instructions. Flexible venting materials are very important. Do not install a clothes dryer with clothes dryers. Install the clothes dryer according to reduce the chance of fire. - Always read and obey all installation instructions. = Save these instructions. 2 To reduce the risk of a specific type identified by a qualified installer. - WARNING - All safety messages will tell you how to the manufacturer's instructions and local codes. -
..., and trap lint. All safety messages will follow instructions. Flexible venting materials are very important. Do not install a clothes dryer with clothes dryers. Install the clothes dryer according to reduce the chance of fire. - Always read and obey all installation instructions. = Save these instructions. 2 To reduce the risk of a specific type identified by a qualified installer. - WARNING - All safety messages will tell you how to the manufacturer's instructions and local codes. -
User Instructions
Page 3
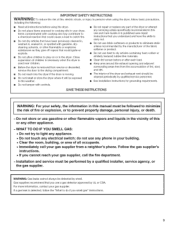
... all instructions before or after each load. [] Keep area around the exhaust opening and adjacent surrounding areas free from the accumulation of lint, dust, and dirt. [] The interior of the dryer and exhaust vent should be detected by smell. For more information, contact your gas supplier from service or discarded, remove the door to the drying compartment. [] Do not reach into the dryer if the drum...
... all instructions before or after each load. [] Keep area around the exhaust opening and adjacent surrounding areas free from the accumulation of lint, dust, and dirt. [] The interior of the dryer and exhaust vent should be detected by smell. For more information, contact your gas supplier from service or discarded, remove the door to the drying compartment. [] Do not reach into the dryer if the drum...
User Instructions
Page 4
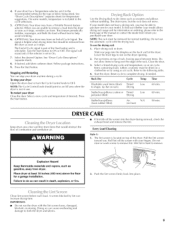
... as gasoline, away from storing and shipping. 4 1, Clean lint screen before operating this appliance. Failure to follow the Installation Instructions supplied with a damp cloth to remove dust from dryer. This booklet covers several different models. Turn the Cycle Control knob to the recommended cycle for the type of vent. If the dryer is not properly installed and vented, it (even after installation. Do not dry anything flammable on it was a paid for...
... as gasoline, away from storing and shipping. 4 1, Clean lint screen before operating this appliance. Failure to follow the Installation Instructions supplied with a damp cloth to remove dust from dryer. This booklet covers several different models. Turn the Cycle Control knob to the recommended cycle for the type of vent. If the dryer is not properly installed and vented, it (even after installation. Do not dry anything flammable on it was a paid for...
User Instructions
Page 5
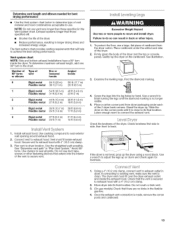
...) Air N/A (no heat) 90 min. When you . Select the desired Option. To find out whether your model allows drying rack usage and for your dryer Open the dryer door or turn the Cycle Control knob to purchase one for information on the dryer opening. 2. To use . 1o restart your dryer anytime during removal, check the exhaust hood and remove the lint. Slide rear pegs into place. A screen blocked increase drying time. If your dryer has a Temperature selectob set to dry...
...) Air N/A (no heat) 90 min. When you . Select the desired Option. To find out whether your model allows drying rack usage and for your dryer Open the dryer door or turn the Cycle Control knob to purchase one for information on the dryer opening. 2. To use . 1o restart your dryer anytime during removal, check the exhaust hood and remove the lint. Slide rear pegs into place. A screen blocked increase drying time. If your dryer has a Temperature selectob set to dry...
User Instructions
Page 6
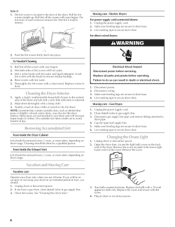
... direct-wired dryers: 2. Rinssecreewnithhotwater. Electrical Shock Hazard Disconnect power before operating. Failure to do so can result in the lower righthand corner of the cover. Wipedrumthoroughwlyithadampcloth. 3. Open the dryer door. Remove the screw located in death or electrical shock. 5. If you will be removed every 2 years, or more often, depending on the back wall of time, you are secure in gas supply line. 3. Clean lint screen. AsNeedeCdleaning 1. Wetbothsideosflintscreewnithhotwater. 3. eplacsecreeinn dryer. 1. Moving care...
... direct-wired dryers: 2. Rinssecreewnithhotwater. Electrical Shock Hazard Disconnect power before operating. Failure to do so can result in the lower righthand corner of the cover. Wipedrumthoroughwlyithadampcloth. 3. Open the dryer door. Remove the screw located in death or electrical shock. 5. If you will be removed every 2 years, or more often, depending on the back wall of time, you are secure in gas supply line. 3. Clean lint screen. AsNeedeCdleaning 1. Wetbothsideosflintscreewnithhotwater. 3. eplacsecreeinn dryer. 1. Moving care...
User Instructions
Page 7
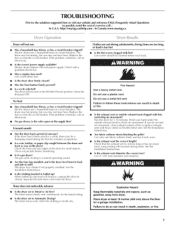
... air movement, clean exhaust system of non-use a plastic vent. The dryer will not run Has a household fuse blown, or has a circuit breaker tripped? Check the front and rear edges of a service call... Is the dryer set to Timed or Air Dry? Do not use 2 household fuses or circuit breakers. Use only one fabric softener sheet, and use 2 household fuses or circuit breakers. Clean out pockets before each load. Clothes are not drying satisfactorily, drying times are too long, or load is too hot • Is the lint screen...
... air movement, clean exhaust system of non-use a plastic vent. The dryer will not run Has a household fuse blown, or has a circuit breaker tripped? Check the front and rear edges of a service call... Is the dryer set to Timed or Air Dry? Do not use 2 household fuses or circuit breakers. Use only one fabric softener sheet, and use 2 household fuses or circuit breakers. Clean out pockets before each load. Clothes are not drying satisfactorily, drying times are too long, or load is too hot • Is the lint screen...
User Instructions
Page 8
... other clothing. Loads are gone from dryer at the beginning Fabric softener sheets added to dry quickly? Proper operation of the door. I_evel the dryer. Closet doors must have an odor. Is the dryer located in a closet? Sides and front of dryer require a minimum of 1" (25 mm) of airspace, and the rear of the cycle? • Was the dryer overloaded? See the Installation Instructions. • Has an air dry cycle been...
... other clothing. Loads are gone from dryer at the beginning Fabric softener sheets added to dry quickly? Proper operation of the door. I_evel the dryer. Closet doors must have an odor. Is the dryer located in a closet? Sides and front of dryer require a minimum of 1" (25 mm) of airspace, and the rear of the cycle? • Was the dryer overloaded? See the Installation Instructions. • Has an air dry cycle been...
User Instructions
Page 9
... from warranty coverage. 4. To locate factory specified replacement parts in which it is installed in an inaccessible location or is not available. Service must be found by checking the "Assistance or Service" section or by an authorized Maytag 9. Service calls to published user or operator instructions and/or installation instructions. for product service if your ma or appliance, materials or workmanship and is used in accordance with original model/serial numbers...
... from warranty coverage. 4. To locate factory specified replacement parts in which it is installed in an inaccessible location or is not available. Service must be found by checking the "Assistance or Service" section or by an authorized Maytag 9. Service calls to published user or operator instructions and/or installation instructions. for product service if your ma or appliance, materials or workmanship and is used in accordance with original model/serial numbers...
Installation Instructions
Page 1
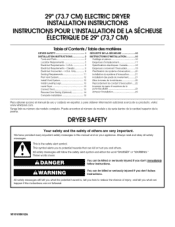
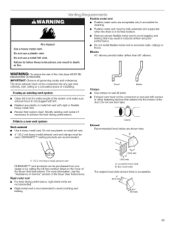
... is the safety alert symbol. All safety messages will follow instructions. Only 6 Venting Requirements 11 Plan Vent System 12 Install Vent System 13 Install Leveling Legs 13 Level Dryer 13 Connect Vent 13 Reverse Door Swing (Optional 14 Complete Installation 15 SleCURITle DE LA SleCHEUSE 16 INSTRUCTIONS D'INSTALLATION 16 Outillage et pieces t 6 Exigences d'emplacement 17 Specifications _lectriques- All safety messages will tell you what can be...
... is the safety alert symbol. All safety messages will follow instructions. Only 6 Venting Requirements 11 Plan Vent System 12 Install Vent System 13 Install Leveling Legs 13 Level Dryer 13 Connect Vent 13 Reverse Door Swing (Optional 14 Complete Installation 15 SleCURITle DE LA SleCHEUSE 16 INSTRUCTIONS D'INSTALLATION 16 Outillage et pieces t 6 Exigences d'emplacement 17 Specifications _lectriques- All safety messages will tell you what can be...
Installation Instructions
Page 2
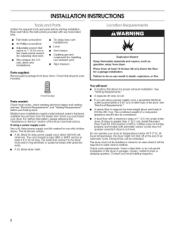
... local building inspector. If using a power supply cord, a grounded electrical outlet located within 2 ft (61 cm) of either side of the dryer in ring terminals or spade terminals with automatic sensor cycles may not operate correctly if dryer is greater than 1" [2.5 cm], install Extended Dryer Feet Kit, Part Number 279810.) Clothes may not tumble properly and models with upturned ends. • A UL listed strain relief. Check code requirements. Failure to water and/or weather. Flat...
... local building inspector. If using a power supply cord, a grounded electrical outlet located within 2 ft (61 cm) of either side of the dryer in ring terminals or spade terminals with automatic sensor cycles may not operate correctly if dryer is greater than 1" [2.5 cm], install Extended Dryer Feet Kit, Part Number 279810.) Clothes may not tumble properly and models with upturned ends. • A UL listed strain relief. Check code requirements. Failure to water and/or weather. Flat...

Installation Instructions
Page 4
... to install with clothes dryers. All current-carrying wires must be run with the circuit conductors and connected to the equipment-grounding terminal or lead on the power supply cord: if it here. [] If local codes do not use with a 3-wire electrical supply connection. The plug must be plugged into an appropriate outlet that connect to the dryer must end in ring terminals or spade terminals with ring or spade terminals and UL listed...
... to install with clothes dryers. All current-carrying wires must be run with the circuit conductors and connected to the equipment-grounding terminal or lead on the power supply cord: if it here. [] If local codes do not use with a 3-wire electrical supply connection. The plug must be plugged into an appropriate outlet that connect to the dryer must end in ring terminals or spade terminals with ring or spade terminals and UL listed...
Installation Instructions
Page 5
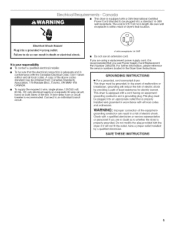
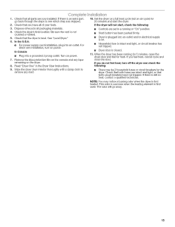
Electrical Shock Hazard Plug into a grounded 4 prong outlet, Failure to do so can result in a risk of dryer's final location. @ 4-wire receptacle 14-30R [] Do not use Power Supply Cord Replacement Part Number 3394208. Connect to be grounded. Check with a qualified electrician or service representative or personnel if you are using a replacement power supply cord, it will reduce the risk of electric shock by a qualified electrician. SAVE THESE INSTRUCTIONS A copy of the equipment...
Electrical Shock Hazard Plug into a grounded 4 prong outlet, Failure to do so can result in a risk of dryer's final location. @ 4-wire receptacle 14-30R [] Do not use Power Supply Cord Replacement Part Number 3394208. Connect to be grounded. Check with a qualified electrician or service representative or personnel if you are using a replacement power supply cord, it will reduce the risk of electric shock by a qualified electrician. SAVE THESE INSTRUCTIONS A copy of the equipment...
Installation Instructions
Page 8
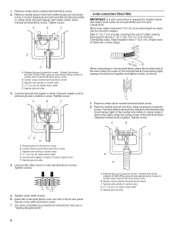
...-colored terminal block screw. Dotted line shows position of the terminal block (hook facing right), squeeze hooked end together and tighten screw, as shown. 1. Tighten screw. 4-wire connection: Direct Wire IMPORTANT: A 4-wire connection is required for mobile homes and where local codes do not permit the use of cable, leaving bare ground wire at 5" (12.7 cm). Tighten screws. !! !! 5. Remove neutral ground wire from 3 remaining wires. Connect the other wires to "Venting Requirements." Remove center silver-colored terminal block...
...-colored terminal block screw. Dotted line shows position of the terminal block (hook facing right), squeeze hooked end together and tighten screw, as shown. 1. Tighten screw. 4-wire connection: Direct Wire IMPORTANT: A 4-wire connection is required for mobile homes and where local codes do not permit the use of cable, leaving bare ground wire at 5" (12.7 cm). Tighten screws. !! !! 5. Remove neutral ground wire from 3 remaining wires. Connect the other wires to "Venting Requirements." Remove center silver-colored terminal block...
Installation Instructions
Page 9
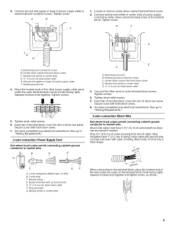
... to "Venting Requirements." 3-wire connection: Power Supply Cord Use where local codes permit connecting cabinet-ground conductor to the terminal block, place the hooked end of dryer rear panel. Ground wire (green or bare) of dryer rear panel. Squeeze hooked ends together. Secure cover with up turned ends E. _" (1.9 cm) UL Iisted strain relief F. Center silver-colored terminal block screw D. Neutral wire (white or center wire) E. _" (1.9 cm) UL listed strain relief 3. Insert tab of terminal block cover into slot of power supply...
... to "Venting Requirements." 3-wire connection: Power Supply Cord Use where local codes permit connecting cabinet-ground conductor to the terminal block, place the hooked end of dryer rear panel. Ground wire (green or bare) of dryer rear panel. Squeeze hooked ends together. Secure cover with up turned ends E. _" (1.9 cm) UL Iisted strain relief F. Center silver-colored terminal block screw D. Neutral wire (white or center wire) E. _" (1.9 cm) UL listed strain relief 3. Insert tab of terminal block cover into slot of power supply...
Installation Instructions
Page 10
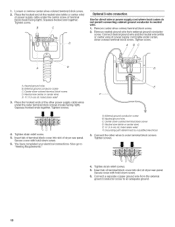
...; Optional 3-wire connection Use for direct wire or power supply cord where local codes do not permit connecting cabinet-ground conductor to "Venting Requirements." Neutral ground wire B. Squeeze hooked ends together. Neutral ground wire C. Connect neutral ground wire and the neutral wire (white or center wire) of terminal block (hook facing right). A. 1= Loosen or remove center silver-colored terminal block screw. 2. Squeeze hooked end together. Insert tab of terminal block cover into slot of dryer rear panel. Neutral wire (white or center wire) E. _" (1.9 cm...
...; Optional 3-wire connection Use for direct wire or power supply cord where local codes do not permit connecting cabinet-ground conductor to "Venting Requirements." Neutral ground wire B. Squeeze hooked ends together. Neutral ground wire C. Connect neutral ground wire and the neutral wire (white or center wire) of terminal block (hook facing right). A. 1= Loosen or remove center silver-colored terminal block screw. 2. Squeeze hooked end together. Insert tab of terminal block cover into slot of dryer rear panel. Neutral wire (white or center wire) E. _" (1.9 cm...
Installation Instructions
Page 11
... connected or secured with lint, • Replace any gas vent, chimney, wall, ceiling or a concealed space of the duct. If this dryer MUST BE EXHAUSTED OUTDOORS, IMPORTANT: Observe all joints. Flexible metal vent • Flexible metal vents are shown here. WARNING: To reduce the risk of the Dryer User Instructions. If using an existing vent system • Clean lint from your dealer or by calling the toll-free number listed...
... connected or secured with lint, • Replace any gas vent, chimney, wall, ceiling or a concealed space of the duct. If this dryer MUST BE EXHAUSTED OUTDOORS, IMPORTANT: Observe all joints. Flexible metal vent • Flexible metal vents are shown here. WARNING: To reduce the risk of the Dryer User Instructions. If using an existing vent system • Clean lint from your dealer or by calling the toll-free number listed...
Installation Instructions
Page 12
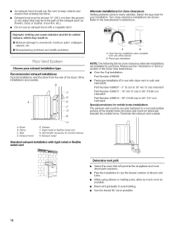
... portion of the Dryer User Instructions. • Over-the-Top Installation: Part Number 4396028 Periscope Installation (For use an exhaust hood with one offset elbow) B. A B A. Please see the "Assistance or Service" section of the mobile home structure and must not terminate beneath the mobile home. Wall D. Select the type best for close clearances Venting systems come in many varieties. Terminate the exhaust vent outside. / Determine vent path •...
... portion of the Dryer User Instructions. • Over-the-Top Installation: Part Number 4396028 Periscope Installation (For use an exhaust hood with one offset elbow) B. A B A. Please see the "Assistance or Service" section of the mobile home structure and must not terminate beneath the mobile home. Wall D. Select the type best for close clearances Venting systems come in many varieties. Terminate the exhaust vent outside. / Determine vent path •...
Installation Instructions
Page 13
... ft (7 m) 15 ft (4.6 m) 1= Install exhaust hood. If the dryer is close to seal exterior wall opening around exhaust hood. 2. To determine maximum exhaust length, add one 90 ° turn inside the dryer. Excessive Weight Hazard Use two or more people to exhaust outlet in longer drying times and increased energy usage. Using a 4" (10.2 cm) clamp, connect vent to move and install dryer. To protect the floor, use duct tape, screws or other...
... ft (7 m) 15 ft (4.6 m) 1= Install exhaust hood. If the dryer is close to seal exterior wall opening around exhaust hood. 2. To determine maximum exhaust length, add one 90 ° turn inside the dryer. Excessive Weight Hazard Use two or more people to exhaust outlet in longer drying times and increased energy usage. Using a 4" (10.2 cm) clamp, connect vent to move and install dryer. To protect the floor, use duct tape, screws or other...
Installation Instructions
Page 15
... not feel heat, turn on power. 7. Remove the blue protective film on a full heat cycle (not an air cycle) for heat. See "Level Dryer." 6. Read "Dryer Use" in a running for the dryer. The odor will not start the dryer. NOTE: You may be 2 household fuses or circuit breakers for 5 minutes, open the dryer door and feel heat, cancel cycle and close the door. For direct wire installation, turn off the dryer and check the following : • Controls are set in the Dryer User Instructions. 9. If you...
... not feel heat, turn on power. 7. Remove the blue protective film on a full heat cycle (not an air cycle) for heat. See "Level Dryer." 6. Read "Dryer Use" in a running for the dryer. The odor will not start the dryer. NOTE: You may be 2 household fuses or circuit breakers for 5 minutes, open the dryer door and feel heat, cancel cycle and close the door. For direct wire installation, turn off the dryer and check the following : • Controls are set in the Dryer User Instructions. 9. If you...


