Maytag MEDC500VW Support Question
Maytag MEDC500VW Support Question
Find answers below for this question about Maytag MEDC500VW - Centennial Series 29 Inch Electric Dryer.Need a Maytag MEDC500VW manual? We have 2 online manuals for this item!
Question posted by Anonymous-55168 on March 29th, 2012
How Do I Access The Ignitor On The Medc500vw? I Need To Replace The Ignitor.
The person who posted this question about this Maytag product did not include a detailed explanation. Please use the "Request More Information" button to the right if more details would help you to answer this question.
Current Answers
Related Maytag MEDC500VW Manual Pages
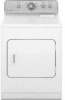
User Instructions - Page 1
... us at the top inside dryer door well. fits 29" (737 mm) Super Capacity, 6.5 cu. white
I )rying rack- Additional help ou obtain assistance or service if you need assistance or service, first see... order parts and accessories, call : 1-800-807-6777. fits 29" (737 mm) Super Capacity Plus, 7.0 cu. DRYER USER INSTRUCTIONS
P
INSTRUCTIONS POUR L'UTILISATEUR DE LA SECHEUSE
Table of purchase or ...
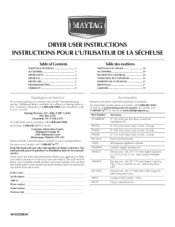
User Instructions - Page 2
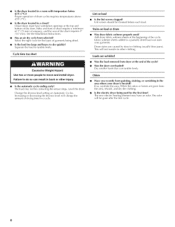
...." WARNING -
All safety messages will follow instructions.
"Risk of fire. - Install the clothes dryer according to collapse, be of a specific type identified by a qualified installer. -
To reduce the... safety messages in this manual and on your appliance. Do not install a clothes dryer with flexible plastic venting materials, if flexible metal
{foil type) duct is the ...
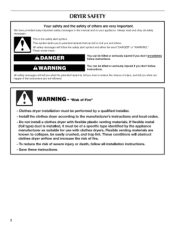
User Instructions - Page 3
... exhaust vent should be exposed
to the weather.
[] Do not tamper with controls.
[] Do not repair or replace any part of the dryer or attempt any electrical switch; Installation and service must be detected by qualified service personnel.
[] See installation instructions for grounding requirements. For more information, contact your safety, the information ...
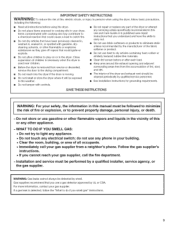
User Instructions - Page 4
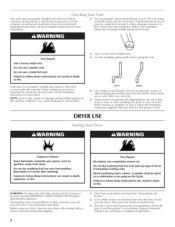
...vent. Refer to flow. If the dryer is not properly installed and vented,...DRYER USE
Explosion Hazard
Keep flammable materials and vapors, such as gasoline, away from storing and shipping.
4
1, Clean lint screen before operating this appliance.
Do not dry anything flammable on use a metal foil vent. Fire Hazard
No washer can result in death
WARNING: To reduce the risk of fire, electric...
User Instructions - Page 5
...
polyester filled)
I])rying
I .ow
60 min.
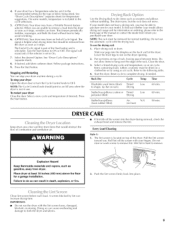
Every Load Cleaning
Style 1 : 1. Place dryer at least !8 inches (460 ram) above the floor for temperature suggestions. A screen blocked increase drying time. IMPORTANT... Start button to complete drying, if needed. If your model allows drying rack usage and for normal tumbling.
Start the dryer. Stuffed toys/pillows (foam rubber filled...
User Instructions - Page 6
... line pipe and remove fittings attached to
dryer pipe. 4. ultlhelint
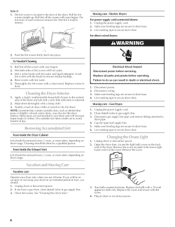
sncortreinessnteorarwigahustphs.Rcroelleitnnotoreffmthoesv[ceinret.WewneittlhiynotisuhrfianrgdteorsD.o remove. Rollintoffthescreewnithyourfingers. 2. Electrical Shock Hazard Disconnect power before operating. Replace all parts and panels before servicing. eplacsecreeinn
dryer.
1. Make sure leveling legs are secure in...
User Instructions - Page 7
...Dryer will increase drying times. Replace the fuse or reset the circuit breaker. If the dryer hasn't been used ? Separate the load items and restart the dryer.
]imer does not noticeably advance
Is the dryer set to check air movement.
Electric dryers...the clothing is not too long or has too many turns. Place dryer at least 18 inches (460 ram) above the floor for a while, there may be ...
User Instructions - Page 8
... tumble freely.
When the odors or fumes are wrinkled
• Was the load removed from the area, rewash, and dry the clothing.
• Is the electric dryer being dried. • Is the load too large and heavy to do so can result in clothing (usually blue jeans). See the Installation Instructions. •...
User Instructions - Page 9
... in your major appliance, to instruct you need repair service, first see front page of ...is used in the country in accordance
with electrical or
5.
Re,placement, parts or re,pair...LAUNDRY WARRANTY
LIMITED WARRANTY
For one year from unauthorized modifications made with Maytag's published installation instructions.
10. household use your major appliance if it is
2. Replacement...
Installation Instructions - Page 1
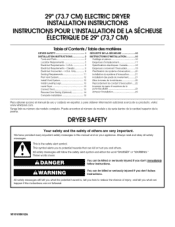
... Raccordement du conduit d'_vacuation.....22 Inversion du sens d'ouverture de la porte (facultatif 22 Achever I LECTRIQUEDE 29" (73,7 CM)
Table of Contents / Table des mati@res
DRYER SAFETY 1 INSTALLATION INSTRUCTIONS 2
Tools and Parts 2
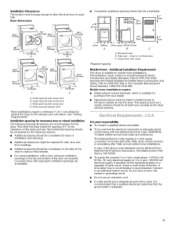
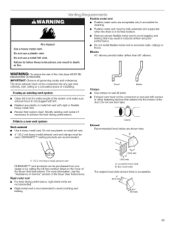
Location Requirements 2 Electrical Requirements - This is , tell you how to potential hazards that can happen if the instructions are very...
Installation Instructions - Page 2
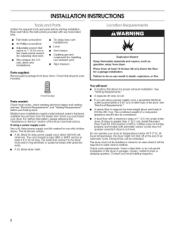
...supplied:
Remove parts package from dryer.
See "Electrical Requirements."
• A sturdy floor to do not permit, installation of the dryer in an area where it will need • A location that ...At lower temperatures, the dryer might not shut off at least 18 inches (46 cm) above the floor for U.S. If using a power supply cord, a grounded electrical outlet located within 2...
Installation Instructions - Page 3
... and a separate ground wire is used, it is recommended that a qualified electrician determine that the electrical connection is adequate• Large opening side-swing door B. Wide opening side-swing door D. This dryer has been tested for this dryer. A copy of the above code standards can be considered•
3"*
qf._cm)
(45.7cm)
_. 3"*
(7.6crn...
Installation Instructions - Page 4

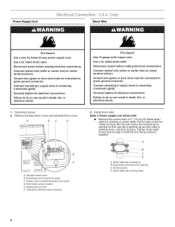
... electrician. grounding conductor can result in a location where grounding through the neutral conductors. Do not modify the plug on the dryer. Electrical Connection
To properly install your dryer, you must determine the type of electrical connection you will be using a power supply cord: Use a UL listed power supply cord kit marked for use aluminum...
Installation Instructions - Page 5
... branch circuit.
[] This dryer is within reach of dryer's final location.
@
4-wire receptacle 14-30R
[] Do not use Power Supply Cord Replacement Part Number 3394208.
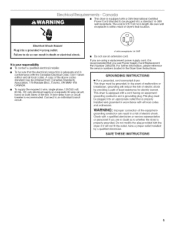
The ...a proper outlet installed by providing a path of electric shock by a qualified electrician. GROUNDING INSTRUCTIONS
[] For a grounded, cord-connected dryer: This dryer must be sure that is properly grounded. A ...
Installation Instructions - Page 6
...,silver-colored terminal block screw D. Clamp section D. Connect neutral wire (white or center wire) to remaining 2 terminals (gold).
Remove the hold in death, fire, or electrical shock. Hole below terminal block opening C. Strain relief tab pointing up and the other is pointing down, and hold -down screw and terminal block cover...
Installation Instructions - Page 8
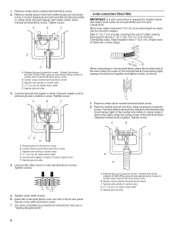
...to center silver-colored terminal block screw. Insert tab of extra length so dryer can be moved if needed. You have 5 ft (1.52 m) of terminal block cover into a ... leaving bare ground wire at 5" (12.7 cm).
B. Direct wire cable must have completed your electrical connections. External ground conductor screw B. Now go to outer terminal block screws.
Strip insulation back 1"...
Installation Instructions - Page 9
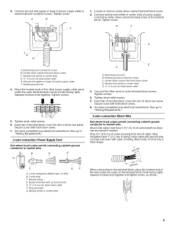
..._" (1.9 cm) UL listed strain relief
3. Direct wire cable must have completed your electrical connections. Ground wire (green or bare) of dryer rear panel. Secure cover with up turned ends E. _" (1.9 cm) UL Iisted..., as shown. You have 5 ft (1.52 m) of extra length so dryer can be moved if needed. Neutral prong D.
Spade terminals with hold -down screw.
7. Loosen or remove...
Installation Instructions - Page 11
...reduce the risk of the system and make sure exhaust hood is not plugged with lint,
• Replace any gas vent, chimney, wall, ceiling or a concealed space of the duct.
If using an ...extended and supported when the dryer is acceptable.
4"
(10.2 cm)__
11 Rigid metal vent
• For best drying performance, rigid metal vents are acceptable only if accessible for cleaning,
• Flexible...
Installation Instructions - Page 13
... ft (13.4 m) 38 ft (11.6 m)
Flexible metal 27 ft (8.2 m) 19 ft (5.8 m)
3
Rigid metal
35 ft (10.7 m) 29 ft (8.8 m)
Flexible metal 25 ft (7.6 m) 17 ft (5.2 m)
4
Rigid metal
27 ft (8.2 m) 21 ft (6.4 m)
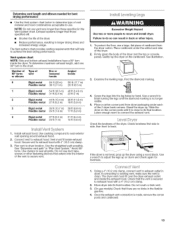
Flexible metal 23...the chart. Slide the dryer on the cardboard. Leave enough room to achieve the best drying performance. Determine vent length and elbows needed for levelness.
1.
...
Installation Instructions - Page 14
... hinges to inner door panel so handle is needed , slide door catch left -side opening, if desired,
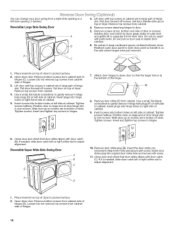
Reversible Large Side-Swing Door
3. Open dryer door. Lift door until top screws in cabinet...that door strike aligns with putty knife. Slide door up so screws are in large part of dryer. Remove bottom screws from cabinet.
4. Tighten screws. Insert and tighten top screws in hinges....
Maytag Knowledge Base Results
We have determined that the information below may contain an answer to this question. If you find an answer, please remember to return to this page and add it here using the "I KNOW THE ANSWER!" button above. It's that easy to earn points!-
Odd taste or odor in my ice or water
... hold the water dispenser lever for 5 seconds, and then release it for the ice maker to need replacement more frequently based on , 5 seconds off -flavored ice. PUR is inserted, the eject button ... Use a sturdy container to flow. This will flush air from the system, water may need replacement more ice. When completely and properly installed, the filter cap in the base... -
My dryer makes sounds or vibrations
... a floor that is not level. Check if any of the four dryer legs are missing. Replace any objects caught in the dryer. This ball of fabric may thump and may be causing the sound....twisted or balled up. Laundry items with a towel load inside the dryer along the front and rear edges of the drum. Remove any missing legs, and level the dryer both front-to-back and ... -
Display shows L2 - Dryer
...or has a circuit breaker tripped? Replace the fuse(s) or reset the circuit breaker(s). The power supply cord may be turning, but will stop appearing after three cycles. Dryer does not heat - This code ... with your dryer. Electric dryers use two household fuses or circuit breakers. If the dryer drum is not turning and there is an L2 code on , even if the dryer drum is ...
Similar Questions

Replace Belt
(Posted by darrelle 9 years ago)

Where Is Reset Button 0n Maytag Centennial Series Dryer
(Posted by Sktwal 9 years ago)

Maytag Centennial Electric Dryer Medc400vwo How To Replace Door Switch
(Posted by marjodanett 9 years ago)

How To Replace Door Switch On Maytag Centennial Electric Dryer Medc400vwd
(Posted by Granlan 10 years ago)

How To Replace Belt To A Maytag Centennial Electric Dryer
(Posted by colapkdla 10 years ago)