Makita LS1040 Support Question
Makita LS1040 Support Question
Find answers below for this question about Makita LS1040.Need a Makita LS1040 manual? We have 2 online manuals for this item!
Question posted by charlesdavidferguson28 on March 24th, 2013
Dropped My Ls1040 Of The Bench Whilst In The Open Position
the machine will not now come down to snip the timber there is a bar under the saw guard which is connected to the safety release button it seems to have been pushed forward because it catches the nut that holds the saw blade
Current Answers
Related Makita LS1040 Manual Pages
Owners Manual - Page 1
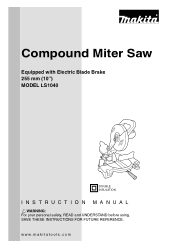
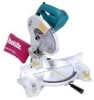
www.makitatools.com Compound Miter Saw
Equipped with Electric Blade Brake 255 mm (10") MODEL LS1040
DOUBLE INSULATION
INSTRUCTION MANUAL
WARNING: For your personal safety, READ and UNDERSTAND before using. SAVE THESE INSTRUCTIONS FOR FUTURE REFERENCE.
Owners Manual - Page 2
...country to it for future reference
GENERAL SAFETY PRECAUTIONS
USA007-1
(For All Tools)
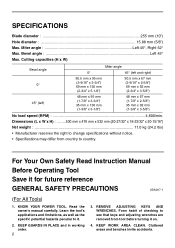
1. KEEP WORK AREA CLEAN. SPECIFICATIONS
Blade diameter 255 mm (10") Hole diameter ...min. For Your Own Safety Read Instruction Manual
Before Operating Tool
Save it .
2. Read the owner's manual carefully.
REMOVE ADJUSTING KEYS AND WRENCHES. Cluttered areas and benches invite accidents. Miter angle...
Owners Manual - Page 3
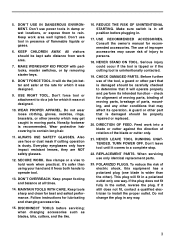
..., or expose them to hold work area well lighted. USE RIGHT TOOL. when changing accessories such as blades, bits, cutters, and ...and safer at all times.
14. If it comes to operate tool.
13. All visitors should be properly repaired or ... of the tool, a guard or other jewelry which it was not designed.
10. DISCONNECT TOOLS before plugging in off position before servicing...
Owners Manual - Page 4
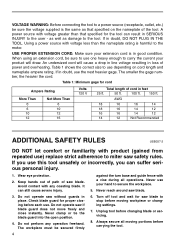
.... Do not operate saw blade. Avoid contact with voltage greater than the nameplate rating is harmful to the tool. A power source with any operation freehand. Make sure your product will cause a drop in line voltage resulting in loss of saw without guards in doubt, DO NOT PLUG IN THE TOOL. Never clamp or tie the blade guard into the open position.
4.
Owners Manual - Page 5
... use the tool in the base to fasten the saw to secure workpiece.
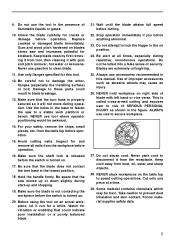
27. Replace cracked or damaged blade immediately. Never use vise to a stable work platform or bench. Make sure that could result in the on position.
24. Use the holes in the presence of flammable liquids or gases.
10. For your safety, remove the...
Owners Manual - Page 7
... and possible injury.
1 1. Nut
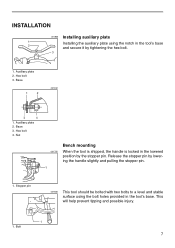
Bench mounting 001792 When the tool is shipped, the handle is locked in the tool's base
2
and secure it by tightening the hex bolt.
3
1. Hex bolt 3. Auxiliary plate 2. Hex bolt
4. INSTALLATION
001855 Installing auxiliary plate
1
Installing the auxiliary plate using the bolt holes provided in the tool's base. Release the stopper pin...
Owners Manual - Page 8
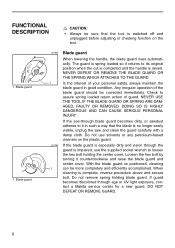
... returns to its original position when the cut is completed and the handle is impaired, use solvents or any petroleum-based cleaners on the tool.
1. Check to loosen the hex bolt holding blade guard. When cleaning is no longer easily visible, unplug the saw and clean the guard carefully with a damp cloth. The guard is spring loaded so...
Owners Manual - Page 9
... provided with the tool unplugged.
4
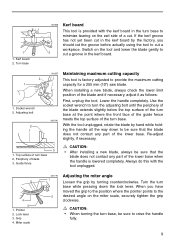
3 1. When installing a new blade, always check the lower limit position of blade 3. Re-adjust slightly, if necessary.
3 1. 1
1. Miter scale
001778
1
2
Adjusting the miter angle
Loosen the grip by hand while holding the handle all the way down the lock lever. Periphery of the blade and if necessary, adjust it as follows...
Owners Manual - Page 10
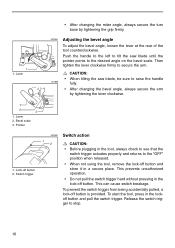
Switch trigger
• When not using the tool, remove the lock-off button is provided. Release the switch trigger to secure the arm. 1 1. Push the handle to the left to tilt the saw blade, be sure to raise the handle
001865
fully.
• After changing the bevel angle, always secure the arm by tightening the grip firmly...
Owners Manual - Page 11
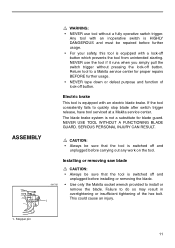
... for blade guard. Installing or removing saw blade
001792
1
CAUTION:
• Always be repaired before further usage.
• For your safety, this tool is switched off and unplugged before carrying out any work on the tool.
The blade brake system is equipped with a lock-off button.
NEVER USE TOOL WITHOUT A FUNCTIONING BLADE GUARD.
WARNING:
• NEVER use the tool if...
Owners Manual - Page 13
...
1.
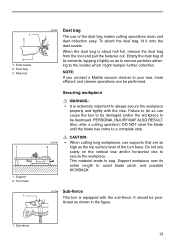
Failure to do so can be positioned as the top surface level of the dust...saw, more efficient and cleaner operations can cause the tool to be destroyed. Sub-fence
13 Fastener
1
1. To attach the dust bag, fit it lightly so as to remove particles adhering to avoid blade pinch and possible KICKBACK.
001766 Sub-fence
This tool is equipped with the vise. NOTE: If you connect...
Owners Manual - Page 14
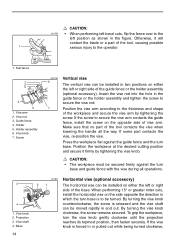
...into the hole in two positions on the opposite side of vise arm. Position the workpiece at the desired cutting position and secure it will
contact the blade or a part of the tool, causing possible
1
serious ...the tool contacts the vise when lowering the handle all operations.
3
4 1.
If some part contacts the vise, re-position the vise. Vise shaft 4. If the vise knob is released and...
Owners Manual - Page 15
....
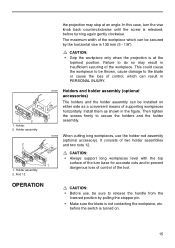
• Make sure the blade is not contacting the workpiece, etc. Install them as a convenient means of supporting workpieces horizontally. It consists of the tool. Holder
2. The maximum width of... of the workpiece. In this case, turn base for accurate cuts and to release the handle from the
lowered position by the horizontal vise is turned on either side as shown in the figure....
Owners Manual - Page 16
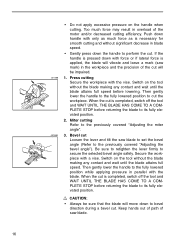
... returning the blade to its fully elevated position.
2. Push down to the previously covered "Adjusting the miter angle".
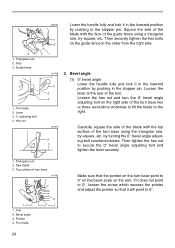
001868 3. Bevel cut Loosen the lever and tilt the saw blade.
16 When the cut . Secure the workpiece with the vise. Too much force as is completed, switch off the tool and WAIT UNTIL THE BLADE HAS COME TO A COMPLETE...
Owners Manual - Page 18
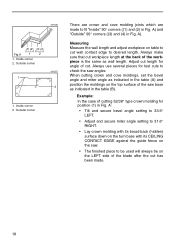
... the wall length and adjust workpiece on the top surface of the saw base as wall length. When cutting crown and cove moldings, set the bevel angle and miter angle as indicated in the table (A) and position the moldings on table to cut . Outside corner
1
(2) (1)
... against the guide fence on the LEFT side of the blade after the cut workpiece length at the back of cut wall contact edge to be...
Owners Manual - Page 21
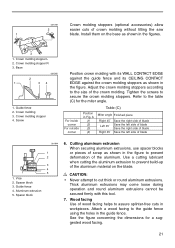
... stoppers. Thick aluminum extrusions may come loose during operation and round aluminum extrusions cannot be secured firmly with its WALL CONTACT EDGE against the guide fence and its CEILING CONTACT EDGE against the crown molding stoppers as shown in the figure. Screw
Position crown molding with this tool.
7. For inside corner
For outside...
Owners Manual - Page 24
... at the rear of turn base two or three revolutions clockwise to tilt the blade to secure the 0° bevel angle adjusting bolt and tighten the lever securely.
1. Hex nut
1
002259
Lower the handle fully and lock it in the lowered position by pushing in the order from the right side.
001768
1
2 3 4
2. Triangular rule...
Owners Manual - Page 25
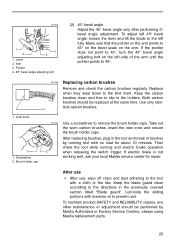
... releasing the switch trigger. To adjust left 45° bevel angle, loosen the lever and tilt the blade to the left side of the arm until the pointer points to prevent rust. After use
• After use, wipe off chips and dust adhering to the tool with machine oil to 45°.
1. Keep the blade guard...
Owners Manual - Page 26
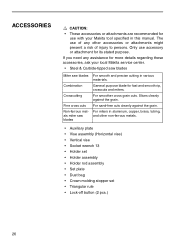
... • Triangular rule • Lock-off button (2 pcs.)
26
For miters in this manual. ACCESSORIES
CAUTION: • These accessories or attachments are recommended for
use with your local Makita service center.
• Steel & Carbide-tipped saw blades
Miter saw blades
Combination
Crosscutting
Fine cross cuts Non-ferrous metals miter saw blades
For smooth and precise cutting in...
Parts Breakdown - Page 3
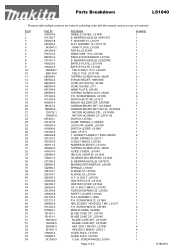
... M8X12, LS1030 TORSION SPRING 36, LS1030 SAFETY COVER, LS1040 FLAT WASHER 5, 9046 P.H. BEARING 6202LLB, NHP1310 F. BEARING 6000LLB, 6222DWE BAFFLE PLATE, LS1011N BAFFLE PLATE, LS1045
FIELD ASS'Y 115V, LS1045 FIELD 115V, LS1011N TAPPING SCREW 4X18, 4323K STRAIN RELIEF, HM1500B CORD (2X14X8 SJ), 2414B CORD GUARD, 2711 NAME PLATE, LS1040 TAPPING SCREW 4X18, 4323K P.H. SPRING 9, LS1011...
Similar Questions


Release Saw Arm
how do you release ether saw to place timber on the plate for cut
how do you release ether saw to place timber on the plate for cut
(Posted by jcunningham56752 1 year ago)

Broken Bits
I purchased my Makita HR2811F around 6 month ago and it broke 6 chisel bits in the choke area. What ...
I purchased my Makita HR2811F around 6 month ago and it broke 6 chisel bits in the choke area. What ...
(Posted by teinpr 2 years ago)

Makita Hr5001c Motor Problem
The motor runs at correct rev's but drops a slight bit of rev's every revolution but then picks up.C...
The motor runs at correct rev's but drops a slight bit of rev's every revolution but then picks up.C...
(Posted by tim50103 7 years ago)

Tool Not Working
I bought a new makita LXPH01 Hammer Drill. I put a fully charged lit-ion battery 3.0a but when I pr...
I bought a new makita LXPH01 Hammer Drill. I put a fully charged lit-ion battery 3.0a but when I pr...
(Posted by shiki98 11 years ago)