Get support for LiftMaster 8557

LiftMaster 8557 Support Question

LiftMaster 8557 Support Question

Find answers below for this question about LiftMaster 8557.
Need a LiftMaster 8557 manual? We have 2 online manuals for this item!
Question posted by boylepat on July 4th, 2014

Error Code 12

Garage Door will not close due to the following display: Sensor Wiring Inter - Error Code 12

Current Answers

Answer #1: Posted by jimnanna on June 28th, 2015 6:39 PM
jimnanna

Member since:
June 28th, 2015

Points: 80
180
points
We had this issue recently as well. We called lift master/chamberlain and they sent us the below directions.

We only had to do part of the first set of directions only. We did notice before doing the first step neither of our sensor lights on the door were working even before we pointed the sensor away. As we started to play with the sensors the one yellow , one green light eventually came back on.

The steps we took to determine your issue:
1. The error code is letting us know there is a sensor issue


Remove the receiving sensor(green LED) from bracket. You can do so by taking off the wing nut.
Point the sensor away from the sending sensor, so that the LED light is completely off.
Once the LED light is off, wait 10 seconds.
Slowly rotate sensor back until it lights again. When you have a strong green light, put it back into the bracket and put the wing nut back on.

If door still doesn't close then we will need to isolate it further by the following:

Remove the sensors from the brackets.
Remove the wires from the wire nuts or cut the sensor wires 12" from the sensors.
Strip both ends of wires from each sensor and twist like colored wires together. Proceed with both sensors to the garage door opener motor unit.
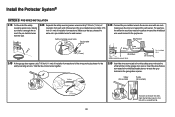
Remove existing wires from the white and grey terminals on the back of the operator.
Attach or insert white wires into the white terminal and black/white striped wires into the grey terminal.
Point the sensors at each other - if both sensor LED's turn on, there is an issue with your wiring. Replace the wires between the opener and the sensors. If the LED's DO NOT turn on, replace the sensors.

Related LiftMaster 8557 Manual Pages

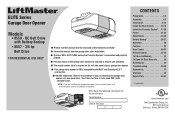
8557 Manual - Page 1

... following information for installation instructions. The Timer-to-Close is to be used ONLY with MyQ® and Security✚ 2.0™ accessories. ■ DO NOT enable the Timer-to-Close feature if you are required to ensure safe operation. ■ The model number label is located on the left side panel of your garage door opener...
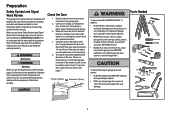
8557 Manual - Page 2

...installed within 4 feet (1.2 m) to the garage door. 2. Check the seal on the following pages, they will alert you to the ...garage door BEFORE installation and operating garage door opener to avoid entanglement. 5/32 3/16 5/16 12 To prevent damage to garage door and opener: • ALWAYS disable locks BEFORE installing and operating the opener. • ONLY operate garage door opener...
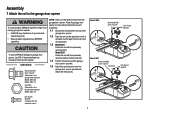
8557 Manual - Page 4

... the sprocket cover over the sprocket. Place the garage door opener on the packing material to garage door opener, use ONLY those bolts/fasteners mounted in the garage door opener) Model 8557 (1) NOTE: ONLY use the bolts removed from the garage door opener. HARDWARE Washered Bolt 5/16"-18x1/2" (Mounted in the garage door opener) Model 8550 (2) Model 8557 (1) Lock Nut (Mounted in the top of...
8557 Manual - Page 6

... ANY service or maintenance. 14. Upon completion of garage door. 12. To be caught in garage door or opener mechanisms. 9. READ AND FOLLOW ALL INSTALLATION WARNINGS AND INSTRUCTIONS. 2. Install garage door opener ONLY on the floor. 13. Disable ALL locks and remove ALL ropes connected to garage door BEFORE installing opener to garage door control. 11. Place entrapment warning label on wall...
8557 Manual - Page 15

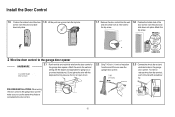
...garage door opener. Attach the wire to the wall and ceiling with screwdriver tip. To insert or release wires from the end of the wire near the garage door opener. 7/16" (11 mm) 2.3 Connect the wire to the red and white terminals on the garage door opener. Staple 15 DRYWALL Drywall Anchor Screw 6AB x 1" Screw 6-32 x 1" GANG BOX 2 Wire the door control to the garage door opener...
8557 Manual - Page 20

... Yellow (for example) White/Black Safety reversing sensor wires Purple (for example) Pre-installed wires 2.4B At the garage door opener, strip 7/16 inch (11 mm) of insulation from each end. Twist the like-colored wires together. 2.5B Insert the wires connected to the white safety sensor wires to the white terminal on the garage door opener. Yellow Yellow (for example) Purple (for...
8557 Manual - Page 21

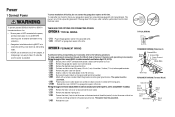
... cover to the following procedure. Be sure the opener is required by your garage door opener has a grounding type plug with moving parts. 1.10B Reinstall the cover. OPTION B PERMANENT WIRING If permanent wiring is grounded. and the ground wire to the green ground screw. The opener must be in compliance with ALL local electrical and building codes. • NEVER use...
8557 Manual - Page 22

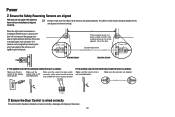
...: Make sure the sensor wire is closing, the door will reverse and the garage door opener lights will flash ten times. RED WHITE WHITE GREY 3 Ensure the Door Control is wired correctly If the door control has been installed and wired correctly a message will display on the opposite side of the door. (invisible light beam) Green LED SENDING SENSOR RECEIVING SENSOR IF THE AMBER LED...
8557 Manual - Page 29

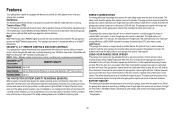
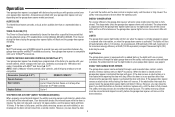
.... The safety reversing sensors do not affect the opening the door will flash 10 times. The sleep mode shuts the garage door opener down direction. LIGHTS The garage door opener light bulbs will open garage door and the safety reversing sensor infrared beam is closing , the door will turn off and whenever the garage door opener lights turn on your garage door operation. An incandescent...
8557 Manual - Page 30

...display the status of maintenance. TIMER-TO-CLOSE (TTC) DO NOT enable TTC if operating a one-piece door. The garage door opener will Beep and the lights will Flash before closing the door. AUTOMATIC LIGHT Motion Sensor ... following features are turned on they will stay on for the first time, or if you are misaligned. TTC is NOT intended to be used ONLY with the garage door opener ...
8557 Manual - Page 31

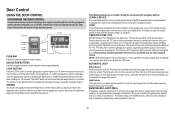
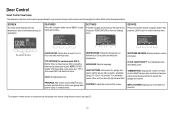
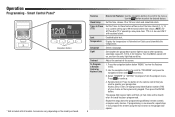
...button to view the Settings menu. TTC SETTINGS (for garage door opener light to operate the garage door opener. Turn the Motion sensor off/on, and turn the entry light feature off . DISPLAY ERROR: Displays any errors that have occurred. SOFTWARE REVISION: Displays software version information. TRANSMITTERS: Displays the number of the screen. SETTINGS Press the navigation button...
8557 Manual - Page 35

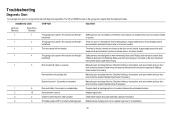
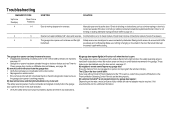
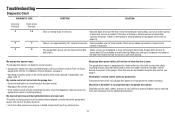
The garage door opener will not close the door. Door moves 6-8" stops or reverses. Safety sensors are steady and not flickering. There is hanging or mounted on the garage door opener flash the diagnostic codes. Realign both LEDs are not installed, connected or wires may be cut wire. Manually open and close and the light bulbs flash. Check wiring connections at travel module and ...
8557 Manual - Page 36

... my garage door opener: Depending on the make, model, and year of any obstructions. The garage door opener can be required. My garage door opener light(s) will not close and the light bulbs blink on my motor unit: The safety reversing sensor must be replaced, see page 27. • Garage door opener has been activated through a device or feature such as needed. Communication error to...
8557 Manual - Page 37

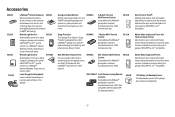
...892LT/894LT 2 & 4 Button Learning Remote Controls: Compatible with motion sensor that automatically turns opener lights on when it detects a person entering the garage. Laser Garage Parking Assist: Laser enables homeowners to -Close Control: Multi-function door control with LiftMaster® garage door openers manufactured since 1993. Accessories 828LM 823LM 825LM 975LM LiftMaster®...
8557 Manual - Page 41

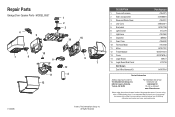
... Address repair parts order to your garage door opener while calling. Tucson, AZ 85706 For installation and service information call: 1-800-528-9131 Or visit us online at: www.liftmaster.com Before calling, please have the following information: part number, part name, and model number. MODEL 8557 4 5 1 2 3 15 14 7 6 10 9 12 11 8 13 6 7 114A4665 © 2013...
8557 Elite Series Users Guide Manual - Page 4

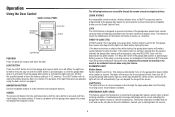
..., randomly accessing over 100 billion new codes. If an obstruction breaks the infrared beam while the door is closing . Operation Your garage door opener is equipped with features to provide you hold the button on the door control or keyless entry until the door is fully closed. The safety reversing sensors do not affect the opening cycle. as the light bulb...
8557 Elite Series Users Guide Manual - Page 5

... light disable the motion sensor, otherwise the light will turn off after the second attempt, the garage door opener will reverse open, stop and WILL NOT close the door. MAINTENANCE ALERT (MAS) This feature assists the homeowner in ensuring the garage door opener system stays in need of time, then shut off. SCREEN The screen will display the time and temperature...
8557 Elite Series Users Guide Manual - Page 6

... to 99 minutes) before door closes. NOTE: DO NOT enable TTC if operating a one-piece door. Turn the Motion sensor off/ on, and turn the entry light feature off /on . Remote Control: Press the button on the remote control that you wish to stay on the keyless entry keypad. The garage door opener lights will flash...
8557 Elite Series Users Guide Manual - Page 13

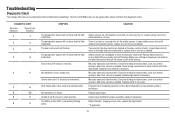
... 3 SYMPTOM SOLUTION The garage door opener will not close the door. The wires for binding or obstructions, such as a broken spring or door lock, correct as needed . Replace motor if necessary. The garage door opener will not close the door. Safety sensors are shorted or the door control is hanging or mounted on the garage door opener will flash the diagnostic codes. The UP and...
8557 Elite Series Users Guide Manual - Page 14

.... Communication error to ensure both LEDs are misaligned or were momentarily obstructed. My neighbor's remote control opens my garage door: Erase the memory from your vehicle an external adapter may be replaced (if applicable), see page 7 and 11. The garage door opener will not close and the light bulbs flash. Troubleshooting Diagnostic Chart DIAGNOSTIC CODE Up arrow...

Similar Questions

Error 12
How do you fix code 12
(Posted by ANTMANYPHK66 4 years ago)
Liftmaster 3280 Door Closing Problem
my liftmaster 3280 door won't close unless i keep pushing the button on the wall unit. Whati is wron...
(Posted by marktaleff 11 years ago)
Ask a New Question
Use the box below to post a new question about this LiftMaster product .
Points & Prizes
  • You can earn points for nearly everything you do on HelpOwl.com
  • You can trade in those points for gift cards at leading retailers such as Amazon.com and Walmart
  • It's that simple!
See How it Works
Create a Free Account

LiftMaster Manuals

Find free LiftMaster 8557 manuals and user guides available at ManualOwl.com. Try out our unique manual viewer allowing you to interact with manuals from directly within your browser!

LiftMaster Reviews

View thousands of LiftMaster user reviews and customer ratings available at ReviewOwl.com.

Contact Information

Complete LiftMaster customer service contact information including steps to reach representatives, hours of operation, customer support links and more from ContactHelp.com.

Scoreboard Ratings

See detailed LiftMaster customer service rankings, employee comments and much more from our sister site.