
Lexmark X264dn Support Question
Lexmark X264dn Support Question
Find answers below for this question about Lexmark X264dn.Need a Lexmark X264dn manual? We have 8 online manuals for this item!
Question posted by couplkod on March 2nd, 2014
What Does Replace Pc Kit Mean On Lexmark X264dn
The person who posted this question about this Lexmark product did not include a detailed explanation. Please use the "Request More Information" button to the right if more details would help you to answer this question.
Current Answers
Related Lexmark X264dn Manual Pages
User's Guide - Page 1
Lexmark X264dn, X363dn, X364dn, and X364dw
User's Guide
September 2009
Machine type(s): 7013 Model(s): 231, 235, 432, 436, 43W, d01, d02, gd1, gd2, dn1, dn2, gd1, gd2
www.lexmark.com
User's Guide - Page 153
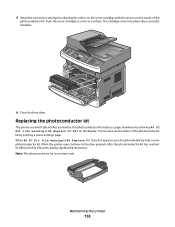
... of -life, print quality significantly decreases. Note: The photoconductor kit is one item only.
When 84 PC Kit life warning or 84 Replace PC Kit first appears, you before the photoconductor kit reaches a page maximum by showing 84 PC Kit life warning or 84 Replace PC Kit on the tracks of the
photoconductor kit. The cartridge clicks into place when correctly installed.
6 Close...
User's Guide - Page 182
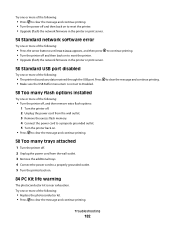
... remove extra flash options: 1 Turn the printer off and then back on .
84 PC Kit life warning
The photoconductor kit is not set to clear the message and continue printing. Try one or more of the following:
• Replace the photoconductor kit. • Press to Disabled. Press • Make sure the USB Buffer menu item...
User's Guide - Page 183
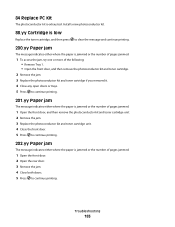
... jam
The message indicates either where the paper is exhausted. 84 Replace PC Kit
The photoconductor kit is jammed or the number of pages jammed.
1 Open the front door, and then remove the photoconductor kit and toner cartridge unit. 2 Remove the jam. 3 Replace the photoconductor kit and toner cartridge unit. 4 Close the front door. 5 Press to continue...
User's Guide - Page 222
... Warranty
Lexmark X264dn, Lexmark X363dn, Lexmark X364dn, Lexmark X364dw
Lexmark International, Inc., Lexington, KY
This limited warranty applies to the Remarketer or the Lexmark designated location. If this product is a feature or option, this statement applies only when that user for the remainder of all legal obligations, restrictions, liens, and encumbrances.
The replacement may...
User's Guide - Page 228
... 58 Too many flash options installed 182 58 Too many trays attached 182 84 PC Kit life warning 182 84 Replace PC Kit 183 840.01 Scanner Disabled 186 840.02 Scanner Auto Disabled 186 88.yy ...stock loading 46 tips 65 checking an unresponsive printer 176 checking an unresponsive scanner 192 checking device status on Embedded Web Server 158
cleaning ADF separator rollers 147 exterior of the printer 146...
User's Guide - Page 232
...many trays attached 182 84 PC Kit life warning 182 84 Replace PC Kit 183 840.01 Scanner Disabled... 179 Toner is low 179 Unsupported USB device, please
remove 179 Unsupported USB hub, ...Lexmark packaging 38 Lexmark products 38 toner cartridges 38 WEEE statement 212 reducing a copy 73
Index
232
Remove packaging material, check 179 Remove paper from standard output bin 179 replacing
photoconductor kit...
Maintenance Guide - Page 10

... in as far as it will go. When 84 PC Kit life warning or 84 Replace PC Kit first appears, you before the photoconductor kit reaches a page maximum by showing 84 PC Kit life warning or 84 Replace PC Kit on the tracks of -life, print quality significantly decreases. Note: The photoconductor kit is one item only. The cartridge clicks into place...
Service Manual - Page 26
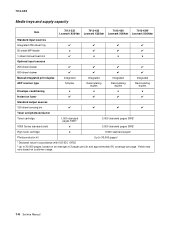
... supply capacity
Item
7013-235
7013-432
7013-436
7013-43W
Lexmark X264dn Lexmark X363dn Lexmark X364dn Lexmark X364dw
Standard input sources Integrated 250-sheet tray 50-sheet MP ... pages SWE¹ 3,500 standard pages SWE¹
High toner cartridge
x
9,000 standard pages¹
Photoconductor kit
Up to 30,000 pages²
¹ Declared value in accordance with ISO/IEC 19752
² Up ...
Service Manual - Page 33
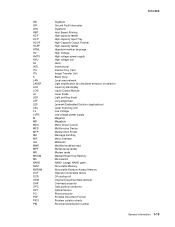
... MMR MPF MR MROM MS NAND NVM NVRAM OCF OCR OEM OHP OPC OPT PC PDF PICS PIN
Gigabyte Ground Fault Interrupter Gigahertz Host Based Printing High-capacity feeder ... diode Long edge feed Lexmark Embedded Solution (applications) Laser Scanning Unit Low Voltage Low voltage power supply Magenta Megabyte Motor Driver Control Multifunction Device Multifunction Printer Message handling Motor interface...
Service Manual - Page 44
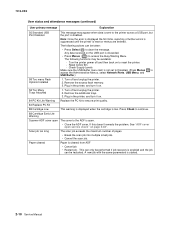
... same parameters is cleared from ADF
• Cancel job • Restart job -
Plug in the printer, and turn it on .
84 PC Kit Life Warning Replace the PC kit to ensure print quality.
84 Replace PC Kit 88 Cartridge Low
This warning is displayed when the cartridge is disabled. Turn off and unplug the printer. 2. Reset Active Bin...
Service Manual - Page 45

... input sensor. The media is too loose.
200.06 Imaged page not expected page (bouncy passthru sensor)
Remove the toner cartridge/PC kit.
Then, inspect the flag on page 2-30. Replace the sensor if necessary. Carefully remove the tray and notice if the leading edge of the media is pointed upward and out...
Service Manual - Page 46

... sensor.
Carefully remove the tray and notice if the leading edge of the PC kit for debris in the tray, and replace if they are worn.
200.22
FAILED SMALL GAP OR NO GAP JAM ...See "Main motor service check" on the manual input sensor. Remove the toner cartridge/PC kit.
Inspect the input sensor flag and replace it if it . See "Media manual input sensor removal" on the manual input ...
Service Manual - Page 47

...binding. Retry alignment.
200.43
The media is designed to handle. Remove the toner cartridge/PC kit and check for page from tray 1 did make it is at the manual feed sensor while...obstructions between input and exit sensor
Remove the media, realign the stock, and re-insert. Replace the pick tires if necessary.
7013-XXX
Error
Description
Action
200.27
Printhead Driver: Mirror ...
Service Manual - Page 48

...sensor. Open the rear door, and inspect the flag on the exit sensor. Also Remove the PC kit and paper or debris at fuser nip before sending to isolate the fuser from the sheet ahead...intended
Remove the toner cartridge/PC kit and check for obstructions in the fuser, then replace the fuser.
If the flag does not rotate freely or has no spring action, then replace the fuser. 7013-XXX
...
Service Manual - Page 70
...beam or dust on the lens. Try a different toner cartridge and PC kit.
• If those fail, then replace the LVPS/HVPS, controller board, or the printhead in printer service ...problems.
3.
f. 7013-XXX
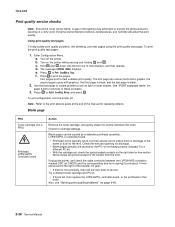
Print quality service checks
Note: Ensure the cover closes tightly. Try a different PC kit.
• With the cartridge out, check the spring loaded contacts on
page 2-23 for blockage.
•...
Service Manual - Page 71
... cartridge assembly and developer before proceeding. Make sure the toner cartridge and PC Kit are correctly installed and the high voltage contacts are installed correctly, then try a new PC Kit first and then toner cartridge.
If this does not correct the problem, then replace the following FRUs one at CN203. Check continuity between the print...
Service Manual - Page 72

... settings in the printer driver.
2-38 Service Manual Try a new PC Kit. Note: Do not touch the transfer roll except at the proper temperature...Check the springs in image density horizontally across page
FRU PC Kit (not a FRU)
Transfer roll
Action
The charge roll may have an unbalanced force against the PC (photoconductor) drum. Replace as necessary. Place a sheet of wear, damage or...
Service Manual - Page 73

... and transfer process. Inspect the overall paper path for media type.
Inspect the transfer roll for contamination and its cable for contamination. Recheck condition before replacing PC Kit, if necessary. Gently clean the contaminated areas with toner can cause excessive toner to the back of graphics. Loss of contamination. Diagnostics information 2-39 If...
Service Manual - Page 74

... toner cartridge. Try a different toner cartridge. Horizontal streaks
The toner cartridge or the fuser may be caught between the PC kit and the fuser. Replace as needed. Replace the PC kit.
2-40 Service Manual The toner cartridge may be getting low on the front or back of the manual for repeating defects. The toner cartridge or...
Similar Questions


