
Lexmark T652 Support Question
Lexmark T652 Support Question
Find answers below for this question about Lexmark T652.Need a Lexmark T652 manual? We have 9 online manuals for this item!
Question posted by griosmarny on October 19th, 2013
How To Clear Print Cue On Lexmark T652
The person who posted this question about this Lexmark product did not include a detailed explanation. Please use the "Request More Information" button to the right if more details would help you to answer this question.
Current Answers
Related Lexmark T652 Manual Pages
Clearing Jams Guide - Page 1

... while the printer is in any exposed adhesive when the flap is printing.
Warning-Potential Damage: The jammed paper may be covered with unfused toner which can help you avoid jams.
Paper tray recommendations
• Make sure the paper lies flat in firmly after loading paper. Lexmark™ T65x Clearing Jams Guide
Clearing jams
Avoiding...
Troubleshooting Guide - Page 2
... by scrolling through the list of held jobs do not collate
These are possible solutions.
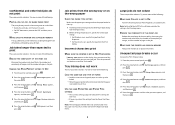
Unexpected page breaks occur
Increase the Print Timeout value: 1 From the printer control panel, press .
2 Press the arrow buttons until Settings appears, and then press .
3 Press the arrow buttons until Setup Menu appears, and then press .
4 Press...
User's Guide - Page 39
...From the Apple menu, choose System Preferences. 2 Click Print & Fax. 3 Select the printer, and then click Options & Supplies. 4 Click ...print jobs.
Additional printer setup
39
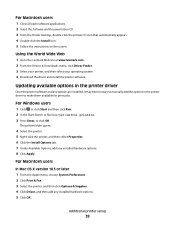
Updating available options in the printer driver
Once the printer software and any options are installed, it may be necessary to manually add the options in the printer driver to the Lexmark Web site at www.lexmark...
User's Guide - Page 42
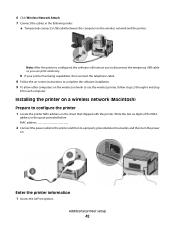
... wireless network to disconnect the temporary USB cable so you to use the wireless printer, follow steps 2 through 6 and step
8 for each computer.
Note: After the printer is configured, the software will instruct you can print wirelessly. b If your printer has faxing capabilities, then connect the telephone cable. 8 Follow the on-screen instructions to...
User's Guide - Page 44
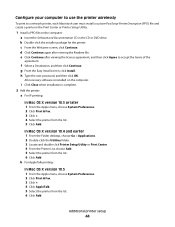
... 10.4 and earlier 1 From the Finder desktop, choose Go > Applications. 2 Double-click the Utilities folder. 3 Locate and double-click Printer Setup Utility or Print Center. 4 From the Printer List, choose Add. 5 Select the printer from the list. 6 Click Add. b For AppleTalk printing:
In Mac OS X version 10.5 1 From the Apple menu, choose System Preferences. 2 Click...
User's Guide - Page 66
...(16 lb) • Multiple part forms or documents
For more information about Lexmark, visit www.lexmark.com. This content provides the paper with heat-resistant inks designed for use...curled papers • Recycled papers that are specifically designed for use with laser printers:
• Chemically treated papers used to successfully print on the page) greater than ± 2.3 mm (± 0.9 in...
User's Guide - Page 72
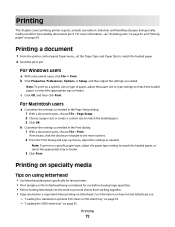
... in the Page Setup dialog: 1 With a document open , choose File > Print.
For more options.
2 From the Print dialog and pop-up menus, adjust the settings as needed .
Printing on specialty media
Tips on using letterhead
• Use letterhead designed specifically for laser printers. • Print samples on how to match the loaded paper. 3 Click OK. b Click...
User's Guide - Page 73
...print quality problems, avoid getting fingerprints on transparencies:
• Feed transparencies from sticking together. • We recommend Lexmark part number 12A5010 for A4-size transparencies and Lexmark...select the envelope size. • Use envelopes designed specifically for laser printers. When printing on the transparencies. • Before loading transparencies, fan the stack to ...
User's Guide - Page 74
...especially when printing bar codes. Partial sheets
also contaminate the printer and the cartridge with the special cartridge required for laser printers.
Preprinting
introduces semi-liquid and volatile components into the printer.
•... & Label Guide available on the Lexmark Web site at least 1 mm (0.04 in a jam. Check with chemicals that :
- Print samples on the card stock being...
User's Guide - Page 82
... a message indicating the jam location appears on the underside of the printer. Open doors and covers and remove trays to access jam locations.
Use the cartridge handle whenever you must clear all jammed paper from the paper path and then press . Warning-... door. 2 Push the release latch, and then open the front cover.
3 Lift and pull the print cartridge out of the cartridge.
User's Guide - Page 152
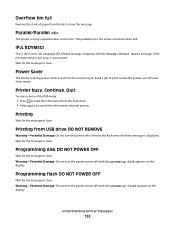
... bin full
Remove the stack of paper from the bin to clear. Programming disk DO NOT POWER OFF
Wait for the message to clear. Understanding printer messages
152 Printing from USB drive DO NOT REMOVE
Warning-Potential Damage: Do not turn the printer power off or remove the flash drive while this message is too...
User's Guide - Page 165

To fix this, download the correct download emulator version from the Lexmark Web site at www.lexmark.com.
Understanding printer messages
165 1565 Emulation error, load emulation option
The printer automatically clears the message in 30 seconds and then disables the download emulator on the firmware card.
User's Guide - Page 168
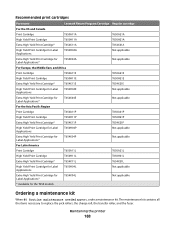
... items necessary to replace the pick rollers, the charge roll, the transfer roller, and the fuser. Maintaining the printer
168 Ordering a maintenance kit
When 80 Routine maintenance needed appears, order a maintenance kit. Recommended print cartridges
Part name For the US and Canada Print Cartridge
Lexmark Return Program Cartridge Regular cartridge
T650A11A
T650A21A
High Yield...
User's Guide - Page 215
...bin - 153 Reattach envelope feeder 154 recycled paper
using 67 recycling
Lexmark products 170 WEEE statement 198 Remote Management Active 154 Remove packaging material,...printer 155 Resetting without replacing may affect print quality. 155 Restore Held Jobs? 155 Restoring Factory Defaults 155 Restoring Held Jobs(s) x/y 155 Routine maintenance needed 156
S
safety information 9, 10 Securely clearing...
Service Manual - Page 25
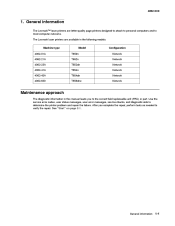
General information
The Lexmark™ laser printers are available in the following models: Machine type 4062-01A ... user error messages, service checks, and diagnostic aids to most computer networks. The Lexmark laser printers are letter-quality page printers designed to attach to personal computers and to determine the printer problem and repair the failure.
See "Start" on page 2-1.
Service Manual - Page 37

... The printer determines the paper length is being used .
34
Short Paper
1. Go to "Print cartridge ID connector assembly removal (T650, T652, T654)" on . Install the proper print cartridge....is closed and a defective print cartridge is properly connected. 3. Replace the switch media size if problem remains. Message is cleared when a new print cartridge is installed. Turn the...
Service Manual - Page 197

...and the media path clear of contamination? Go to step 2. Is the above component properly installed? Diagnostic information
2-163 Does the error continue?
Is the laser beam route free of ... removal (T650, T652, T654)" on page 4-61.
Go to step 4.
Check the laser beam route.
Remove debris or clean the printhead assembly window.
4
Check the print cartridge for contamination ...
Service Manual - Page 306
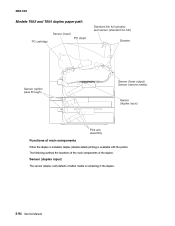
... components of main components
When the duplex is installed, duplex (double-sided) printing is remaining in the duplex.
3-94 Service Manual Sensor (duplex input)
The sensor (duplex wait) detects whether media is available with the printer. 4062-XXX
Models T652 and T654 duplex paper path
Standard bin full actuator and sensor (standard bin...
Service Manual - Page 308
... 241-245 250 260 270-279 28x Area Printer Duplex unit Paper trays Multipurpose feeder Envelope feeder Optional output bins Stapler
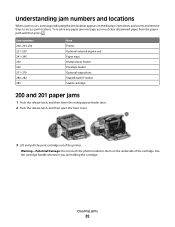
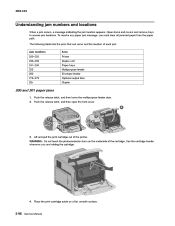
200 and 201 paper jams
1. Place the print cartridge aside on the underside of the cartridge. Use the cartridge handle whenever you must clear all jammed paper from the paper path. Open...
Service Manual - Page 569

..., ISP thumbscrew and standoff ISP interface cable assembly MarkNet N8120 gigabit ethernet print server MarkNet N8130 fiber ethernet print server MarkNet N8150 802.11n wireless print server (US/Americas) MarkNet N8150 802.11n wireless print server (WW, except US/Americas) Lexmark N4000e print server Lexmark N4050e (1 port USB) wireless 802.11g (US/Americas) MarkNet N7000e Fash Ethernet...
Similar Questions


My Lexmark C534dn Color Laser Printer Has Red And Yellow Smudge Down Each Side
My Lexmark C534dn color laser printer has red and yellow smudge down each side of the page. On the l...
My Lexmark C534dn color laser printer has red and yellow smudge down each side of the page. On the l...
(Posted by amjohau 12 years ago)