Get support for Lexmark T652

Lexmark T652 Support Question

Lexmark T652 Support Question

Find answers below for this question about Lexmark T652.
Need a Lexmark T652 manual? We have 9 online manuals for this item!
Question posted by tttdols on May 27th, 2014

How To Change Configuration Id On Lexmark T652dn

The person who posted this question about this Lexmark product did not include a detailed explanation. Please use the "Request More Information" button to the right if more details would help you to answer this question.

Current Answers

Answer #1: Posted by waelsaidani1 on May 27th, 2014 6:27 AM
This answer was accepted by the poster of the original question.
waelsaidani1

Member since:
May 12th, 2013

Points: 19,501,787
1,100
points
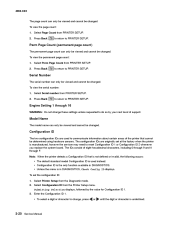
Configuration IDThe two configuration IDs are used to communicate information about certain areas of the printer that cannot be determined using hardware sensors. The configuration IDs are originally set at the factory when the printer is manufactured, however the servicer may need to reset Configuration ID 1 or Configuration ID 2 whenever you replace the system board. The IDs consist of eight hexadecimal characters, including 0 through 9 and A through F.Note: When the printer detects a Configuration ID that is not defined or invalid, the following occurs:• The default standard model Configuration ID is used instead.• Configuration ID is the only function available in DIAGNOSTICS.• Unless the menu is in DIAGNOSTICS, Check Config ID displays. To set the configuration ID:1.Select Printer Setup from the Diagnostic mode.2.Select Configuration ID from the Printer Setup menu.Submitting Selection displays, followed by the value for Configuration ID 1.3.Enter the Configuration ID 1.• To select a digit or character to change, press left or right arrow until the digit or character is underlined.

To change a digit or character, press up arrow to increase or down arrow to decrease the value.•  When the last digit is changed, press the tick button to validate the Configuration ID 1.If Invalid ID appears, the entry is discarded, and the previous Configuration ID 1 is displayed on the screen.If the process is successful, Submitting Selection appears on the display, followed by the current value for Confirguration ID 2.

4.Repeat the steps for entering the Configuration ID, and press the tick button.If the Configuration ID 2 is validated, Submitting Selection appears, and a check  appears next to Printer Setup. 5.Restart the printer.

Answer #2: Posted by seemeagain on May 27th, 2014 6:47 AM
seemeagain

Member since:
May 2nd, 2014

Points: 139,390
100
points

Answer #3: Posted by BusterDoogen on June 4th, 2014 7:32 AM
BusterDoogen

Member since:
October 30th, 2011

Points: 28,565,397
100
points

The two configuration IDs are used to communicate information about certain areas of the printer that cannot

be determined using hardware sensors. The configuration IDs are originally set at the factory when the printer is manufactured, however, the servicer may need to reset Configuration ID 1 or Configuration ID 2 whenever you replace the system board. The IDs consist of eight hexadecimal characters, including 0 through 9 and A through F.

Note: When the printer detects a Configuration ID that is not defined or invalid, the following occurs:

The default standard model Configuration ID is used instead.

Configuration ID is the only function available in DIAGNOSTICS.

Unless the menu is in DIAGNOSTICS, Check Config ID displays.

To set the configuration ID:

1. Touch to select PRINTER SETUP from the Diagnostics Menu.

2. Touch to select Configuration ID.

3. Touch the keyboard icon to display a keyboard with 1 through 0 and a through f. The current values for Configuration ID 1 and Configuration ID 2 are displayed.

Use keys to type the numbers for the two configuration IDs.

Use the left arrow to move over a digit from the right of the number toward the left.

When the numbers are correct, touch Submit.

If you have a question, touch the question mark icon.

To exit without changing the numbers, touch Back. Note: Be sure to touch Submit, or the number will not be changed.

Submitting Selection displays, followed by the value for Configuration ID 1.

Note: If Invalid ID appears, the entry is discarded, and the previous Configuration ID 1 is displayed on the screen.

If the process is successful, Submitting Selection appears on the display, followed by the current value for Configuration ID 2.

4. Restart the printer.

I hope this is helpful to you!

Please respond to my effort to provide you with the best possible solution by using the "Acceptable Solution" and/or the "Helpful" buttons when the answer has proven to be helpful. Please feel free to submit further info for your question, if a solution was not provided. I appreciate the opportunity to serve you!


Related Lexmark T652 Manual Pages

User's Guide - Page 38

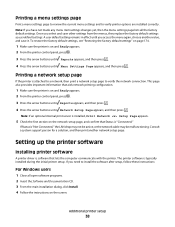
...Setting up the printer software Installing printer software A printer driver is software that aids network printing configuration. 1 Make sure the printer is on and Ready appears. 2 From the printer control panel, press... settings. Printing a network setup page If the printer is "Connected." Once you have not made any menu item settings changes yet, then the menu settings page lists all ...
User's Guide - Page 47

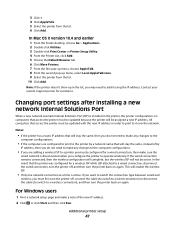
... new IP address in the printer, the printer configurations on again. Additional printer setup 47 If you want to switch the connection type between wired and wireless, you are configured to print to it using the IP address. Changing port settings after installing a new network Internal Solutions Port When a new network Lexmark Internal Solutions Port (ISP) is...
User's Guide - Page 66

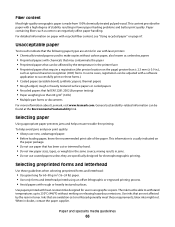
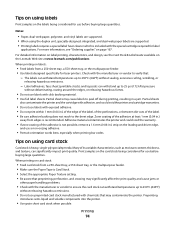
...lb) • Multiple part forms or documents For more information about Lexmark, visit www.lexmark.com. Use papers printed with heat-resistant inks designed for use coated ... letterhead printed using an offset lithographic or engraved printing process. • Avoid papers with laser printers: • Chemically treated papers used to make copies without melting or releasing hazardous emissions....
User's Guide - Page 73

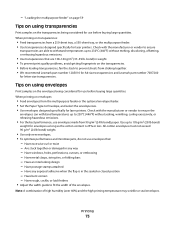
... can withstand temperatures up to 105 g/m2 (28 lb bond) weight for laser printers. Tips on using transparencies Print samples on envelopes: • Feed envelopes from sticking together. • We recommend Lexmark part number 12A5010 for A4-size transparencies and Lexmark part number 70X7240 for use before buying large quantities. Have excessive curl or...
User's Guide - Page 74

...Paper Type is heavy, single-ply specialty media. Print samples on the labels being considered for laser printers. When printing on using the duplex unit, specially-designed, integrated, and dual-web paper labels ... and could void the warranty. • If zone coating of the adhesive at www.lexmark.com/publications. For more information, see the Card Stock & Label Guide available on page...
User's Guide - Page 198

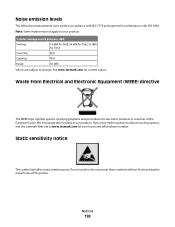
...average sound pressure, dBA Printing 53 dBA for T650, 54 dBA for T652, 55 dBA for current values. We encourage the recycling of the printer. Do not touch in conformance with ISO 9296. See www.lexmark.com for T654 Scanning N/A Copying N/A Ready 30 dBA Values are subject... symbols without first touching the metal frame of our products. Note: Some modes may not apply to change.
User's Guide - Page 200

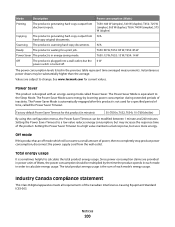
... electronic inputs. T652: 725 W (simplex), 565 W (duplex); T652: 85 W; T652: 13 W; See www.lexmark.com for a print job. The Power Saver Mode is automatically engaged after this product (in energy-saving mode. Setting the Power Saver Timeout to change. The product is in minutes): 30 (T650n, T652, T654); 10 (T650dn/dtn) By using the configuration menus, the...
Service Manual - Page 5

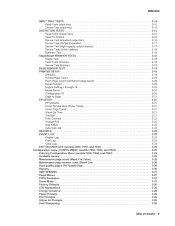
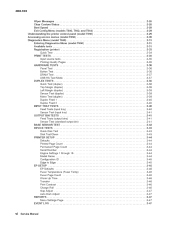
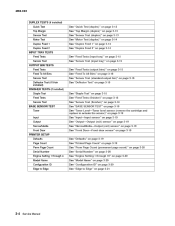
...SENSOR TEST ...PRINTER SETUP ...Defaults ...Printed Page Count ...Perm Page Count (permanent page count) ...Serial Number ...Engine Setting 1 through 16 ...Model Name ...Configuration ID ...Edge to ...Log ...EXIT DIAGNOSTICS (models T650, T652, and T654) ...Configuration menu (CONFIG MENU) (models T650, T652, and T654) ...Entering Configuration Menu (models T650, T652, and T654) ...Available menus ...
Service Manual - Page 6

... SENSOR TEST ...3-42 DEVICE TESTS ...3-43 Quick Disk Test ...3-43 Disk Test/Clean ...3-43 PRINTER SETUP ...3-44 Defaults ...3-44 Printed Page Count ...3-44 Permanent Page Count ...3-44 Serial Number ...3-44 Engine Settings 1 through 16 ...3-44 Model Name ...3-44 Configuration ID ...3-45 Edge to Edge ...3-45 EP SETUP ...3-45 EP Defaults ...3-46 Fuser Temperature...
Service Manual - Page 10

... drive release linkage removal (T650, T652, T654) ...4-23 Fuser unit assembly removal (T650, T652, T654) ...4-23 Fuser wiper cover assembly removal (T650, T652, T654) ...4-24 HVPS card assembly removal (T650, T652, T654) ...4-24 Inner deflector removal (T650, T652, T654) ...4-25 Laser cover removal (T650, T652, T654) ...4-27 LCD screen bezel removal (T650, T652, T654) ...4-28 LVPS card assembly...
Service Manual - Page 25

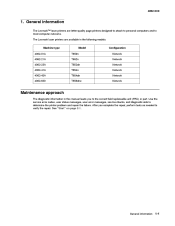
General information 1-1 After you to determine the printer problem and repair the failure. General information The Lexmarklaser printers are available in the following models: Machine type 4062-01A 4062-21A 4062-23A 4062-41A 4062-43A 4062-630 Model T650n T652n T652dn T654n T654dn T656dne Configuration Network Network Network Network Network Network Maintenance approach The...
Service Manual - Page 29

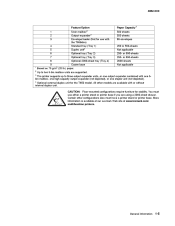
... 250 or 550-sheets Not applicable 250- CAUTION: Floor-mounted configurations require furniture for the T650 model. General information 1-5 The printer supports up to two 5-bin mailbox units are supported. More information is available at our Lexmark Web site at www.lexmark.com/ multifunction printers. 4062-XXX Feature/Option 5-bin mailbox Output expander3 Envelope feeder...
Service Manual - Page 37

...ID connector assembly is properly connected. 3. The printer determines the paper length is too short to "Print cartridge ID connector assembly removal (T650, T652, T654)" on page 4-59. This occurs when the printer... media being used . 2. Replace the print cartridge ID connector assembly if problem remains. Invalid Refill Change Cartridge Defective Cartridge 32.XX Cartridge part number X ...
Service Manual - Page 214

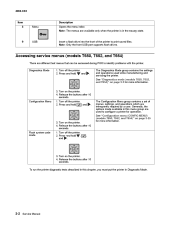
... Release the buttons after 10 seconds. See "Diagnostics mode (models T650, T652, and T654)" on page 3-3 for more information. 3. Release the buttons after 10 seconds. Turn on the printer. 4. Turn on the printer. 4. Configuration Menu 1. The Configuration Menu group contains a set of the printer to print saved files. Release the buttons after 10 seconds. Press and...
Service Manual - Page 216

...BASE SENSOR TEST Toner Input Output NarrowMedia Front Door PRINTER SETUP Defaults Page Count Perm Page Count Serial Number Engine Setting 1 through 4 Model Name Configuration ID Edge to Edge See "Defaults" on page 3-19...20 See "Engine Setting 1 through 16" on page 3-20 See "Model Name" on page 3-20 See "Configuration ID" on page 3-20 See "Edge to Edge" on page 3-21 See "Staple Test" on page 3-18 See...
Service Manual - Page 232

... The model name can only be viewed and cannot be changed. Note: When the printer detects a Configuration ID that cannot be determined using hardware sensors. Select Configuration ID from PRINTER SETUP. 2. Select Perm Page Count from the Printer Setup menu. The configuration IDs are used instead. • Configuration ID is the only function available in DIAGNOSTICS. • Unless the...
Service Manual - Page 233

... the backup roll heat up time. to its factory default value. Select EP Defaults from EP SETUP. 2. appears next to If the Configuration ID 2 is On, the text and graphics are restored. Restart the printer. The fuser temperature can change a digit or character, press • When the last digit is used to restore each...
Service Manual - Page 237

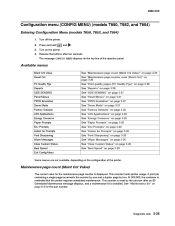
... (CONFIG MENU) (models T650, T652, and T654) Entering Configuration Menu (models T650, T652, and T654) 1. Available menus Maint Cnt Value Reset Cnt Prt ... Cnt)" on page 3-26 See "Print quality pages (Prt Quality Pgs)" on page 3-26 See "Reports" on the printer. 4. Diagnostic aids 3-25 The message CONFIG MENU displays on page 6-2 for the maintenance page counter is installed. See "...
Service Manual - Page 244

... Toner Sensor Input Sensor Output Sensor NarrowMedia Front Door DEVICE TESTS Quick Disk Test Disk Test/Clean PRINTER SETUP Defaults Printed Page Count Perm Page Count Serial Number Engine Settings 1 through 16 Model Name Configuration ID Edge To Edge EP SETUP EP Defaults Fuser Temp Fuser Page Count See "DEVICE TESTS" on page...
Service Manual - Page 257

... successful, Submitting Selection appears on the screen. To set at the factory when the printer is manufactured, however, the servicer may need to reset Configuration ID 1 or Configuration ID 2 whenever you have a question, touch the question mark icon. • To exit without changing the numbers, touch Back. Submitting Selection displays, followed by the current value for...

Similar Questions

Lexmark Ms711 Laser Printer Weight
what does the ms711 laser printer weigh without additional trays?
(Posted by cathyrose2 10 years ago)
My Lexmark C534dn Color Laser Printer Has Red And Yellow Smudge Down Each Side
My Lexmark C534dn color laser printer has red and yellow smudge down each side of the page. On the l...
(Posted by amjohau 12 years ago)
Ask a New Question
Use the box below to post a new question about this Lexmark product .
Points & Prizes
  • You can earn points for nearly everything you do on HelpOwl.com
  • You can trade in those points for gift cards at leading retailers such as Amazon.com and Walmart
  • It's that simple!
See How it Works
Create a Free Account

Lexmark Manuals

Find free Lexmark T652 manuals and user guides available at ManualOwl.com. Try out our unique manual viewer allowing you to interact with manuals from directly within your browser!

Lexmark Reviews

View thousands of Lexmark user reviews and customer ratings available at ReviewOwl.com.

Contact Information

Complete Lexmark customer service contact information including steps to reach representatives, hours of operation, customer support links and more from ContactHelp.com.

Scoreboard Ratings

See detailed Lexmark customer service rankings, employee comments and much more from our sister site.

Lexmark Recalls

Find comprehensive Lexmark recall information updated hourly on RecallOwl.com.