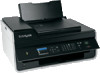
Lexmark S415 Support Question
Lexmark S415 Support Question
Find answers below for this question about Lexmark S415.Need a Lexmark S415 manual? We have 2 online manuals for this item!
Question posted by AETPE on May 6th, 2014
Printhead Error 2 Printer Stopped Before Copy Was Completed
Current Answers
Answer #1: Posted by TommyKervz on May 6th, 2014 12:12 PM

Member since:
January 10th, 2013 Points: 17,776,813

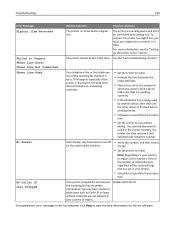
Printhead Errors on the S and Pro Series Products
Document ID:SO5018 02/08/12 Properties
Problem Unsupported Printhead;Printhead not supported by all in one; AIO; Printhead Error; An intermittent "Printhead error" message is displayed on the printer; There is a problem with the printhead; Printhead problem; Issue with printhead;
Solution
Overview
If you are having print quality issues or are experiencing printhead error messages, you may have been impacted from a printhead problem affecting a limited number of Lexmark devices.
IMPORTANT! The following steps require you to download a file to your computer or upload firmware to your printer. The time required to complete this procedure depends on the quality of your network connection and the size of the file involved.
Symptom
You may encounter the following error messages on your S or Pro Series printer:
- "Unsupported Printhead"
- "Printhead problem"
- "There is a problem with the printhead"
- "Printhead error"
Procedure
There are two troubleshooting guide options if you encounter any of the above-mentioned errors.
Option 1: Clean the Printhead
NOTE: Please read these steps thoroughly first, then perform the steps.
Step Action 1
Go to "Replace Printhead" in the menu on the printer.
For touchscreen-capable models:
- Touch Ink Level Icons (lower right corner).
- Press "More Options".
- Scroll menu down to "Replace Printhead".
- Press Wrench (setup/tool) button.
- Scroll to "Maintenance Menu".
- Check "OK"
- Scroll to "Replace Printhead".
- Check "OK"
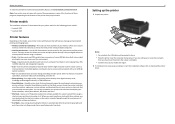
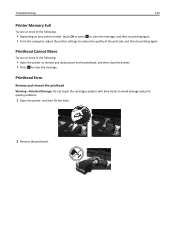
Open the printer and lift the latch.
Note: You will need to press or squeeze the front part of the carrier to release the latch. Your printer may not look exactly like the image above, but the printhead removal steps should be similar.
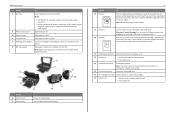
3Lift the printhead out of the printer carrier.
Important! Hold it by the sides as shown above, make sure not to touch the bottom and back areas.
4Clean the contacts on the printhead carrier. This is the frame (and associated contacts) within the printer itself from which you just removed the printhead.
Note: The contacts will look exactly as shown on the image below, but the one found inside the printer.
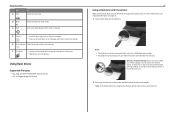
5Wipe the printhead contacts using a clean, lint-free cloth.
Important! Be careful not to touch the ink nozzles and especially DO NOT WIPE them.
6
Firmly re-insert the Printhead, and then close the latch until it clicks.
Note: Make sure you press down and back on the Printhead after you have latched it in to make certain that it is tight.
7Lower the latch and close the cover.
NOTE: If removing and reinserting the printhead does not resolve the error, then proceed to option 2.
Option 2: Firmware Update
It is recommended to update the printer firmware to the latest version, if not 11-25-10 or greater.
Step Action 1
Click here to view the steps on how to download the latest printer firmware.
Note: Go to this page for further information.
Still Need Help?
Please call from near the computer and printer in case the technician on the phone asks you to perform a task on this device.
If you require additional assistance, please contact Lexmark Technical Support. NOTE: When calling for support, you will need your printer/model type and serial number (SN).
Related Lexmark S415 Manual Pages


Similar Questions


I received the following messgae re: my Lexmark s515: "Printhead Error 2". Please help.

I have updated the software , followed all the steps and still have a printhead erro