Lexmark Pinnacle Pro901 Support Question
Lexmark Pinnacle Pro901 Support Question
Find answers below for this question about Lexmark Pinnacle Pro901.Need a Lexmark Pinnacle Pro901 manual? We have 5 online manuals for this item!
Question posted by Hometta on October 4th, 2013
Lexmark Pinnacle Pro901 How To Remove Printhead
The person who posted this question about this Lexmark product did not include a detailed explanation. Please use the "Request More Information" button to the right if more details would help you to answer this question.
Current Answers
Related Lexmark Pinnacle Pro901 Manual Pages
User's Guide - Page 2
...
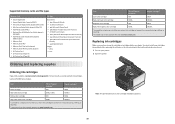
Ordering and replacing supplies 13
Ordering ink cartridges...13 Using genuine Lexmark ink cartridges...13 Replacing ink cartridges...14 Ordering paper and other supplies...15 Recycling Lexmark products...15
Using the printer control panel buttons and menus 16
Using the printer control panel...16 Understanding the home screen...17 Navigating menus using the touch...
User's Guide - Page 8
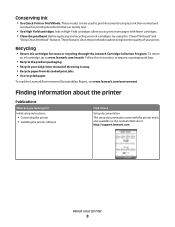
... cartridges allow you to print documents using the "Clean Printhead" and
"Deep Clean Printhead" features.
To read the Lexmark Environmental Sustainability Report, see www.lexmark.com/environment.
Recycling
• Return ink cartridges for ? Initial setup instructions:
• Connecting the printer • Installing the printer software
Find it away. • Recycle paper from...
User's Guide - Page 9
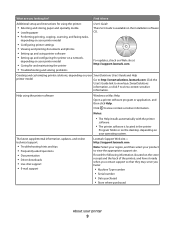
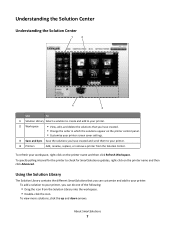
... to view context-sensitive information.
Creating and customizing printer solutions, depending on your SmartSolutions User's Guide and Help
printer model
Go to http://smartsolutions.lexmark.com.
Notes:
• The Help installs automatically with the printer
software.
• The printer software is available on your printer
9
Record the following information (located on the...
User's Guide - Page 11

...
5 6
7
9
8
Use the 1 Scanner unit
2 Ink cartridge access 3 Ethernet port 4 USB port
5 LINE Port
To
• Access the ink cartridges and printhead. • Remove paper jams.
Install, replace, or remove ink cartridges. Connect the printer to an active telephone line (through a standard wall jack, DSL filter, or VoIP adapter) to a power source. Warning-Potential Damage...
User's Guide - Page 12

Use the 8 Duplex unit
9 Printhead access
To
• Print on both sides of a sheet of paper. • Remove paper jams.
Install the printhead. Note: The carrier moves to the printhead access area when no printhead is installed in the printer.
About your printer
12
User's Guide - Page 14

... you have a new ink cartridge or cartridges before you begin.
Note: Install the new ink cartridges immediately after removing the old ones or the ink remaining in the printhead nozzles may dry out.
1 Turn on your printer. 2 Open the printer.
Note: The printhead moves to the cartridge installation position.
3 Press the release tab, and then...
User's Guide - Page 21

... Fedora 10 (Web only)1
1 The printer driver for this operating system is available only at http://support.lexmark.com. Using the printer software
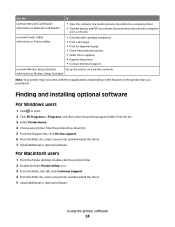
21 Using the Windows printer software
Software installed during initial installation, then...they can help you did not install these additional programs during printer installation
When you set up to install some additional programs. The following table ...
User's Guide - Page 24
...; Print an alignment page. • Clean the printhead nozzles. • Order ink or supplies. • Register the printer. • Contact technical support.
Lexmark Wireless Setup Assistant
Set up the printer on the features of a memory device inserted into a network printer.
• Transfer photos and PDF documents from the printer drop-down list. 5 From the Support tab...
User's Guide - Page 112
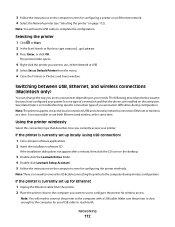
...Note: You will need to remove the USB cable connecting the printer to the computer for your printer for one active network connection (Ethernet...Lexmark Extras folder. 4 Double-click Lexmark Setup Assistant. 5 Follow the instructions on the computer screen for configuring a printer on an Ethernet network. 4 Select the Network printer (see "Selecting the printer" on page 112). Selecting the printer...
User's Guide - Page 113
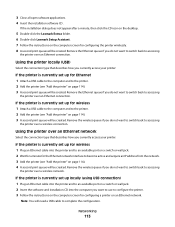
... printer over a wireless connection. Remove the Ethernet queue if you do not want to switch back to the printer. 2 Add the printer (see "Add the printer" on an Ethernet network.
If the printer ...the desktop.
5 Double-click the Lexmark Extras folder. 6 Double-click Lexmark Setup Assistant. 7 Follow the instructions on the computer screen for configuring a printer on page 114). 3 A second ...
User's Guide - Page 132
... or will temporarily power on the display.
Note: Do not remove the alignment page until printing is plugged into an electrical outlet. Using the printer control panel
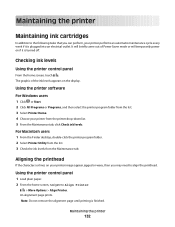
1 Load plain paper. 2 From the home screen, navigate to align the printhead. Checking ink levels
Using the printer control panel
From the home screen, touch .
Using the...
User's Guide - Page 136
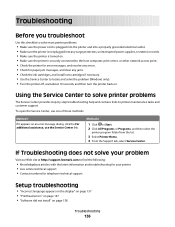
... host computer, print server, or other network access point. • Check the printer for error messages, and resolve any errors. • Check for telephone technical support
Setup troubleshooting
• "Incorrect language appears on the display" on page 137 • "Printhead errors" on page 137 • "Software did not install" on page 138...
User's Guide - Page 137
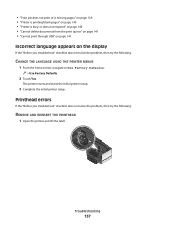
... language appears on the display
If the "Before you troubleshoot" checklist does not solve the problem, then try the following :
REMOVE AND REINSERT THE PRINTHEAD
1 Open the printer and lift the latch.
2
Troubleshooting
137
Printhead errors
If the "Before you troubleshoot" checklist does not solve the problem, then try the following :
CHANGE THE LANGUAGE...
User's Guide - Page 138
... support.
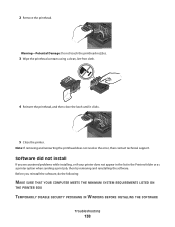
Before you encountered problems while installing, or if your printer does not appear in the list in the Printers folder or as a printer option when sending a print job, then try removing and reinstalling the software. Warning-Potential Damage: Do not touch the printhead nozzles.
3 Wipe the printhead contacts using a clean, lint-free cloth.
4 Reinsert the...
User's Guide - Page 139
...the printer.
3 Firmly plug the rectangular end of the printhead.
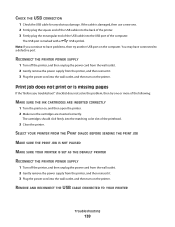
3 Close the printer. The cartridges should click firmly into the wall outlet, and then turn on the printer. SELECT YOUR PRINTER FROM...THE INK CARTRIDGES ARE INSERTED CORRECTLY
1 Turn the printer on the computer. REMOVE AND RECONNECT THE USB CABLE CONNECTED TO YOUR PRINTER
Troubleshooting
139
Print job does not print or is...
User's Guide - Page 140
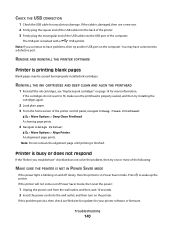
..., and then wait 10 seconds. 2 Insert the power cord into the USB port of the printer control panel, navigate to Deep Clean Printhead:
> More Options > Deep Clean Printhead A cleaning page prints.
4 Navigate to a defective port.
Note: Do not remove the alignment page until printing is marked with a
USB symbol.
If this problem persists, then...
Quick Reference - Page 10
... before you begin. For best results, use only. You must install new cartridges immediately after removing the old ones or the ink remaining in the printhead nozzles may dry out. 1 Turn on the Lexmark Web site at www.lexmark.com. Supported memory cards and file types
Memory Card
• Secure Digital (SD) • Secure...
Quick Reference - Page 14
... Windows users
1 With a document open , choose File > Print to visit.
Lexmark Printer Utility (not available in Mac OS X version 10.5 or earlier)
Note: This application is automatically installed with cartridge installation. • Print a test page. • Print an alignment page. • Clean the printhead nozzles. • Order ink or supplies. • Register the...
SmartSolutions User's Guide - Page 7
... Sync Save the solutions you have created and send them to your workspace, right-click on the printer name and then click Advanced. To add a solution to your printer.
To refresh your printer.
4 Printers
Add, rename, replace, or remove a printer from the Solution Library into the workspace. • Double-click the icon. To view more solutions...
SmartSolutions User's Guide - Page 10

... set the Date and Time on to the SmartSolutions Web site, then you set to the current date and
time for the Add Printer Wizard to work.
• You only need to add
it is your account. • To rename a printer, click Rename Printer in the printers area. • To remove a printer, click Remove Printer in the printers area.


