Get support for Lexmark Pinnacle Pro901

Lexmark Pinnacle Pro901 Support Question

Lexmark Pinnacle Pro901 Support Question

Find answers below for this question about Lexmark Pinnacle Pro901.
Need a Lexmark Pinnacle Pro901 manual? We have 5 online manuals for this item!
Question posted by Massifra on March 13th, 2014

How To Remove Printhead Pro 901

The person who posted this question about this Lexmark product did not include a detailed explanation. Please use the "Request More Information" button to the right if more details would help you to answer this question.

Current Answers

There are currently no answers that have been posted for this question.
Be the first to post an answer!

Remember that you can earn up to 1,100 points for every answer you submit. The better the quality of your answer, the better chance it has to be accepted.

Related Lexmark Pinnacle Pro901 Manual Pages

User's Guide - Page 11

... unit 2 Ink cartridge access 3 Ethernet port 4 USB port 5 LINE Port To • Access the ink cartridges and printhead. • Remove paper jams. Install, replace, or remove ink cartridges. Note: Remove the plug to access the port. 7 Power supply with port Connect the printer to a computer, a local network, an external DSL, or a cable modem. Connect your...
User's Guide - Page 12

Use the 8 Duplex unit 9 Printhead access To • Print on both sides of a sheet of paper. • Remove paper jams. Install the printhead. Note: The carrier moves to the printhead access area when no printhead is installed in the printer. About your printer 12
User's Guide - Page 14

... protective cap to avoid exposing the ink to air. 5 Close the printer. Note: Install the new ink cartridges immediately after removing the old ones or the ink remaining in the printhead nozzles may dry out. 1 Turn on your printer. 2 Open the printer. Note: The printhead moves to install the black cartridge. Use two hands to the...
User's Guide - Page 25

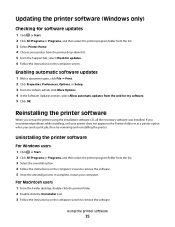
.... 3 Select the uninstall option. 4 Follow the instructions on the computer screen to remove the software. 5 Once the uninstall process in the Printers folder or as a printer option when you send a print job, then try removing and reinstalling the printer. If you set up the printer using the installation software CD, all the necessary software was installed.
User's Guide - Page 44

... Memory Device screen appears on the display. Notes: • If the printer does not recognize the memory device, then remove and reinsert it. • If a flash drive or a digital camera... • .xlsx (Microsoft Excel Open Document Format) • Memory Stick PRO • .pptx (Microsoft PowerPoint Open Document Format) • Memory Stick Duo (with adapter) • .wpd (WordPerfect)...
User's Guide - Page 132

...-down list. 5 From the Maintenance tab, click Check ink levels. Using the printer control panel 1 Load plain paper. 2 From the home screen, navigate to align the printhead. Maintaining the printer 132 It will temporarily power on the display. Using the printer software For Windows users 1 Click or Start. 2 Click All Programs or Programs, and...
User's Guide - Page 137

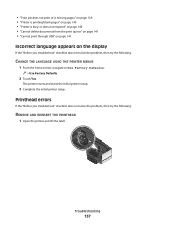
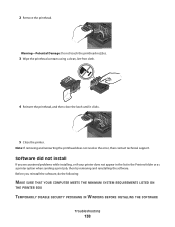
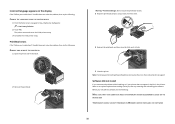
... language appears on the display If the "Before you troubleshoot" checklist does not solve the problem, then try the following : REMOVE AND REINSERT THE PRINTHEAD 1 Open the printer and lift the latch. 2 Troubleshooting 137 Printhead errors If the "Before you troubleshoot" checklist does not solve the problem, then try the following : CHANGE THE LANGUAGE...
User's Guide - Page 138

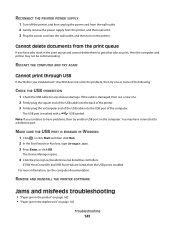
..., do the following: MAKE SURE THAT YOUR COMPUTER MEETS THE MINIMUM SYSTEM REQUIREMENTS LISTED ON THE PRINTER BOX TEMPORARILY DISABLE SECURITY PROGRAMS IN WINDOWS BEFORE INSTALLING THE SOFTWARE Troubleshooting 138 Note: If removing and reinserting the printhead does not resolve the error, then contact technical support. Warning-Potential Damage: Do not touch the...
User's Guide - Page 139

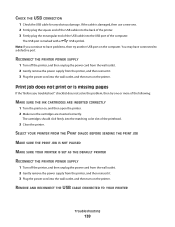
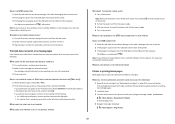
... MAKE SURE YOUR PRINTER IS SET AS THE DEFAULT PRINTER RECONNECT THE PRINTER POWER SUPPLY 1 Turn off the printer, and then unplug the power cord from the wall outlet. 2 Gently remove the power supply from the printer, and then reinsert it . 3 Plug the power cord into the USB port of the printhead. 3 Close the printer. CHECK THE USB...
User's Guide - Page 140

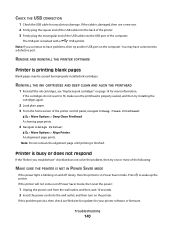
... outlet, and then turn on the computer. If the cartridges do not seem to fit, make sure the printhead is properly seated, and then try another USB port on the printer. Note: Do not remove the alignment page until printing is marked with a USB symbol. If this problem persists, then check our Web...
User's Guide - Page 141

The USB port is enabled. The Device Manager opens. 4 Click the plus sign (+) beside Universal Serial Bus controllers. REMOVE AND REINSTALL THE PRINTER SOFTWARE Jams and misfeeds troubleshooting • "Paper jam in the printer" on page 142 • "Paper jam in the print queue and cannot delete them to get other jobs to print...
User's Guide - Page 146

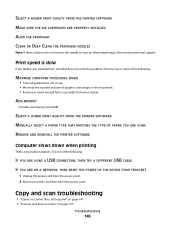
... down when printing These are possible solutions. SELECT A HIGHER PRINT QUALITY FROM THE PRINTER SOFTWARE MAKE SURE THE INK CARTRIDGES ARE PROPERLY INSTALLED ALIGN THE PRINTHEAD CLEAN OR DEEP CLEAN THE PRINTHEAD NOZZLES Note: If these solutions do not remove the streaks or lines on page 147 Troubleshooting 146 Print speed is slow If...
User's Guide - Page 147

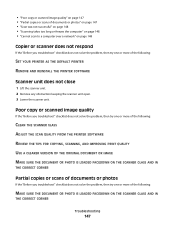
...or more of the following: CLEAN THE SCANNER GLASS ADJUST THE SCAN QUALITY FROM THE PRINTER SOFTWARE REVIEW THE TIPS FOR COPYING, SCANNING, AND IMPROVING PRINT QUALITY USE A CLEARER...or more of the following : SET YOUR PRINTER AS THE DEFAULT PRINTER REMOVE AND REINSTALL THE PRINTER SOFTWARE Scanner unit does not close 1 Lift the scanner unit. 2 Remove any obstruction keeping the scanner unit open. ...
Quick Reference - Page 6

... port 5 LINE Port To • Access the ink cartridges and printhead. • Remove paper jams. Install, replace, or remove ink cartridges. Using the printer control panel The following diagrams explain the sections of paper. • Remove paper jams. Use the 9 Printhead access To Install the printhead. If an icon is not displayed, then the function is not...
Quick Reference - Page 10

... new cartridges immediately after removing the old ones or the ink remaining in the printhead nozzles may dry out... refilling, or recycling. 2 Available only on your printer. 2 Open the printer. Supported memory cards and file types Memory Card •...• Memory Stick • Memory Stick PRO • Memory Stick Duo (with adapter) • Memory Stick PRO Duo (with adapter) • xD-Picture ...
Quick Reference - Page 11

... it is turned off. Note: Install the new ink cartridges immediately after removing the protective cap to avoid exposing the ink to : > More Options > Align Printer An alignment page prints. Cleaning the printhead nozzles Poor print quality is finished. Using the printer software For Windows users 1 Load plain paper. 2 Click or Start. 3 Click All...
Quick Reference - Page 14

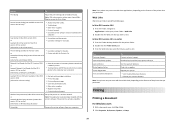
...• Print an alignment page. • Clean the printhead nozzles. • Order ink or supplies. • Register the printer. • Contact technical support. Web Links Web Links ...or earlier) (referred to as Wireless Setup Assistant) Uninstaller Remove the printer software from a memory device to : Applications > select your printer folder > Web Links 2 Double-click the Web Link that...
Quick Reference - Page 22

... problem, then try the following: REMOVE AND REINSERT THE PRINTHEAD 1 Open the printer and lift the latch. Warning-Potential Damage: Do not touch the printhead nozzles. 3 Wipe the printhead contacts using a clean, lint-free cloth. 4 Reinsert the printhead, and then close the latch until it clicks. 2 2 Remove the printhead. 5 Close the printer. Printhead errors If the "Before you reinstall...
Quick Reference - Page 23

... USB port of the printhead. 3 Close the printer. The USB port is missing pages If the "Before you continue to Align Printer: > More Options > Align Printer. 23 REMOVE AND REINSTALL THE PRINTER SOFTWARE Printer is not in the Default tab, select your printer does not appear on the printer. RECONNECT THE PRINTER POWER SUPPLY 1 Turn off the printer. Note: Make sure...
Quick Reference - Page 24

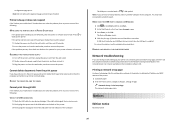
... the wall outlet, and then wait 10 seconds. 2 Insert the power cord into the wall outlet, and then turn on the printer. You may not be communicating. REMOVE AND REINSTALL THE PRINTER SOFTWARE Network troubleshooting If you troubleshoot" checklist does not solve the problem, then try another USB port on a network, print a network...

Similar Questions

Ask a New Question
Use the box below to post a new question about this Lexmark product .
Points & Prizes
  • You can earn points for nearly everything you do on HelpOwl.com
  • You can trade in those points for gift cards at leading retailers such as Amazon.com and Walmart
  • It's that simple!
See How it Works
Create a Free Account

Lexmark Manuals

Find free Lexmark Pinnacle Pro901 manuals and user guides available at ManualOwl.com. Try out our unique manual viewer allowing you to interact with manuals from directly within your browser!

Lexmark Reviews

View thousands of Lexmark user reviews and customer ratings available at ReviewOwl.com.

Contact Information

Complete Lexmark customer service contact information including steps to reach representatives, hours of operation, customer support links and more from ContactHelp.com.

Scoreboard Ratings

See detailed Lexmark customer service rankings, employee comments and much more from our sister site.

Lexmark Recalls

Find comprehensive Lexmark recall information updated hourly on RecallOwl.com.