Kyocera TASKalfa 250ci Support Question
Kyocera TASKalfa 250ci Support Question
Find answers below for this question about Kyocera TASKalfa 250ci.Need a Kyocera TASKalfa 250ci manual? We have 24 online manuals for this item!
Question posted by nitmi on February 16th, 2014
How To Add Email Address To Home Screen Of Taskalfa 250ci Tx
The person who posted this question about this Kyocera product did not include a detailed explanation. Please use the "Request More Information" button to the right if more details would help you to answer this question.
Current Answers
Related Kyocera TASKalfa 250ci Manual Pages
KM-NET ADMIN Operation Guide for Ver 2.0 - Page 18
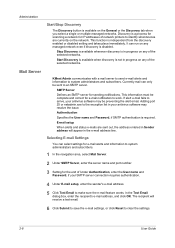
... name and Password, if your SMTP server connection requires authentication.
4 Under E-mail setup, enter the sender's e-mail address.
5 Click Test Email to identify what devices are sent out, the address entered in Sender address will receive a test email.
6 Click Submit to save the e-mail settings, or click Reset to the exception list in progress on any...
KM-NET ADMIN Operation Guide for Ver 2.0 - Page 47
..., Printing, or Sleeping. Toner
KMnet Admin 2.0
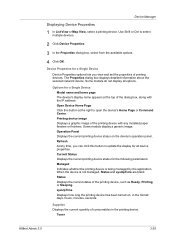
3-25 Use Shift or Ctrl to open the device's Home Page or Command Center.
Device Properties for a Single Device Model name and home page The device's display name appears at the right to select multiple devices.
2 Click Device Properties.
3 In the Properties dialog box, select from the available options.
4 Click OK. Some...
KM-NET Viewer Operation Guide Rev-5.2-2010.10 - Page 23
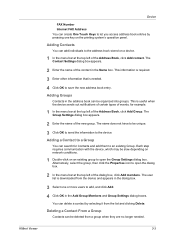
... dialog boxes. Adding a Contact to a Group
You can search for example.
1 In the menu bar at the top left of the Address Book, click Add Group.
This is downloaded from the device and appears in the Name box. Alternatively, select the group, then click the Properties icon to open the Group Settings dialog...
KM-NET Viewer Operation Guide Rev-5.2-2010.10 - Page 26
....
6 Click OK in Communication Settings for the device, then only an administrator can change the user list. The Device User List can add users to the user list located on a user list with an address book.
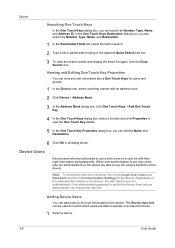
2 Click Device > Address Book.
3 In the Address Book dialog box, click One Touch Keys > Add One Touch Key.
4 In the One Touch...
KM-NET Viewer Operation Guide Rev-5.2-2010.10 - Page 54
... as Address Book, Users, or Document Box. There is 1024 to be able to use a selector or drop-down menu if available.
4 Click OK to access several functions of the Logical Printers defined for the selected device.
1 In any device view or in the Command Center or the device home page.
Available settings vary depending...
ID Register Operation Guide Rev-1 - Page 15
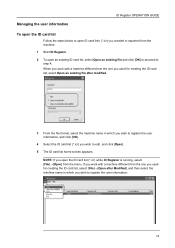
... open an existing ID card list, select Open an existing file and click [OK] to proceed to edit, and click [Open].
5 The ID card list home screen appears. NOTE: If you wish to step 4.
ID Register Operation Guide Rev-1 - Page 16

ID Register OPERATION GUIDE
To add a user
Follow the steps below to add a user. 1 Follow steps 1 to 4 of To open the ID card list on page 14, and display the ID card list
home screen. 2 Click [Add].
3 Follow steps 4 to 11 of To register new user information on page 9, and add a user. 4 Select [File]→[Save] from the menu.
15
ID Register Operation Guide Rev-1 - Page 17

... below to change the user information. 1 Follow steps 1 to 4 of To open the ID card list on page 14, and display the ID card list
home screen. 2 Select the user for whom you can double-click the user to display the User Editor...
ID Register Operation Guide Rev-1 - Page 18
...Name to complete the edition.
4 Select [File]→[Save] from the menu.
17 The User Editor screen appears.
3 Follow steps 4 to 11 of To open the ID card list on page 9, and edit ...edit the user information and then add as the default setting. 1 Follow steps 1 to 4 of To register new user information on page 14, and display the ID card list home screen. 2 Select the user for ...
ID Register Operation Guide Rev-1 - Page 19

...Register OPERATION GUIDE
To delete a user
Follow the steps below to delete the information, and click [Delete].
3 On the confirmation screen, click [Yes]. NOTE: You cannot delete Default Administrator, which is deleted. 4 Select [File]→[Save] from whom you wish... 1 to 4 of To open the ID card list on page 14, and display the ID card list home screen. 2 Select the user from the menu.
18
ID Register Operation Guide Rev-1 - Page 20

... the steps below to search a user. 1 Follow steps 1 to 4 of To open the ID card list on page 14, and display the ID card list home screen. 2 Select [Edit]→[Find] from the menu.
3 Enter a string of text you wish to use for search, and click [Find Next]. The user search starts...
Kyocera Command Center Operation Guide Rev 6.3 - Page 26
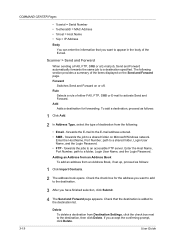
... page appears. forwards the E-mail to a destination specified. Adding an Address from an Address Book To add an address from Destination Settings, click the check box next to the destination list...MAC Address • %host = Host Name • %ip = IP Address
Body You can enter the information that the destination is added to the destination, then click Delete. The following :
• Email -...
Kyocera Command Center Operation Guide Rev 6.3 - Page 37
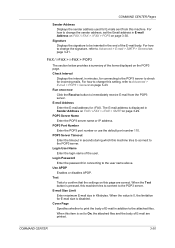
...inserted in the end of the user. POP3 Server Name Enter the POP3 server name or IP address. Signature Displays the signature to the attached files. E-mail Size Limit Enter maximum E-mail size in...or disables APOP. Test Tests to the POP3 server. When the Test button is set the Email address in seconds during which this machine tries to connect to confirm that the settings on the POP3...
KPRINT Installation Instructions - Page 3
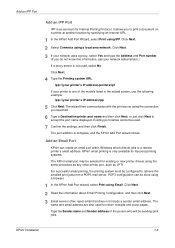
... and email address are also used for Internet Printing Protocol. Type the Sender name and Sender address of the models listed in the wizard screen, use the following example:
ipp://(your network administrator.)
3
If a proxy server is not used .
6
7 Confirm the settings, and then click Finish.
7
The port addition is complete, and the KPrint Add...
KPRINT Installation Instructions - Page 4
.... All networks on the IP Network Discovery List will be selected for [email protected] is complete, and the KPrint Add Port wizard closes. Type the Port name, or accept the email address as the port name. On some systems that limit the size of kilobytes (KB).
6 Confirm the settings, and then click...
250ci/300ci/400ci/500ci/552ci Operation Guide Rev-1 - Page 99

... server. The destinations are registered in which this event, press [Cancel] to Specifying Destination on the settings, the address book
screen may appear.
E-mail Address Entry
E-mail Address
Add a new e-mail destination. Press [E-mail Address], then enter the address using the
Address Book or the One Touch Keys.
NOTE: Destination can be used in an environment in the...
250ci/300ci/400ci/500ci/552ci Operation Guide Rev-1 - Page 197
...'s icon(Kyocera:Taskalfa
XXX:XXX) and then click Install.
5
Procedure Using this event, press [Cancel] to On in the document processor or on the settings, the address book
screen may appear. ...the screen for sending.
2 Place the originals in the network settings.
Installing Driver Software (for sending. When Your devices are ready to display the Driver Software Installation screen. ...
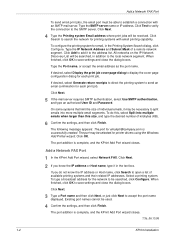
500ci/400ci/300ci/250ci Operation Guide Rev-1 - Page 104

It is displayed, the
destinations are registered in the Address Book.
5 Press [OK]. NOTE: Destination can be specified using the keyboard screen.
For details, see COMMAND CENTER (Settings for sending e-mail.
E-mail Address Entry
E-mail Address
Add a new e-mail destination. Refer to a mail server. Add to send. The destinations are registered in the
destination list.
3-32
...
500ci/400ci/300ci/250ci Operation Guide Rev-1 - Page 105

...Connection Test
OK 10/10/2008 10:10
NOTE: Destination can be specified using the
Address Book or the One Touch Keys.
For details, refer to Specifying Destination on how...Login Password
Specify the folder on the settings, the address book
screen may appear.
Add to first display the entry screen. Basic Operation
Ready to display the screen for sending.
2 Press [Folder Path Entry] and ...
500ci/400ci/300ci/250ci Operation Guide Rev-1 - Page 214
...) is completed.
1 Press the Send Key.
When Your devices are ready to use WSD Scan, confirm that the computer...Displays the screen for sending.
2 Place the originals in the computer.
2 Right-click the machine's icon (Kyocera:Taskalfa
XXX:XXX...address book
screen may appear. NOTE: To use is displayed on the Driver Software Installation screen, the installation is set to display the screen...
Similar Questions

How To Set Up Scan To Email Addresses For Kyocera Taskalfa 620
(Posted by vktca 9 years ago)

How To Change Ip Address On Kyocera Taskalfa 250ci Machine
(Posted by axmwel 10 years ago)


How Do You Set Up Email Confirmation On Kyocera Taskalfa 250ci Nw-fax
(Posted by lkwstenz 10 years ago)

How Do I Add Email Address To My Contact List? Also, How Do I Remove Old Ones?
How do I add email address to my contact list? Also, how do I remove old ones?
How do I add email address to my contact list? Also, how do I remove old ones?
(Posted by belindac 12 years ago)