Get support for Kodak ESP 7250 - All-in-one Printer

Kodak ESP 7250 Support Question

Kodak ESP 7250 Support Question

Find answers below for this question about Kodak ESP 7250 - All-in-one Printer.
Need a Kodak ESP 7250 manual? We have 4 online manuals for this item!
Question posted by steeltj on May 6th, 2014

Printer Tray Esp 7200 Won't Close

The person who posted this question about this Kodak product did not include a detailed explanation. Please use the "Request More Information" button to the right if more details would help you to answer this question.

Current Answers

There are currently no answers that have been posted for this question.
Be the first to post an answer!

Remember that you can earn up to 1,100 points for every answer you submit. The better the quality of your answer, the better chance it has to be accepted.

Related Kodak ESP 7250 Manual Pages

User guide - Page 5

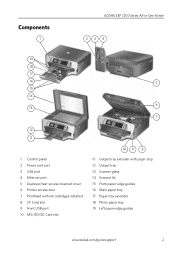
... ESP 7200 Series All-in-One Printer 23 4 19 18 17 16 5 15 14 6 13 7 12 11 1 Control panel 2 Power cord port 3 USB port 4 Ethernet port 5 Duplexer/rear-access cleanout cover 6 Printer access door 7 Printhead with ink cartridges installed 8 CF Card slot 9 Front USB port 10 MS/XD/SD Card slot 10 9 8 11 Output tray...
User guide - Page 7

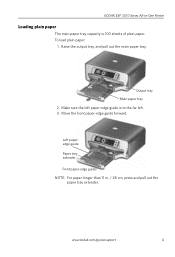
KODAK ESP 7200 Series All-in . / 28 cm, press and pull out the paper tray extender. To load plain paper: 1. www.kodak.com/go/aiosupport 4 Move the front paper-edge guide forward. Raise the output tray, and pull out the main paper tray. Make sure the left paper-edge guide is 100 sheets of plain paper...
User guide - Page 9

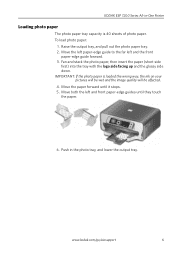
... paper, then insert the paper (short side first) into the tray with the logo side facing up and the glossy side down. IMPORTANT...tray, and pull out the photo paper tray. 2. Push in -One Printer Loading photo paper The photo paper tray capacity is loaded the wrong way, the ink on your pictures will be wet and the image quality will be affected. 4. KODAK ESP 7200 Series All-in the photo tray...
User guide - Page 13

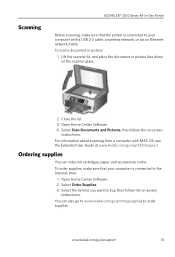
... cartridges, paper, and accessories online. Close the lid. 3. Select Scan Documents and Pictures, then follow the on the scanner glass. 2. To order supplies, make sure that your computer is connected to the Internet, then: 1. www.kodak.com/go /esp7250support. Scanning KODAK ESP 7200 Series All-in-One Printer Before scanning, make sure that the...
User guide - Page 15

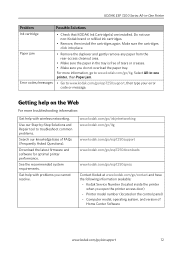
KODAK ESP 7200 Series All-in -one printer, then Paper jam. Download the latest firmware and software for optimal printer performance. Get help with wireless networking. Computer model, operating system, and version of FAQs (Frequently Asked Questions). For more troubleshooting information: Get help on the control panel) - Select All-in -One Printer Problem Possible Solutions Ink...
Extended user guide - Page 21

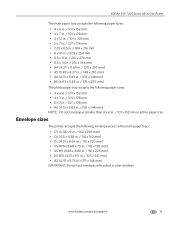
KODAK ESP 7200 Series All-in-One Printer The main paper tray accepts the following paper sizes: • 4 x 6 in. / 101 x 152 mm • 4 x 7 in. / ...) • US #10 (4.13 x 9.5 in. / 105 x 241 mm) • A2 (4.37 x 5.75 in either paper tray. www.kodak.com/go/aiosupport 15 Envelope sizes The printer accepts the following paper sizes: • 4 x 6 in. / 101 x 152 mm • 4 x 7 in. / 101...
Extended user guide - Page 23

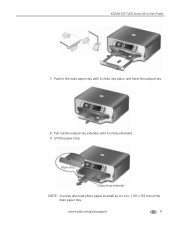
Push in the main paper tray. www.kodak.com/go/aiosupport 17 Pull out the output tray extender until it is fully extended. 9. Paper stop . KODAK ESP 7200 Series All-in-One Printer 7. Lift the paper stop Output tray extender NOTE: You may also load photo paper as small as 4 x 6 in. / 101 x 152 mm in the main paper tray until it clicks into place, and lower the output tray. 8.
Extended user guide - Page 25

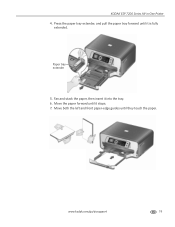
Paper tray extender 5. Fan and stack the paper, then insert it is fully extended. Move the paper forward until they touch the paper. Move both the left and front paper-edge guides until it stops. 7. KODAK ESP 7200 Series All-in-One Printer 4. www.kodak.com/go/aiosupport 19 Press the paper tray extender, and pull the paper tray forward until it into the tray. 6.
Extended user guide - Page 27

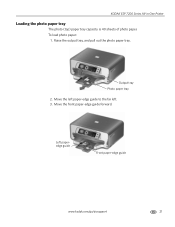
KODAK ESP 7200 Series All-in-One Printer Loading the photo paper tray The photo (top) paper tray capacity is 40 sheets of photo paper. Output tray Photo paper tray 2. Move the front paper-edge guide forward. Left paperedge guide Front paper-edge guide www.kodak.com/go/aiosupport 21 Move the left paper-edge ...
Extended user guide - Page 29

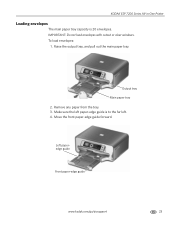
KODAK ESP 7200 Series All-in-One Printer Loading envelopes The main paper tray capacity is to the far left. 4. IMPORTANT: Do not load envelopes with cutout or clear windows. Remove any paper from the tray. 3. Move the front paper-edge guide forward. Raise the output tray, and pull out the main paper tray. Left paperedge guide Front...
Extended user guide - Page 31

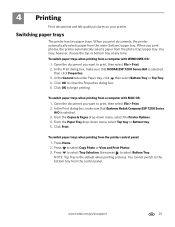
..., then click Properties. 3. 4 Printing Print documents and lab-quality pictures on your printer. To switch paper trays when printing from a computer with MAC OS: 1. Press to close the Properties dialog box. 5. In the Print dialog box, make sure that KODAK ESP 7200 Series AiO is the default when printing pictures. Open the document you want...
Extended user guide - Page 32

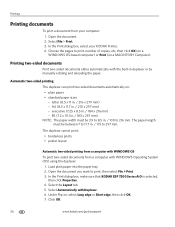
... or by manually rotating and reloading the paper. Load plain paper into the paper tray. 2. Select the Layout tab. 5. Under Flip on : • plain paper...Printer. 4. Open the document you want to print, number of copies, etc, then click OK (on a WINDOWS OS-based computer) or Print (on a MACINTOSH Computer). Open the document. 2. In the Print dialog box, make sure that KODAK ESP 7200...
Extended user guide - Page 33

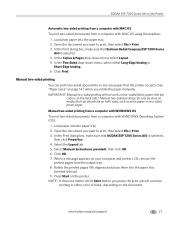
... on your computer and printer LCD, remove the printed pages from a computer with WINDOWS OS To print two-sided documents from the output tray. 8. NOTE: It ...Printer Automatic two-sided printing from a computer with MAC OS To print two-sided documents from a computer with MAC OS using the duplexer: 1. Open the document you want to print, then select File > Print. 3. KODAK ESP 7200...
Extended user guide - Page 34

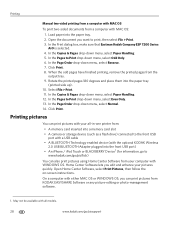
...Rotate the printed pages 180 degrees and place them into the paper tray. 2. Select File > Print. 11. Printing pictures You can print... with all -in-one printer from: • A memory card inserted into a memory card slot • A camera or storage device (such as a flash ...In the Print dialog box, make sure that Eastman Kodak Company ESP 7200 Series AiO is selected. 4. In the Copies & Pages drop...
Extended user guide - Page 37

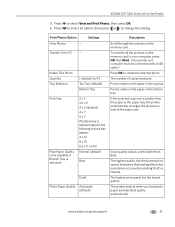
... on the memory card. Good quality output; eliminates the banding effect that print. KODAK ESP 7200 Series All-in the paper tray, the printer automatically arranges the pictures to best fit the paper size. Rotate This Photo Quantity Tray Selection 1 (default) to 99 Top Tray (default) Bottom Tray Print Size Plain Paper Quality (only available if Bottom...
Extended user guide - Page 39

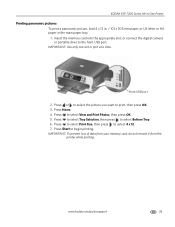
... To prevent loss of data from your memory card, do not remove it from the printer while printing. www.kodak.com/go/aiosupport 33 Front USB port 2. Press Home. 4.... USB port. Press to select Bottom Tray. 6. Press to select Tray Selection, then press to select View and Print Photos, then press OK. 5. KODAK ESP 7200 Series All-in-One Printer Printing panoramic pictures To print a panoramic...
Extended user guide - Page 45

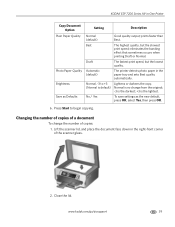
Close the lid. eliminates the banding effect that sometimes occurs when printing Draft ...prints faster than Best. Photo Paper Quality Automatic (default) The printer detects photo paper in -One Printer Copy Document Option Setting Description Plain Paper Quality Normal (default) Good quality output; KODAK ESP 7200 Series All-in the paper tray and sets Best quality automatically.
Extended user guide - Page 47

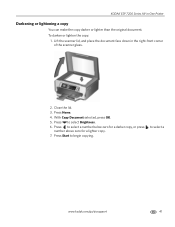
..., press OK. 5. To darken or lighten the copy: 1. Close the lid. 3. Press to begin copying. Press to select a www.kodak.com/go/aiosupport 41 Press Home. 4. to select a number below zero for a darker copy, or press number above zero for a lighter copy. 7. KODAK ESP 7200 Series All-in the right-front corner of...
Extended user guide - Page 49

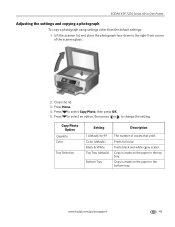
... in the bottom tray. Close the lid. 3. Copy Photo Option Quantity Color Tray Selection Setting Description 1 (default) to change the setting. Lift the scanner lid, and place the photograph face down in -One Printer Adjusting the settings and copying a photograph To copy a photograph using settings other than the default settings: 1. KODAK ESP 7200 Series All-in...
Extended user guide - Page 51

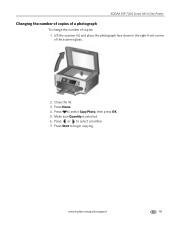
.... 7. Lift the scanner lid, and place the photograph face down in -One Printer Changing the number of copies of a photograph To change the number of the scanner glass. 2. Close the lid. 3. Press to select Copy Photo, then press OK. 5. KODAK ESP 7200 Series All-in the right-front corner of copies: 1. Make sure Quantity...

Similar Questions

Esp 7200 Printer
error code 28 did a system restore and then undid restore
(Posted by barbcee409 9 years ago)
How To Install My Printer (kodak Esp 5250) To My New Laptop Which Has Window 8
How do I install my printer KODAK ESP 5250 on my new laptop computer which has WINDOW 8 installed? I...
(Posted by roberthaney102 10 years ago)
Ask a New Question
Use the box below to post a new question about this Kodak product .
Points & Prizes
  • You can earn points for nearly everything you do on HelpOwl.com
  • You can trade in those points for gift cards at leading retailers such as Amazon.com and Walmart
  • It's that simple!
See How it Works
Create a Free Account

Kodak Manuals

Find free Kodak ESP 7250 - All-in-one Printer manuals and user guides available at ManualOwl.com. Try out our unique manual viewer allowing you to interact with manuals from directly within your browser!

Kodak Reviews

View thousands of Kodak user reviews and customer ratings available at ReviewOwl.com.

Contact Information

Complete Kodak customer service contact information including steps to reach representatives, hours of operation, customer support links and more from ContactHelp.com.

Scoreboard Ratings

See detailed Kodak customer service rankings, employee comments and much more from our sister site.