KitchenAid KFRS365TSS Support Question
KitchenAid KFRS365TSS Support Question
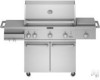
Find answers below for this question about KitchenAid KFRS365TSS - Outdoor 36" Gas GRI.Need a KitchenAid KFRS365TSS manual? We have 2 online manuals for this item!
Question posted by danbancroft2 on June 24th, 2017
Cannot Find Grill Covers To Fit Older Kitchenaid Grills
My KitchenAid gas grill is 10 years old...with a depth of 28.5inches....Most grils are no 21 -25 inches deep...cannot find a grill cover...Any suggestions/
Current Answers
Answer #1: Posted by Odin on June 24th, 2017 11:59 AM
Odin

Member since:
April 10th, 2010 Points: 41,236,680

Member since:
April 10th, 2010 Points: 41,236,680
See https://www.repairclinic.com/Shop-For-Parts/b121c11d956819/Model-KFRS365TSS00-Kitchenaid-Cap-Lid-Cover-Parts. To be sure this cover will fit, however, call the number at the top before ordering.
Hope this is useful. Please don't forget to click the Accept This Answer button if you do accept it. My aim is to provide reliable helpful answers, not just a lot of them. See https://www.helpowl.com/profile/Odin.
Related KitchenAid KFRS365TSS Manual Pages
Parts List - Page 1
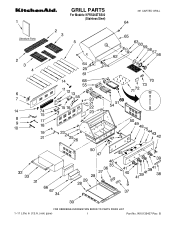
W10136407 Rev. B GRILL PARTS
For Models: KFRS365TSS00 (Stainless Steel)
36" CARTED GRILL
KitchenAid
1−11 Litho In U.S.A. (rek) (psw)
1
Part No.
Parts List - Page 2

... W10137901 Valve, Sear Brnr
2
W10136407 Part
No. Part No. DESCRIPTION
21 W10128636 Bracket, Warming Rack
22 W10128637 Cover, Access Panel
23 W10128638 Clip, Wire 24 W10136420 Hood Assy 25 W10128640 Hole Plug 26 W10137047 Panel, Side Left 27 W10128644 Bracket, Grease
Tray (Right) 28 W10128655 Roller, Drip Tray 29 W10128656 Drip Tray Assy
(Includes...
Installation Instructions - Page 1
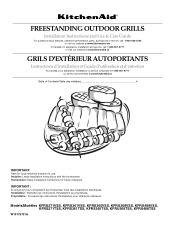
...FREESTANDING OUTDOOR GRILLS
Installation Instructions and Use & Care Guide
For questions about features, operation/performance, parts, accessories or service, call: 1-800-422-1230 or visit our website at www.kitchenaid.com...
In Canada, for assistance, installation and service, call: 1-800-807-6777 or visit our website at www.KitchenAid.ca
GRILS D'EXTÉRIEUR ...
Installation Instructions - Page 5
... some models) ■ Vinyl grill cover (on some models. Rotisserie A 6" (15.2 cm) minimum clearance is an accessory on the back of combustion and ventilation air. Do not store combustible materials near combustible materials. A grounded, 3-prong outdoor outlet is located on some models)
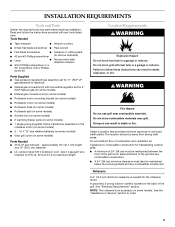
Parts Needed ■ 20 lb LP gas fuel tank - INSTALLATION REQUIREMENTS
Tools...
Installation Instructions - Page 6

....7 cm)
50¹⁄₈" (127.2 cm)
28¹⁄₂" (72.4 cm) front of handle to back of the equipment and approved for outdoor use with a W-A marking. Not available on 27" ...cm) 36" (91.4 cm) 48" (121.9 cm)
C. Ground prong
6
Recommended Ground Method
The outdoor grill, when installed, must be obtained from the outlet when not in any outdoor cooking gas appliance ...
Installation Instructions - Page 7
... gas supplier.
It is equipped for elevations up to 35.5 cm) WCP maximum. Mounting hole C. Gas Supply Requirements
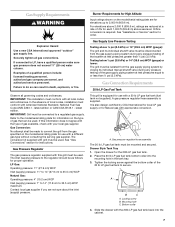
WARNING
Explosion Hazard Use a new CSA International approved "outdoor" gas ... WCP Natural Gas: Operating pressure: 4" (10.2 cm) WCP Inlet (supply) pressure: 7" to 14" (17.8 cm to 2,000 ft (609.6 m). Gas Connection Requirements
20 lb LP Gas Fuel Tank
This grill is also ...
Installation Instructions - Page 11
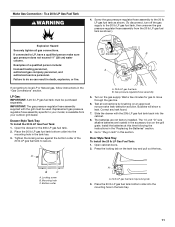
.../hose assembly to the 20 lb LP gas fuel tank, then unscrew the gas pressure regulator/hose assembly from your outdoor grill dealer.
Replacement gas pressure regulator/hose assembly specific to your model, is available from the 20 lb LP gas fuel tank as shown. (To disconnect, turn off the gas supply to the 20 lb LP...
Installation Instructions - Page 12
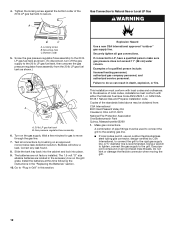
... the "Replacing the Batteries" section.
10. This installation must conform with local codes and ...gas supply to the existing gas line.
■ If local codes permit, use an outdoor flexible stainless steel tubing gas connector, design-certified by brushing on the grill grate. Wait a few minutes for gas to LP, have a qualified person make sure gas pressure does not exceed 11" (28...
Installation Instructions - Page 14
... nut driver
■ 10 mm socket and wrench or 10 mm nut driver
■ Thin flat-blade screwdriver
■ Pliers
■ Pipe thread sealant certified for information on the back of the grill after plugging the grill into the outlet.
■ Use only a Ground Fault Interrupter (GFI) protected circuit with this outdoor cooking gas appliance.
■...
Installation Instructions - Page 18

...burner top with LP gas at connections where required. Bubbles will feel it drop into the deep notch. With a ...cover aside. Also record the conversion date and the technician/company that is located inside the grill cabinet on the gas...10 mm socket and wrench or 10 mm nut driver to reattach the igniter and sear burner plate.
9. 4. Align the notches in the gas supply line near the grill...
Installation Instructions - Page 20
...C
D
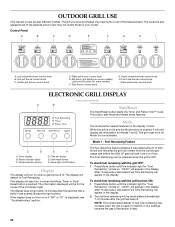
A. The display will also turn on when a gas burner is pushed, it will go blank 10 minutes after the grill has been lit. Fuel Remaining Feature
The fuel remaining feature ... the display control. Left rotisserie burner control knob B. Left grill burner control knob C.
OUTDOOR GRILL USE
This manual covers several different models. The locations and appearances of the features ...
Installation Instructions - Page 22

...covered when not in use. WARNING
Fire Hazard Do not use grill near grill.
Prepare the Gas Supply
1.
Turn 20 lb LP gas fuel tank valve and all of the way in when using gas... a garage or indoors. For outdoor grills using the grill. Inspect the 20 lb LP Gas Fuel Tank Supply Hose Inspect the gas pressure regulator/hose assembly before using a 20 lb LP gas fuel tank: Slowly open tank ...
Installation Instructions - Page 23
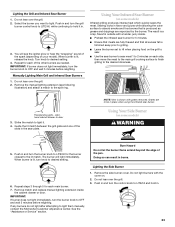
...Push in .
3. Turn knob to light them manually, contact the KitchenAid Customer eXperience Center. Do not lean over the grill. 3. Freestanding grills -
Grates are fully thawed and that is lit, turn the burner ... any burners do not light after attempting to desired setting.
4. Remove the side burner cover. IMPORTANT: If burner does not light immediately, turn the control knob to be in...
Installation Instructions - Page 29

...while larger quantities may be purchased from the KitchenAid® Customer eXperience Center. Slow Cook Function...warming drawer. Follow the cookware manufacturer's instructions. Cover dough with lightly oiled waxed paper and place
...rack will fit from the bottom of times the drawer is installed outdoors, the SLOW...) from front to back or side to 10 hours for cooking times are 2 settings, Hi...
Installation Instructions - Page 30
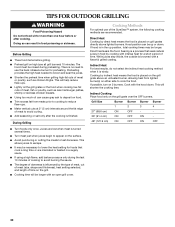
... an open grill cover. Direct Heat
Cooking by indirect heat means the food is finished. Direct heat sears the food. Cooking by direct heat means the food is placed on grill grates directly above..., total cooking times may be closed during the last 10 minutes of cooking to lower the heat setting for preheating. TIPS FOR OUTDOOR GRILLING
WARNING
Food Poisoning Hazard Do not let food sit for...
Installation Instructions - Page 33
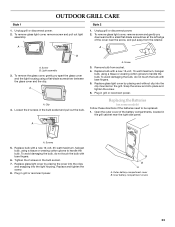
... the left edge of the battery compartments, located in grill or reconnect power.
Replace bulb with a new 12-volt, 10-watt maximum, halogen
bulb, using a tissue or wearing cotton gloves to be replaced. 1. Replacing the Batteries
(on the grill. Open the outer cover of the cover near the right side panel. Replace bulb with bare...
Installation Instructions - Page 34

...grain. IMPORTANT: Make sure gas supply is cool. Always rub...grill cover, available from the burners. STAINLESS STEEL
IMPORTANT: To avoid damage to -clean areas, use Heavy Duty Degreaser Part Number 31552, a commercial degreaser designed for stainless steel. Use the brass bristle brush to order. EXTERIOR
The quality of grain to avoid scratching or damaging the
surface. ■ KitchenAid...
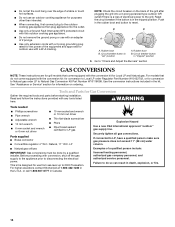
Installation Instructions - Page 38
... the 4 hinge screw mounting holes through 3 for outdoor use, marked W-A, with electronic grill display
■ Was a Flame Time™ cycle...9632; Is the main or regulator gas shutoff valve in areas not covered by skin. Reset the circuit breaker....show in order to vent the moisture.
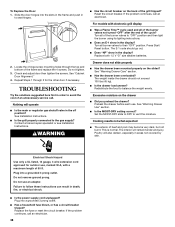
TROUBLESHOOTING
Try the solutions suggested here first in the display? If the problem continues, call...
Installation Instructions - Page 39
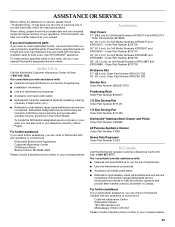
... are trained to your nearest KitchenAid designated service center.
For further assistance If you need further assistance, you use only factory specified parts.
Accessories
Vinyl Covers 27" (68.6 cm) for Grill Model Numbers KFRS361T and KFRU361V - Order Part Number 8212703
Rotisserie Kits 27" (68.6 cm): Order Part Number KFKU271TSS 36" (91.4 cm): Order Part...
Installation Instructions - Page 40
... 1-800-422-1230.
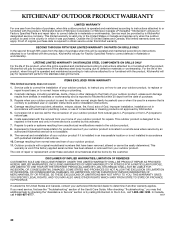
The removal and reinstallation of your outdoor product from natural gas to determine if another warranty applies. If you may find
additional help by checking the "Assistance or Service" section or by a KitchenAid designated service company. KITCHENAID® OUTDOOR PRODUCT WARRANTY
LIMITED WARRANTY
For one year from the date of purchase, when this...
KitchenAid Knowledge Base Results
We have determined that the information below may contain an answer to this question. If you find an answer, please remember to return to this page and add it here using the "I KNOW THE ANSWER!" button above. It's that easy to earn points!-
Refrigerator unlevel - Side by side refrigerator
...kitchen cabinet. Side by side refrigerator versus a standard-depth refrigerator. A cabinet-depth or counter-depth refrigerator is intended to level the cabinet. A standard-depth refrigerator is approximately 31 3/8" deep, so it easier to adjust the tilt of the grille toward you do I level my refrigerator? Leveling a cabinet-depth, side by side refrigerator Place a level inside the... -
Filter is difficult to remove - Side by side refrigerator
...grille and open the refrigerator doors for easier access. For Style 1 filters, use . However, it difficult to remove - Email Your Feedback How old... to remove due to only use handles that are covered so you Not Helpful Helpful Answers others found helpful... in the base grille, directly below the refrigerator doors. Less than one year 1 to unlatch the... -
Doors uneven/not properly aligned - Side by side refrigerator
...depth or counter-depth refrigerator is level. Turn in a standard kitchen. Adjusting the doors of a cabinet-depth... standard-depth refrigerator is approximately 31 3/8" deep and ...side refrigerator versus a standard depth refrigerator. If the door...standard-depth, click here If the refrigerator is cabinet-depth,...depth...is approximately 27 1/2" deep, not including the handle...a standard-depth side by ...
Similar Questions


What Parts Are Needed To Get The Grill To Light Again? Can Anyone Help?
(Posted by monaporche 10 years ago)
Gas Grill Kbsli367tss.Does Not Light Or Ignite On Two Burners.We Need Parts?
(Posted by monaporche 10 years ago)

Flames Shrink With More Burners On
I have a KitchenAid KFSR365TSS grill that loses "power" when more burners are turned on. I have trie...
I have a KitchenAid KFSR365TSS grill that loses "power" when more burners are turned on. I have trie...
(Posted by jpoznik 11 years ago)

Outdoor Grill
I have a Kitchenaid outdoor grill Model# KBNU361VSS. I have a 15 LB propane tank hooked in and the c...
I have a Kitchenaid outdoor grill Model# KBNU361VSS. I have a 15 LB propane tank hooked in and the c...
(Posted by Dowboy 12 years ago)