KitchenAid KBHS109SSS Support Question
KitchenAid KBHS109SSS Support Question
Find answers below for this question about KitchenAid KBHS109SSS - 30 in. 1.4 cu. Ft. Microwave Oven.Need a KitchenAid KBHS109SSS manual? We have 3 online manuals for this item!
Question posted by Mikegelb on October 16th, 2012
Please Provide Exact Location For Electrical Outlet For This Item Thanks
The person who posted this question about this KitchenAid product did not include a detailed explanation. Please use the "Request More Information" button to the right if more details would help you to answer this question.
Current Answers
Related KitchenAid KBHS109SSS Manual Pages
Use & Care Guide - Page 3
... injury, and tell you to properly grounded outlet. s As with the provided Installation Instructions. This symbol alerts you what can be followed, including the following:
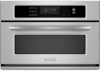
WARNING: To reduce the risk of burns, electric shock,
fire, injury to persons, or exposure to heat, cook, or dry food.
s The microwave oven must be heated in the "PAN...
Use & Care Guide - Page 4
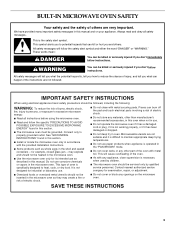
... properly and that there is removed from paper or plastic bags before placing bags in the microwave oven for electrical connections. Have a qualified electrician check your electrical system.
GROUNDING INSTRUCTIONS
For a permanently connected microwave oven:
The microwave oven must be connected to a grounded, metallic, permanent wiring system, or an equipment grounding conductor should not...
Use & Care Guide - Page 5
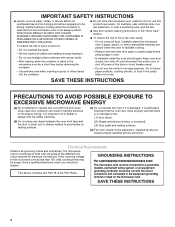
... Grid
The convection grid provides optimal heat circulation for the crisper pan. Electronic oven control
B. See "Assistance or Service" to the oven could
result if someone ...microwave oven without having the turntable in the oven. s Grid will become hot. s Do not store the grid in place. s The crisper pan will become hot. Do not use any of the parts and features listed. The location...
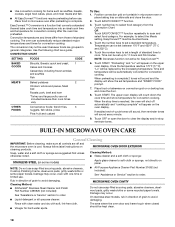
Use & Care Guide - Page 6

Insert C. s Always place the steamer on electric or gas burners. s To avoid scratching, use oven mitts or pot
holders when handling. See steam chart in... as rice, potatoes, pasta and vegetables, place food and water/liquid in the microwave. s See "Positioning Baking Tray" section before starting the oven. Place directly over the base. Base: For steam cooking, place water in a convectional...
Use & Care Guide - Page 7

... ML K
JI
M. Options Q. Microwave oven display H. Options P. Microwave soften/melt L. EasyConvect™ conversion cooking P. Cook time C. Microwave custom defrost N. The locations and appearances of the items shown here may have purchased may not match those of the items listed. Cook time F. Microwave cooking power D. Crisping H. ELECTRONIC OVEN CONTROL
This manual...
Use & Care Guide - Page 10
...larger pieces, and uniformly shaped foods cook more food heated at one corner to provide an opening to burst. Amount of irregularly shaped foods, bones and foods such as...shell. When microwave cooking with cookware. s The turntable must be heated in microwave oven. Arranging If heating irregularly shaped or different sized foods, arrange the thinner parts and smaller sized items toward the ...
Use & Care Guide - Page 12
... will sound every minute.
5.
If enabled, end-of the cooking container and the microwave oven cavity are Normal (default), More or Less and will appear on the display. During...adjusts for cooking.
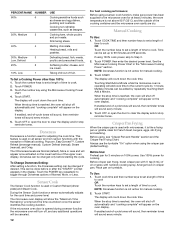
When the stop reminder tones. PERCENT/NAME NUMBER
60%
6
50%, Medium
5
40%
4
30%, Medium- 3 Low, Defrost
20%
2
10%, Low
1
USE
Cooking sensitive foods such as lasagna. Touch...
Use & Care Guide - Page 13
....
2.
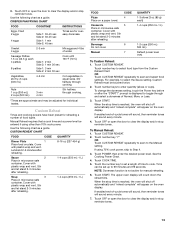
Casserole
5
Place in microwave-safe
container. Manual
7
QUANTITY 1-3 slices [3 oz (85 g) each 4 patties
8 patties
Side 1: 2 min Side 2: 1 min 30 sec
Side 1: 3 min Side 2: 2 min 30 sec
Cook until 160°F ... 4 tbs of -cycle tones will sound, then reminder tones will appear on the oven display. Custom Reheat
Times and cooking powers have been preset for overeasy doneness.
Let...
Use & Care Guide - Page 14
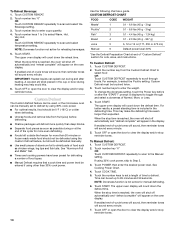
...leg tips and fish tails. Custom Defrost
The Custom Defrost feature can be used, or the microwave oven can be touched twice.
3. s Use small pieces of the cycle for reheating beverages.
... (177, 355 or 473 mL)
Manual
6
Default power level 30%
*See the Defrost Preparation Chart at the end of aluminum foil to defrost by using 30% cook power, skip to toggle through foods. Touch START. Time...
Use & Care Guide - Page 18
...must be exact because ...items such as a guide. Convection temperatures and times differ from the Convection Chart OR Touch EASYCONVECT™ function repeatedly to set a length of standard cooking.
Touch OFF or open the door to order.
Rub in microwave oven or
place baking tray on panel.
The upper oven display will appear on the oven display. BUILT-IN MICROWAVE OVEN...
Use & Care Guide - Page 20
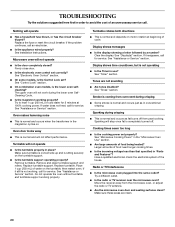
... it still is coming from past cooking. See "Assistance or Service" section. Have a qualified electrician check the electrical system of an unnecessary service call.
Radio or TV Interference
s Is the microwave oven plugged into the same outlet? TROUBLESHOOTING
Try the solutions suggested here first in order to heat 1 cup (250 mL) of food need...
Use & Care Guide - Page 21
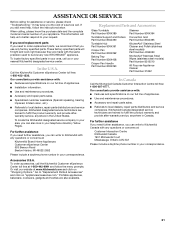
...your correspondence.
s Installation information. To locate the KitchenAid designated service company in Canada.
Go to fulfill the product warranty and provide after-warranty service, anywhere in your ...our website at 1-800-442-9991 and follow the instructions below. Our consultants provide assistance with any questions or concerns at :
Customer Interaction Centre KitchenAid Canada ...
Use & Care Guide - Page 22
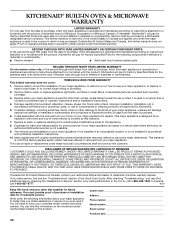
...located in materials or workmanship and is reported to KitchenAid within 30 days from the date of purchase.
6. This limited warranty does not cover:
ITEMS...maintained according to instructions attached to be provided by the customer. DISCLAIMER OF IMPLIED WARRANTIES...9632; Electric element
■ Solid state touch control system parts
SECOND THROUGH TENTH YEAR LIMITED WARRANTY On microwave ovens only...
Dimension Guide - Page 1
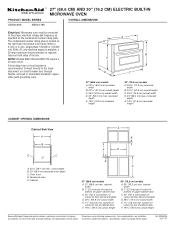
...05-17-07 The model/serial number rating plate is located on the model/serial number rating plate. Connect directly ...oven E. ® 27" (68.6 CM) AND 30" (76.2 CM) ELECTRIC BUILT-IN MICROWAVE OVEN
PRODUCT MODEL SERIES
OVERALL DIMENSIONS
KBHS109S
KBHS179S
Electrical: Microwave oven must be connected to the proper electrical voltage and frequency as specified on the right-hand microwave oven...
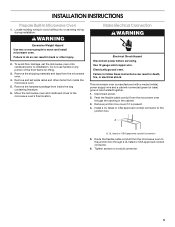
Installation Guide - Page 2
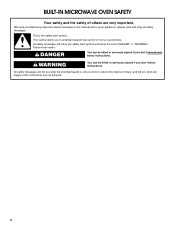
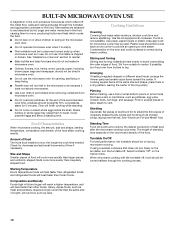
We have provided many important safety messages in this manual and on your appliance. This is , tell you how to potential ... and obey all safety messages. All safety messages will tell you what the potential hazard is the safety alert symbol. BUILT-IN MICROWAVE OVEN SAFETY
Your safety and the safety of injury, and tell you what can be killed or seriously injured if you don't follow the...
Installation Guide - Page 3
...
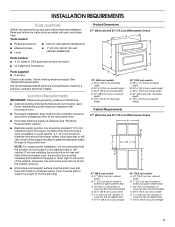
Gather the required tools and parts before starting installation. Location Requirements
IMPORTANT: Observe all electrical connections be recessed and located in the adjacent right or left corner of the microwave oven.
■ Grounded electrical supply is recommended that are installing the junction box on rear wall behind the microwave oven, the junction box must be solid, level and...
Installation Guide - Page 4
... wiring practices.
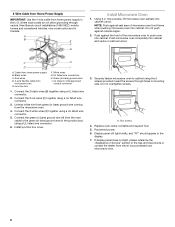
4 Check with the National Electrical Code, ANSI/ NFPA 70-latest edition or CSA Standards C22.1-94, Canadian Electrical Code, Part 1 and C22.2 No.
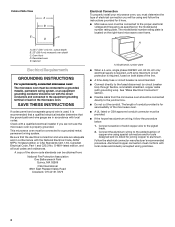
Cabinet Side View A B
E
C
D
A. 23¹⁄₄" (59.1 cm) min. Oven front D.
O-M91-latest edition, and all local codes and ordinances. The length of conduit provided is located on the microwave oven.
Installation Guide - Page 5
...microwave oven to do so can result in death, fire, or electrical shock. Failure to the junction box through the opening in back or other items from the microwave oven.
4. Move the microwave oven... to the microwave oven's final location. Locate existing wiring to the
junction box. Electrically ground oven. Feed the flexible cable conduit from inside the microwave oven.
5. Install...
Installation Guide - Page 6
.... Reconnect power. 6.
Black wires C. Red wires D. 4-wire flexible cable from the microwave oven.
4. Install junction box cover.
3.
Two screws
4. Display panel will light briefly, .... Connect the 2 black wires (B) together using the 2 screws provided.
Using 2 or more people, lift microwave oven partially into cabinet.
Green (or bare) ground wires
I
A. Connect the green ...
Installation Guide - Page 7
... time.
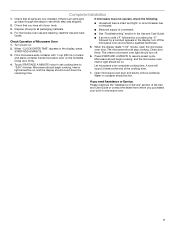
7. Check that you need Assistance or Service:
Please reference the "Assistance or Service" section of water and place container inside microwave oven on . The microwave should count down the remaining time.
■ Electrical supply is connected;
■ See "Troubleshooting" section in the Use and Care Guide.
■ If an error code ("F" followed by...
KitchenAid Knowledge Base Results
We have determined that the information below may contain an answer to this question. If you find an answer, please remember to return to this page and add it here using the "I KNOW THE ANSWER!" button above. It's that easy to earn points!-
Caster installation on the under-counter outdoor refrigerator
... on its back, you lay the refrigerator on its desired location. Water supply hookup - Side by side refrigerator Refrigerator unlevel ...location, lock the wheels. If you can damage the refrigerator. It may damage the compressor. Locking the casters will protect the refrigerator from refrigerator. Unlock the wheels and move the refrigerator into an electrical outlet... -
Hot water dispenser does not operate
... knob and see if the circuit breaker has tripped or if a house fuse has blown. If the electrical outlet is controlled by a switch, make sure it is plugged into a grounded 3 prong outlet. Make sure the water supply has not been turned off. If the problem persists, you should contact ... -
Adjusting beater to bowl clearance Animation - Tilt-Head Stand Mixers
... (A) SLIGHTLY counterclockwise (left) to raise the Flat Beater or clockwise (right) to bowl clearance? Make adjustment so that it is too far away from the electrical outlet. Tilt-Head Stand Mixers How do I adjust my beater to lower the Flat Beater. If, for any reason, the Flat Beater hits the bottom of...
Similar Questions


Where Is The Fuse Located
Where is the fuse located on a Kitchenaid model khhc2090sss microwave oven
Where is the fuse located on a Kitchenaid model khhc2090sss microwave oven
(Posted by Rlwalker2 5 years ago)

Fuse Location
where is the fuse for my kitchenaide KHMS2050SSS microwave
where is the fuse for my kitchenaide KHMS2050SSS microwave
(Posted by mike2017 7 years ago)

Wave Guide Cover
I need to order a wave guide cover for this model. Do you know where I can find this? I'm not locati...
I need to order a wave guide cover for this model. Do you know where I can find this? I'm not locati...
(Posted by akahle 9 years ago)

Replace Lightbulb In Microwave
how do you replace light bulb in microwave?
how do you replace light bulb in microwave?
(Posted by bparker312 11 years ago)