Get support for Kenmore 9804 - 5.8 cu. Ft. Gas Dryer

Kenmore 9804 Support Question

Kenmore 9804 Support Question

Find answers below for this question about Kenmore 9804 - 5.8 cu. Ft. Gas Dryer.
Need a Kenmore 9804 manual? We have 2 online manuals for this item!
Question posted by 2rnzrus on March 27th, 2023

How To Open Front Panel

How do you open the front panel of Kenmore gas dryer 98042

Current Answers

Answer #1: Posted by SonuKumar on March 27th, 2023 7:28 PM
This answer was accepted by the poster of the original question.
SonuKumar

Member since:
May 9th, 2021

Points: 16,568,330
1,100
points
Locate the two screws that secure the bottom of the front panel to the washing machine. These screws are usually located at the bottom of the panel, one on each side.

Use a screwdriver to remove these screws, taking care not to lose them.

Once the screws are removed, grasp the bottom of the front panel with both hands and gently pull it towards you. The panel should release from the clips that hold it in place.

https://www.manualslib.com/manual/408443/Kenmore-8804-5-8-Cu-Ft-Electric-Dryer.html#product-9804%20-%205.8%20cu.%20Ft.%20Gas%20Dryer


Please respond to my effort to provide you with the best possible solution by using the "Acceptable Solution" and/or the "Helpful" buttons when the answer has proven to be helpful.

Regards,
Sonu
Your search handyman for all e-support needs!!

Answer #2: Posted by shlokuprit on March 27th, 2023 7:01 PM
shlokuprit

Member since:
November 28th, 2020

Points: 35,590
100
points
Hey there!

To open the front panel of your Kenmore gas dryer 98042, follow these steps:

1. Unplug the dryer from the electrical outlet or turn off the circuit breaker that supplies power to the dryer.

2. Locate the screws that hold the top panel in place. They are typically located at the back of the dryer, but the exact location may vary depending on the model.

3. Remove the screws using a screwdriver and lift the top panel off the dryer.

4. Locate the screws that hold the front panel in place. These are typically located at the top of the front panel, near the corners.

5. Remove the screws using a screwdriver and set them aside.

6. Tilt the front panel forward and disconnect any wires or cables that connect it to the dryer. Take note of where the wires and cables are connected so you can reconnect them later.

7. With the wires disconnected, lift the front panel off the dryer and set it aside.

You should now have access to the inside of your Kenmore gas dryer 98042.

Answer #3: Posted by chandima6416 on March 30th, 2023 1:27 AM
chandima6416

Member since:
March 21st, 2023

Points: 100
100
points
Step 1

Unplug your dryer from the electrical outlet.

Step 2

Open the lint trap cover if there is one and remove the lint trap. Locate the two screws that are just under the lint filter and remove them. Set them aside in a safe place.

Step 3

Grasp the top of the dryer firmly with one hand on either side and pull toward you sharply and then lift up slightly. This will release the top of the dryer from the two springs that hold the front panel to the machine.

Step 4

Look at the back of the machine. Near the top will be two screws. Remove them and keep them safe. On some models the screws are Phillips; on other models you will need a flat screwdriver, and on still other models you will need a small crescent wrench to remove these two screws.

Step 5

Gently lift up on the top of the machine. On some models the front will lift up, and on other models the back lifts up toward you. Look at the wires that are attached to the top and note their order. Grasp the connectors and pull the wires straight out so you can lift the top all the way up.

Step 6

Lift up slightly on the front of the machine to release the spring clips that hold the bottom edge of the front panel and then pull the front panel away from the machine and set it to one side. You now have full access to the interior of your Kenmore dryer.


Answer #4: Posted by chandima6416 on March 30th, 2023 1:38 AM
chandima6416

Member since:
March 21st, 2023

Points: 100
100
points
Step 1

Unplug your dryer from the electrical outlet.

Step 2

Open the lint trap cover if there is one and remove the lint trap. Locate the two screws that are just under the lint filter and remove them. Set them aside in a safe place.

Step 3

Grasp the top of the dryer firmly with one hand on either side and pull toward you sharply and then lift up slightly. This will release the top of the dryer from the two springs that hold the front panel to the machine.

Step 4

Look at the back of the machine. Near the top will be two screws. Remove them and keep them safe. On some models the screws are Phillips; on other models you will need a flat screwdriver, and on still other models you will need a small crescent wrench to remove these two screws.

Step 5

Gently lift up on the top of the machine. On some models the front will lift up, and on other models the back lifts up toward you. Look at the wires that are attached to the top and note their order. Grasp the connectors and pull the wires straight out so you can lift the top all the way up.

Step 6

Lift up slightly on the front of the machine to release the spring clips that hold the bottom edge of the front panel and then pull the front panel away from the machine and set it to one side. You now have full access to the interior of your Kenmore dryer.


If you have any other quries, please follow the manual.

Related Kenmore 9804 Manual Pages

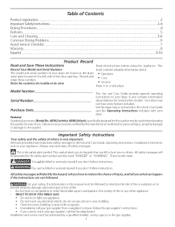
Use and Care Guide - Page 2

... about : The model and serial numbers of your dryer are found on your dryer. Important Safety Instructions Your safety and the safety of tlnis or any appliance. All safety messages will identify the hazard, tell you to reduce the chance of the door opening. WHATTODOIFYOUSMELL GAS: • Do not try to tlne washer. Noter...
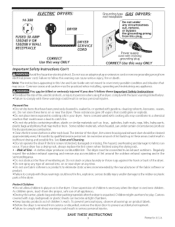
Use and Care Guide - Page 3

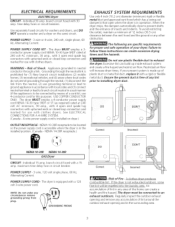
... place laundry or throw rugs against the front or back of children's reach. Keep laundry products out of the dryer. Clean the lint screen before or after the dryer isunpacked. The dryer must... 14-30R © ELECTR/C DRYERS: DRYER FUSED 30 AMP 120/240 V OR 120/208 V WALL RECEPTACLE DRYER SER VICE CORD CORRECT Use this way ONL Y Grounding type GAS DRYERS: wall receptacle Do not under ...
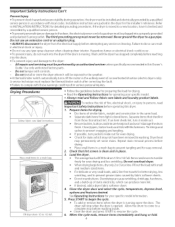
Use and Care Guide - Page 4

... by fabric softener sheets. Refer to a gas pipe. The third grounding prong must never be plugged into the dryer if the drum is moved to a new location, have been removed in the dryer for better drying, less wrinkling, and to persons, read and follow fabric care labels and laundry product labels. Never ground the...
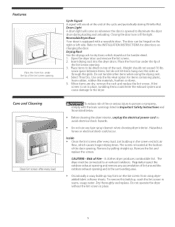
Use and Care Guide - Page 5

... be dried on the lint screen from using the drying rack. 4. Dry thoroughly and replace. Place items to the dryer. Features Hace the front bar under the lip of the lint screen opening and in place. The screen is equipped with the basic warnings listed in important Safety Instructions and those listed...
Use and Care Guide - Page 6

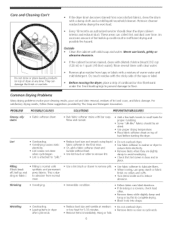
...press fabrics. o Use proper drying temperature. o Reduce load size and rewash using liquid Do not overload dryer. • Overdrying causes static fabric softener in the final rinse, o Use fabric softener in place.... at any time. Care and Cleaning Con't Do not store or place laundry products on top of dryer at medium or low heat for proper tumbling. If the cabinet becomes stained, ...
Use and Care Guide - Page 7

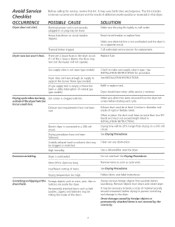
... list includes common occurrences that are inside of items. SeeDrying Procedures. Check to baste a scrap of rigid or flexible metal. High humidity. SeeDrying Procedures. Dryer is open (gas models). Do not overload. Remove items as soon as belt buckles, zippers and fasteners may save both time and expense. Foreign objects such as coins...
Use and Care Guide - Page 8

... of this product if it is all that it Rapid Resolution - But like garage door openers and water heaters, in the Agreement: Parts and labor needed to help by the use ... appointment online. A service technician to power fluctuations. limitation of this product. 4. Your new Kenmore® appliance is used for other than private family purposes, this product. The Master Protection...
Installation Instructions - Page 2

... and service must be followed to minimize the risk of fire or explosion or to the Dryer must be performed by a qualified installer, service agency or the gas supplier. CONTENTS Pre-lnstallation Requirements ...Electrical Requirements ...Exhaust System Requirements ...Gas Supply Requirements ...Location of all occupants. . Clear the room, building or area of Your...
Installation Instructions - Page 3

...accessible when the dryer is prohibited for use grounding terminal or lead to be expelled into the laundry area. f_...dryer duct. _i#iiiii! If your dryer. NEMA 14-30R receptacle.) Correct Incorrect NEMA 10-30R NEMA 14-30R GAS Dryer CIRCUIT- The dryer is in the installed position. (Canada - A clothes dryer produces combustible lint. Regularly inspect the outdoor exhaust opening...
Installation Instructions - Page 4

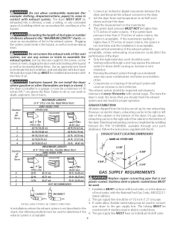
...start the dryer. 3. The system back pressure MUSTNOT be used. SAME AS OTHER SIDE ./" 5 718" /_,31=j (10.2 cm) 0 3Oft. (9.14 m) (6.35 cm) 18 ft. (5.49 m) GAS SUPPLY REQUIREMENTS 1 22 ft. (6.71 m} 14 ft. (4.27 ... cabinet or the bottom of 18 inches (45.7 cm) above the floor. On gas dryers, exhausting can result in the absence of every 18months with duct tape. If the ...
Installation Instructions - Page 5

... fuel burning appliance shall be installed in a closet with equivalent air openings for test gauge connection, MUST be disconnected from the gas supply piping system during any pressure testing of the gas supply connection to dripping water or outside weather conditions. 2. Your dryer needs the space around it will come in excess of the...
Installation Instructions - Page 6

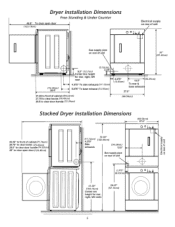
... (123.19cm) Electrical supply on rear of unit / 0 o ,'_,_ # l Gas supply pipe \ on rear of unit LU O T "_i• 41.00" (104.14cm) Center line height for rear, right, left vents 38.25" (97.16cm) 6 Dryer Installation Dimensions Free=Standing & Under Counter 48.5" To clear open door (124.46cm) 72.00" (11.12cm) (182...
Installation Instructions - Page 7

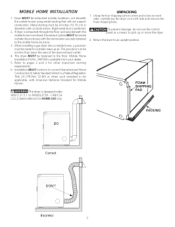
... ill _ i © Incorrect !iii_iiiiiil i_ii!iiii!i!i 7 To prevent damage, do not use the control panel as a means to the mobile home structure. 3. If dryer is not applicable, with the termination secu rely fastened to pick up air. When installing a gas dryer into a mobile home, a provision must be exhausted outside make up or move the...
Installation Instructions - Page 8

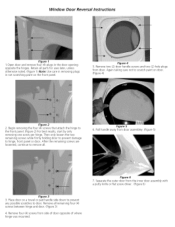
...flat screw driver. (Figure 6) Begin removing the four (4) screws that attach the hinge to hinge, front panel or door. Place door on door. (Figure 4) Figure 2 2. Figure 4 5. Again taking care ... noted. (Figure 1) Note: Use care in removing plugs in the door opening opposite the hinges. Window Door Reversal Instructions Figure 1 1.0pen door and remove four (4) plugs in not...
Installation Instructions - Page 9

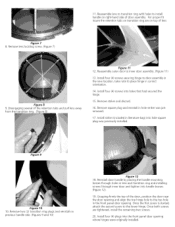
... handle by placing the handle mounting bosses through inner door and tighten into the front panel door opening . Install four (4) plugs into handle bosses. (Figure 12). 19. Reassemble lens to...top hole in lens and transition ring and installing screws through holes in the front panel door opening where hinges were originally installed. For proper fit insure the retention tabs on previous ...
Installation Instructions - Page 10

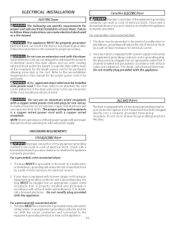
...shock by a path of least resistance for your dryer is equipped with a three-prong (grounding) plug for electrical current. ALL GAS Dryers The dryer is equipped with a licensed electrician if you ...outlet that is properly grounded. In the event of electrical shock. For a permanently connected dryer: I . Check with a power supply cord having an equipment-grounding conductor and a...
Installation Instructions - Page 11

... bracket. Attach the power cord neutral (center wire) conductor to the back of the dryer upper corner. 2. Reattach the strain relief mounting bracket to the silver colored center terminal... NUT TO THESE -HREADS STRAIN RELIEF BRACKET,. brass-colored terminals on the back of the dryer with the green ground screw. . Attach the red and black power cord conductors to the...
Installation Instructions - Page 12

...-rigid or approved pipe from gas supply line to be used when elevating the dryer for gas leaks with an open flame. VALVE OPEN I GAS FLOW POSITION REPLACEMENT PARTS Pedestal ...dryer may occur. Apply an approved thread sealer that is located inside the dryer console or under the top panel. NEVER test for ease of air. Place a level on all materials in the gas supply line to allow gas...
Installation Instructions - Page 24

..., lawn and garden equipment, or heating and cooling systems, no matter who made it, no matter who sold it -yourself. in items like garage door openers and water heaters. 1-800-4-MY-HOME ® (1-800-469-4663) Call anytime, day or night (U.S.A. For the replacement parts, accessories and owner's manuals that you...

Similar Questions

Dryer Vent Positioning
Where is the vent positioned on the back of an 8787 HE3 7.0Cu Ft Electric Dryer?
(Posted by monte20536 1 year ago)
Best Sears Gas Dryer
what are the. Best Kenmore gas dryers?
(Posted by snyder4444 8 years ago)
Diasble Buzzer On Kenmore 8041
How do I go about diabling the buzzer on the Kenmore 8041 5.8 CU FT electric dryer?
(Posted by dhuard22 9 years ago)
Control Panel
came with no directions to replace control panel. where can I find how to replace this part in my dr...
(Posted by mike200083006 10 years ago)
New Kenmore Gas Dryer 90311 Drum Will Not Turn, Power Is On.
Control panel indicates dryer is going through cycle but drum is not turning and gas is not heating.
(Posted by kittykinstley 13 years ago)
Ask a New Question
Use the box below to post a new question about this Kenmore product .
Points & Prizes
  • You can earn points for nearly everything you do on HelpOwl.com
  • You can trade in those points for gift cards at leading retailers such as Amazon.com and Walmart
  • It's that simple!
See How it Works
Create a Free Account

Kenmore Manuals

Find free Kenmore 9804 - 5.8 cu. Ft. Gas Dryer manuals and user guides available at ManualOwl.com. Try out our unique manual viewer allowing you to interact with manuals from directly within your browser!

Kenmore Reviews

View thousands of Kenmore user reviews and customer ratings available at ReviewOwl.com.

Contact Information

Complete Kenmore customer service contact information including steps to reach representatives, hours of operation, customer support links and more from ContactHelp.com.

Scoreboard Ratings

See detailed Kenmore customer service rankings, employee comments and much more from our sister site.

Kenmore Recalls

Find comprehensive Kenmore recall information updated hourly on RecallOwl.com.