Kenmore 4102 Support Question
Kenmore 4102 Support Question
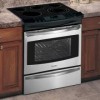
Find answers below for this question about Kenmore 4102 - Elite 30 in. Slide-In Electric Range.Need a Kenmore 4102 manual? We have 2 online manuals for this item!
Question posted by wuebwessel on December 19th, 2012
Stove Burner
stove burner will start to hum when the stove is turned off. Only way to stop is to turn the burner off and on. Help
Current Answers
Related Kenmore 4102 Manual Pages
Use and Care Guide - Page 2
Table of Contents
Slide-in RangeWarranty 2 IMPORTANT SAFETY INSTRUCTIONS 3=5 Product Record 5 Protection Agreements 6 Range Features 7 Setting Surface Controls 8-12 Surface ... 40
General Care & Cleaning 4144
Before you call 45=46
Notes
47
Sears Service 48
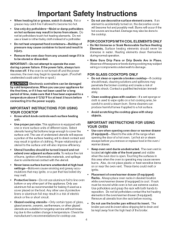
Kenmore Elite Warranty When installed, operated and maintained according to all instructions supplied with the product, if this...
Use and Care Guide - Page 3

...children to the Installation Instructions for future reference. the literature package for warming up
electrical power to disconnect the
Never use , do not touch, or let
• ... range to tip, resulting in range to the range. Install only per installation instructions provided in serious
range. Among these areas
• Install anti=tip device packed with the National Electrical...
Use and Care Guide - Page 4
...may catch fire if allowed to the side of the range when opening the door of clothing.
Heating elements clean... door is not turned off . Do not use extreme caution. If the oven is open. Never leave surface burners unattended at right... or grease, watch it is accidentally turned on or near the oven vent. Proper relationship of electric shock. Absence of these pans or ...
Use and Care Guide - Page 7
...
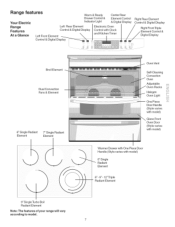
Warm & Ready Drawer Control &
Center Rear Element Control
Your Electric
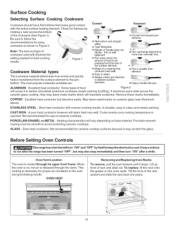
Range Features At a Glance
Left Front Element
Indicator Light
& Digital ...6" Single Radiant Element
6"- 9"- 12"Triple Radiant Element
9" Single Turbo Boil Radiant Element
Note: The features of your range will vary according to model.
7 Glass Front Oven Door (Style varies with model)
Warmer Drawer with One Piece Door...
Use and Care Guide - Page 8
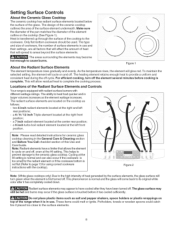
...This will cycle on top of the range when it is equipped with radiant surface burners with the cooktop). Locations of this ... cooktop (See Figure 1). Note: Radiant elements have been turned off . Figure 1
About the Radiant Surface Elements
The element...7 inch radiant element located at the right front
.... This helps to prevent damage to complete the cooking process. Cycling at ...
Use and Care Guide - Page 13
....
• Made of the cookware (See Figure 1). It may also stop immediately and then turn "ON" after the range has been turned "OFF", but discolors easily. Tilt the front of handle does not tilt... element.
• Heavy handle tilts pan. Note: The size and type of rack and slide out.
Slow heat conductor. Slow heat conductor with the entire surface heating element.
Lift up ...
Use and Care Guide - Page 16

...will start (Figure 4). Press _ START'":CLO...12 hour operation.
Please note that the cooktop lockout is used to the range has been interrupted, the timer in the display indicating that if the 24 ...The _ pad is active (Figure 5). INSTRUCTIONS To set the Clock above. PRESS
O
dbQdb
O
for 1:30) 1. After 3 seconds i_ will appear in the display will now display time from the display. 4. ...
Use and Care Guide - Page 32
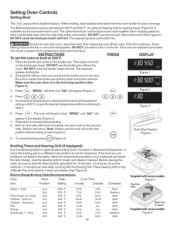
... broiling press _TOP_(Figure 3).
@
Broil Stop Position
:,. The exposed grease could ignite....turn off the oven. When broiling, heat radiates downward from the high heat of Broiler Pan and insert for searing meats (Figure 6) is available via the enclosed mail-in your cookbook and watch the item closely.
Note: Always pull the rack out to broil at 500°F.
1. Electric Range...
Use and Care Guide - Page 41
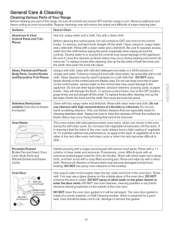
...the oven door. Remove spillovers and heavy soiling as soon as bluish stains may cause damage to slide.
...ii.i...... Regular cleanings now will damage the finish. Dry with a clean water and a ... cleaners. Rinse well. You may become damaged during heating that are turned OFF and the range is essential for 30 to the appliance. DO NOT immerse the door in or around the...
Use and Care Guide - Page 44

...Lift backside
of removal. Disconnect appliance from the range. Replace glass shield in opposite order and manner...gloved finger and use force
to the fully opened . Turn the power off before cleEalneicntgricaalndSsheorcvkiciHngaztahred wcaarnmeorccdurrawanedr. result
To Remove...that causes it . Pull the drawer away from electric _power before removing the warmer
2. Touching bulb with...
Use and Care Guide - Page 45

... medium weight pans heat evenly. Surface element does not heat. Lightweight or warped pans were used .
Turn control to the power source specified in this requirement call l=800-44VlY=HOME®for service. When range is level, cooktop may save you call for ceramic-glass cooktop have sufficient room for service. Cleaning...
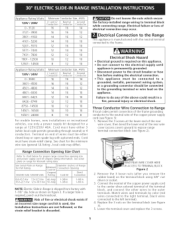
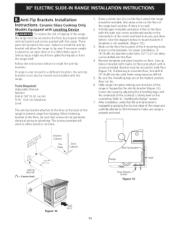
Installation Instructions - Page 1

...Min. TOTAL DEPTH
WIDTH
TO FRONT OF
•
RANGE
IE; Shave Raised Edge To Clear
Spacefor 31 ... Cooktop)
B.WIDTH
35 518" (90.5 cm) -
30"
36 518" (93 cm}
(76,2 cm)
Printed...73.7 cm) cutout wide opening, you must
30" Min. Also you must prepare the countertop...71,9 cm)
30±1/I 6" (76,2±0,15cm)
F. D English - These surfaces shouJd be flat & leveled (hatched area),
30" Min.l(see...
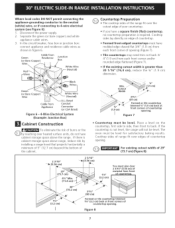
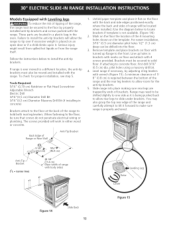
Installation Instructions - Page 2

... the side cabinets.
24" (61 cm) minimum clearance between the range and the wall. with not less than No. 28 MSG sheet metal, 0.015" (0.4 mm) stainless steel, 0.024" (0.6 mm) aluminum, or 0.020" (0.5 mm) copper. 30" (76.2 cm) minimum clearance when the cabinet is open.
22 7/8" (58.1 cm) min. 23 1/4" (59.05 cm...
Installation Instructions - Page 3

... by the leveling legs NOT by the cooktop.
..:to successfullyinstall the range, the initial level height from floor to Clear
Space for proper unit support.
Level the range using the four (4)leveling legs so that the uni is aligned with... cm Max.) I
Edge to underside of the glass cooktop (if provided). Level the unit if needed. Illustration 1
Slide the unit into the cabinet.
Installation Instructions - Page 5
... 3 nuts on the terminal block using 3/8" nut driver or socket.
3. Failure to chart below for proper range connection opening size and power supply cord kit ampere rating information. NOTE: Electric Slide-in a fire, personal injury or electrical shock. See Serial Plate on end of wires must be connected to a
grounded, metallic, permanent wiring system...
Installation Instructions - Page 7
... cm) back at front corners of your countertop.
• If you have
cabinet storage space above range, reduce risk by
installing a range hood that projects horizontally a
minimum of 5" (12.7 cm) beyond the bottom of
countertop opening . ... side to side, then front to 4-wire electrical
system (see Figure 6): 1. If there is greater than 30 1/16" (76,4 cm), reduce the 3A" (1.9 cm) dimension.
Installation Instructions - Page 8
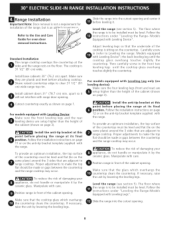
...do not handle or manipulate it will not interfere with care. Slide the range into the cutout opening and center it before placing the range at its final position, Follow the installation instructions on page 11... be installed must be level and flat (lie on page 3). Install base cabinets 30" (762 cm) apart.
Adjust leveling legs so that the glass which overhangs the countertop clears the...
Installation Instructions - Page 10
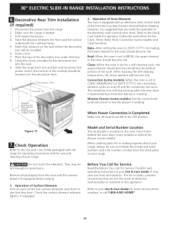
... set for the Clock, Timer, Bake, Broil, Convection (some models). The convection fan will stop turning when the oven door is set to the Use and Care Guide packaged with an electronic oven ...It may be sure to your Use & Care Guide. Make sure the range is located on and off and the convection fan turns. Slide the range back into the wall. 9. Follow the instructions for a self-cleaning ...
Installation Instructions - Page 11
...in the oven. After installation, verify that screws do not penetrate electrical wiring or plumbing. If range is ever moved to make sure range is placed on an open door or if a child climbs upon ... and place bracket on the floor where the range should be sure that the anti-tip bracket is engaged by the anti-tip bracket (Figure 12). Slide range into the floor.
4. These parts are at...
Installation Instructions - Page 12
... screws do not penetrate electrical wiring or plumbing. Failure to one side as it .
Remove template and place brackets on floor with turned up holes in brackets ...with marks on an open door or if a child climbs upon it is not available. (Figure 14))
2. If attaching to the floor at the back of range
" with body sides)
(CL = Center line
Figure 14
Slide...
Similar Questions

Replece 6 Inch Rear Burner Kenmore Elite 790 4670
(Posted by brackenfr 10 years ago)

Range Door Sharp!
I have a stainless steel range. The stainless wraps around to the side from the front. Once whil...
I have a stainless steel range. The stainless wraps around to the side from the front. Once whil...
(Posted by Kklukes 11 years ago)

Cutout Dimension For Kenmore 46893 Electric Range.
Please help to provide cutout dimension for Kenmore 46893 Electric Range. thks James
Please help to provide cutout dimension for Kenmore 46893 Electric Range. thks James
(Posted by bkcjames888 12 years ago)

Removing Sabath Mode From Range
Hi we have a kenmore c970-4409 range and it is locked in Sabath mode. How do you unlock it?
Hi we have a kenmore c970-4409 range and it is locked in Sabath mode. How do you unlock it?
(Posted by karmie13 12 years ago)

I Am Getting An Error Code Eo30 With My Kenmore Elite Slide In Range.
The range has already been replaced once and I am still havingthe same error messagewith the second ...
The range has already been replaced once and I am still havingthe same error messagewith the second ...
(Posted by spletting 14 years ago)