Jenn-Air JED8345ADB Support Question
Jenn-Air JED8345ADB Support Question
Find answers below for this question about Jenn-Air JED8345ADB.Need a Jenn-Air JED8345ADB manual? We have 5 online manuals for this item!
Question posted by fleet87602 on June 14th, 2014
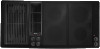
Burner Elements
When i turn on the front element switch the back burner also comes on. If I turn on the back burner the front 1 does not come on but i can't regulate the temperature, it just stays on high temp
Current Answers
Related Jenn-Air JED8345ADB Manual Pages
Dimension Guide - Page 1
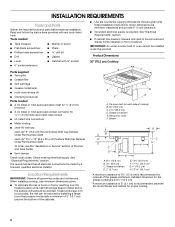
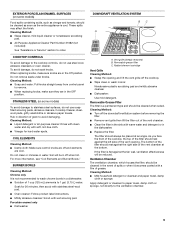
... box in the cabinet to allow as much slack as possible between the junction box and the cooktop so that the cooktop can be moved if servicing becomes necessary in the cabinet). Grease containers E. Blower
B
A*
...Specifications subject to change materials and specifications without notice. Ref. q The cooktop should be connected directly to the junction box in the cabinet through the ...
Dimension Guide - Page 2
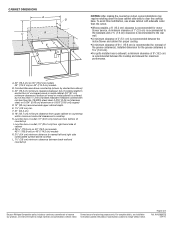
...sidewalls and a ³⁄₄" (1.9 cm) clearance is recommended between back wall and countertop
Because Whirlpool Corporation policy includes a continuous commitment to cooktop
H. Specifications subject to clear the cooktop base. A minimum clearance of countertop
I
K
J
NOTES: After making the countertop cutout, some installations may require notching down the base cabinet side...
Installation Instruction - Page 1
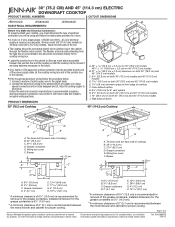
... electrical inspector's use. W10298937B 30" (76.2 CM) AND 45" (114.3 CM) ELECTRIC DOWNDRAFT COOKTOP INSTALLATION INSTRUCTIONS
INSTRUCTIONS D'INSTALLATION DE LA TABLE DE CUISSON ÉLECTRIQUE AVEC ASPIRATION PAR LE BAS DE...(76,2 CM) ET 45" (114,3 CM)
Table of others . Optional 9 Install Cooktop 10 Make Electrical Connection 10 Complete Installation 11
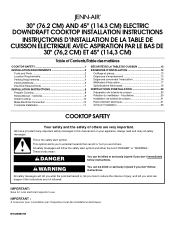
SÉCURITÉ DE LA TABLE DE ...
Installation Instruction - Page 2
Check existing electrical supply. When installing cooktop, use minimum dimensions given.
■ To ... Jigsaw ■ Ratchet with any tools listed here. Wiring box cover F. If cabinet storage is recommended for proper cooling.
2 Product Dimensions
30" (76.2 cm) Cooktop
B
C
A F
D E
A. Grease containers D. 2" (5.1 cm)
E. 13³⁄₄" (34.9 cm) F. 11 30.0 cm) G. 4" (...
Installation Instruction - Page 8
... in back or other injury.
1. Follow the electrical connector manufacturer's recommended procedure.
Grates C. Radiant element cartridge
4. Use foam end caps from cooktop. 3. Turn tie down on the foam end caps.
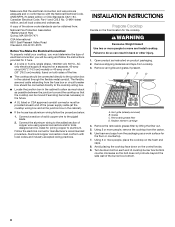
8. INSTALLATION INSTRUCTIONS
Prepare Cooktop
Decide on each end of the burner box bottom.
8 Remove shipping materials and tape from the packaging as a work surface for...
Installation Instruction - Page 10
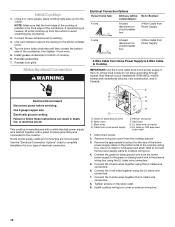
... shock. White wires C. Red wires G. Make Electrical Connection
WARNING
Electrical Connection Options
If your type of the countertop, then tighten ¹⁄₄ turn more people, place cooktop right side up from Home Power Supply to 4-Wire Cable to bottom of the countertop. Use a UL listed or CSA approved strain relief to...
Installation Instruction - Page 11
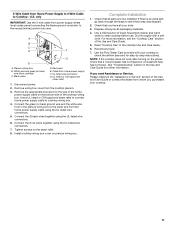
... a circuit breaker has not tripped or a household fuse has not blown. NOTE: If the cooktop does not work after turning on plenum wiring box. If you have all your cooktop to the white wire from whom you purchased your cooktop.
11 UL listed wire connector G. Remove wiring box cover from power supply where local...
Use and Care - Page 2
... instructions. All safety messages will follow instructions. TABLE OF CONTENTS
COOKTOP SAFETY 2 PARTS AND FEATURES 4 COOKTOP USE 4
Cooktop Controls 4 Cooktop Cartridge 5 Install Grill 5 Ceramic Glass 6 Coil Elements and Burner Bowls 6 Grill Use 6 Downdraft Ventilation System 7 Home Canning 7 Cookware 8 COOKTOP CARE 8 General Cleaning 8 TROUBLESHOOTING 10 ASSISTANCE OR SERVICE 10...
Use and Care - Page 3
...; Clean Cooktop With Caution - Improper installation of these pans or bowls during cooking may result in color. If a wet sponge or cloth is in temperature.
■ Utensil Handles Should Be Turned Inward and Not Extend Over Adjacent Surface Units - Only certain types of electric shock, or fire.
■ Do Not Soak Removable Heating Elements...
Use and Care - Page 4

... or all controls when done cooking. Cooktop cartridge D. Exhaust fan control switch
E. Right front element control knob G. Exhaust fan vent grille C. Cooktop cartridge D. Right rear element control knob F. Right front element control knob G. Left front element control knob H. Failure to desired heat setting.
Hi
Lo
Hi
To Use:
Push in and turn knob to do so can be...
Use and Care - Page 5
... plug toward the receptacle until it is completely engaged.
6.
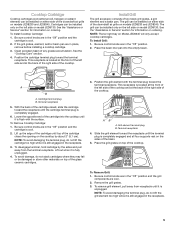
NOTE: To avoid damaging the terminal plug, do not lift the grill element too high while it is located at the front of the left side of the cooktop and at the back of the right side of the basin.
5. If the grill grates...
Use and Care - Page 6

... water can cause pitting and permanent marks.
■ To avoid scratches, do not cook foods directly on the cooktop. NOTE: Before removing or replacing coil elements and burner bowls, make sure they can adhere to the cooktop and can leave deposits when heated.
■ To avoid damage to change color.
It may cycle on...
Use and Care - Page 7
....
■ Trim excess fat to cookware, do not improve the food flavor.
Radiant element cartridge
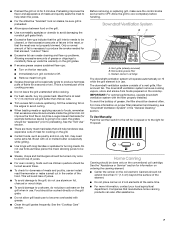
The downdraft ventilation system will avoid loss of the food. For more information, contact...Manually: Push the vent fan switch to the left for turning meats. Companies that is necessary to Off.
■ Remove meat from foods prepared on the cooktop. Meat that manufacture home canning...
Use and Care - Page 8

... rubbing until white film disappears.
Metal marks from aluminum and copper ■ Cooktop Polishing Creme:
Clean as soon as a base they can be used as cooktop has cooled down .
However, when used as possible on a hot surface cooking area, element or surface burner. Cast iron
■ Heats slowly and evenly. ■ Good for browning...
Use and Care - Page 9
...cooktop controls, do not soak knobs. Do not remove seals under knobs. STAINLESS STEEL (on some models)
To avoid damage to stainless steel surfaces, do not use steel wool, abrasive cleansers or oven cleaner.
For more information, see "Coil Elements and Burner Bowls." Radiant element...to the ventilation chamber.
9 Cleaning Method: ■ Turn off when hot. Vent grille (already removed) B....
Use and Care - Page 10

...Clean as soon as the surface cooking area, element or surface burner. GREASE JAR
A grease jar is not due to a setting.
10
Excessive heat around cookware on cooktop
■ Is the cookware the proper size?...calling for nonstick surfaces. It may save you the cost of the items listed in knob before turning to one of a service call : 1-800-688-2080. When calling, please know the purchase...
Use and Care - Page 11
... (nonstick finish, wood handles, cover, steaming rack, rice paddles, flat bottom and cooking tips) Order Model Number A0142
Canning Element (use with conventional coil cooktop only) Order Model Number A0145A
Electric Grill Accessories (element, 2 grill grates and basin liner pan) Order Model Number AW8000ADB
Surface Wall Cap Dampers Jenn-Air® 6" (15.2 cm...
Use and Care - Page 12

...:
■ Electric element
■ Electronic controls
■ Touch Pad and microprocessor
■ Magnetron tube
■ Glass ceramic cooktop: if due to ...the appliance.
9. SECOND THROUGH FIFTH YEAR LIMITED WARRANTY ON CERTAIN COMPONENT PARTS
In the second through fifth years from unauthorized modifications made to thermal breakage
■ Sealed gas burners...
Warranty - Page 1

... materials or workmanship:
■ Electric element
■ Electronic controls
■ Touch Pad and microprocessor
■ Magnetron tube
■ Glass ceramic cooktop: if due to better help by ...checking the "Assistance or Service" section or by the customer. Repairs when your major appliance to thermal breakage
■ Sealed gas burners
ITEMS...
CAD - Page 1

All Jenn-Air® appliances are appropriately UL, CUL or CSA approved.
1 PLAN
O
2 FRONT ELEVATION
3 SIDE ELEVATION
[Manufacturer:
Jenn-Air
Model Number:
JED8345ADB
RENNAIR® Date: MM/DD/YY
Scale:
1n
2
- -
0"
A z a CV O
sa
GA 0-
0_
0
information. 434" CUTOUT DIM.
45"
APPLIANCE DIM.
0
0 w
_
0
NOTE: Dimensional information is provided for ...
Similar Questions

Cvgx2423w - Burner Removal
Steps to be taken for Burner removal to gain access to the ignition module.
Steps to be taken for Burner removal to gain access to the ignition module.
(Posted by dalexa64 8 years ago)

How To A Get Replacement Burners On My Grill Under Lifetime Warranty?
Warranty
Warranty
(Posted by Edwicks 9 years ago)

How To Adjust The Burner Flames
Burners are way to high on low and food will not simmer.
Burners are way to high on low and food will not simmer.
(Posted by cderstine 10 years ago)

How To Replace Burner Gas Valve On Jenn-air Cvgx2423
I ordered a new valve and assume that the replacement burner gas valve screws into the manifold, can...
I ordered a new valve and assume that the replacement burner gas valve screws into the manifold, can...
(Posted by jblapilusa 10 years ago)

Burners Get Warm But Not Hot
I have a jennair model JED8130ADB, all four burners will get warm but none hot enough to boil water....
I have a jennair model JED8130ADB, all four burners will get warm but none hot enough to boil water....
(Posted by jblawrence1 11 years ago)