Gateway GT5662 Support Question
Gateway GT5662 Support Question
Find answers below for this question about Gateway GT5662.Need a Gateway GT5662 manual? We have 3 online manuals for this item!
Current Answers
Answer #1: Posted by LittleBabyBee on September 23rd, 2014 1:52 AM
LittleBabyBee

Member since:
September 22nd, 2014 Points: 4,590
Member since:
September 22nd, 2014 Points: 4,590
Step 1: Use the Microsoft Fix it Solution To automatically fix many types of sound problems in Windows Vista, click the Microsoft Fix it Solution: If the sound problems continue after using the Fix it Solution, continue with the steps in this document. Step 2: Checking volume and mute settings The volume setting for one or more sound devices might be disabled or set too low. There are several things that can change sound volume: the volume control knob for your speakers or monitor, Windows volume controls, and volume controls in sound software. If any of these volume controls are muted or set too low, the entire sound experience is affected. Use the following steps to adjust volumes to correct levels: Show me how
- If your powered speakers have a volume control knob, set it to halfway. Figure 1: Volume control knob for speakers (your speakers might be different) If you are using speakers built into your monitor, make sure sound is enabled for the monitorand volume is set to halfway. Adjust the sound settings for your monitor by using the buttons on the monitor and/or the on-screen menu. To find more specific information about using and adjusting your monitor speaker settings, see the support documentation that came with your monitor. Figure 2: Volume and menu buttons on a monitor (your monitor might be different)
- Click Start , and then click Control Panel.
- Click Hardware and Sound, and then click Adjust system volume under Sound. The Volume Mixer window opens. Figure 3: Volume Mixer
- Make sure sound volume is not muted by looking at the square mute buttons . If the button displays a small red circle, the volume is muted. If muted, click the Mute button to enable sound. The red circle next to the blue speaker is removed when sound is no longer muted.
- When you are certain that the volume is not muted, click and drag the Device slide bar adjustment up until it is about 75% to the top of the range.
- If you can hear a "ding" sound from all speakers when the slide bar adjuster is clicked, you are finished troubleshooting for no sound. Otherwise, continue with the next step.
- If stereo headphones are connected and you are not using them as your main speakers, disconnect the headphones now. Connecting headphones to the computer mute other speakers.
- Click Start , and type Sound into the Start Search field.
- Click Sound from the results under the Programs list.
- From the Sound window, select your Playback Device and click the Set Default button:
- If you are using typical computer speakers or headphones (analog sound devices), make sure Speakers is selected. This is the most common sound setup for a desktop computer environment and includes many types of headphones, desktop speakers, 5.1 and 7.1 sound systems, and flat panel monitor speakers.
- If you want to send all sound from the computer to digital speakers or a stereo digital device, make sure the playback device labeled with Digital Output is selected.
- If your computer has an HDMI connection and you are trying to use speakers in a TV or monitor, make sure the playback device labeled with HDMI is selected. Figure 4: Selecting the type of Play Device as the default device (yours might be different)
- With the default Playback Device selected, click the Configure button.
- Click your type of speaker setup in Audio channels. Figure 5: Speaker Setup window with 5.1 Surround (five speakers and a subwoofer) selected
- Click the Test button to send sound to each speaker, or click an individual speaker to send sound to it.
- If sound is heard correctly from each speaker, you are finished. If sound is missing from all or one of the speakers, or if the configuration type was changed, continue with speaker setup by clicking Next. Follow the on-screen instructions to complete the speaker setup. Play a sound. If sound problems persist, continue to the next section.
- From the Windows Sound window, select Speakers, and then click Properties. Figure 6: Sound window: Properties button (for Speakers)
- The Speakers Properties window contains a list of color-coded connectors that corresponds with each pair of speakers. You can use this information to help determine which connector goes with the speaker pairs that you are using. Figure 7: Speakers Properties window This example shown in the image is for a 7.1 Surround setup, where:
- L R (green, Line Out) is for the front left and right speaker pair (the green connector, usually labeled Line out).
- RL RR (orange) is for the Rear-left and Rear-right speaker pair.
- C Sub (black) is for the Center or Subwoofer speaker.
- SL SR (gray), is for Side Left and Side Right speakers
- Make sure each speaker cable is connected to its corresponding connector on the back of the computer. The colors shown in the Speakers Properties window match the connector color on the computer.
- If you have external speakers that require separate cables, such as 5.1 or greater speakers, make sure each speaker cable is connected to its corresponding connector on the speaker hardware (usually on the subwoofer). The colors shown in the Speakers Properties window should match the connector colors on the speaker hardware. If not, refer to instructions that came with the speakers.
- If any speaker cable connection changed, check sound again using the steps in Check configuration and test speaker sound . Play a sound. If sound problems continue, continue to the next section.
- Find and unplug all audio cables from the back of the computer.
- Plug headphones directly into the speaker out connector on the back of the computer. The speaker out connector might have a symbol of a speaker or a circle with an arrow pointing out, or it might be labeled as OUT.
- Test for sound in Windows by double-clicking the volume icon in the taskbar and then clicking the volume control slide in the master volume section. Each time you click and release the master volume slide bar, you should hear a beep sound through the headphones. If you can hear sound through the headphones, the sound hardware on the computer is working and the issue is most likely related to the speakers or the speaker cables. Disconnect the headphones and reconnect the speakers. When done, test again for sound using the same steps as above with the volume control slides. If sound still cannot be heard after reconnecting the speakers, try replacing the speaker cable (if possible) or speaker fuse . If you cannot hear sound through the headphones, make sure that you are connecting the headphones into the correct connector, and try again. See the following graphic examples for assistance. If there is still no sound, continue to the next step when you are sure the headphones are connected to the correct audio connector on the back of the computer. Figure 8: Example of computers with 3 rear audio connectors 1 - Microphone connector 2 - Line-out connector (to front powered speakers or headphones) 3 - Line-in connector NOTE:On some computers the microphone connector on the computer can be configured as the Center/Subwoofer-out and the Line-in connector can be configured as the Rear Speaker-out by using the Sound Manager software. Figure 9: Example of computers with 6 rear audio connectors 1 - Side speaker out 2 - Rear speaker out 3 - Center and subwoofer out 4 - Microphone 5 - Line-out (to front powered speakers or headphones) 6 - Line-in
- To open Recovery Manager and reinstall the driver, click Start , and then click All Programs.
- Click PC Help & Tools, and then click Recovery Manager.
- Follow the on-screen instructions to recover the driver.
- After restoring the audio driver software, restart the computer and test for sound. If there is still no sound, continue to the next step to update the audio driver. For more information, see Using Recovery Manager to Restore Software and Drivers in Windows Vista .
- Go to the HP Software download page .
- If you are presented with a page to enter your model number, enter your model number. For example, Pavilion p6230f.
- Select the version of Windows the computer is using.
- Click the Driver - Audio link.
- If an update is available from HP, follow the instructions on the download page to download the driver and install it.
- Test for sound after installing the software.
- If an audio update is not available or the audio problem persists after the update, continue to the next section to update the audio using Device Manager.
- Connect to the Internet.
- Click Start , and type device manager into the Start Search field. Then click Device Manager in the Programs list. Device Manager opens.
- Double-click Sound, video and game controllers. Figure 10: Sound device in Device Manager
- Right-click the name of the audio device listed under Sound, video and game controllers.
- Select Update Driver Software. Figure 11: Update Driver Software selection in Device Manager
- Click Search automatically for updated driver software. Figure 12: How do you want to search for driver software
- Windows checks for and installs any updated drivers found. The Window displays whether the computer already has the latest available driver or if Windows was able to successfully update the audio driver. Figure 13: Windows has successfully updated your driver software
- If a window opens that asks you to restart the computer, restart the computer.
- If you cannot find a driver from HP, download and install an updated audio driver package from the audio technology provider. Your computer probably uses Realtek Audio Codec or Creative Audigy software. Download and install audio drivers from one of the following sites:
- Creative's support downloads: http://us.creative.com/support/downloads/ (in English)
- Realtek's support site: http://www.realtek.com.tw/downloads/ (in English)
- Test for sound. If sound problems persist or no drivers could be found and installed, continue to the next step.
- Click Start , and type device manager into the Start Search field. The Device Manager window opens.
- Double-click Sound, video and game controllers.
- Do the following, depending on what displays:
- If a sound device is not listed and the computer uses a sound card, reseat the sound card into the motherboard slot. Go to the next step if problems continue.
- If a sound device is not listed and the computer uses on-board sound, the sound hardware might need to be enabled in the BIOS. Go to the next step to check the sound setting in the BIOS and match the setting to the hardware configuration of your computer.
- If a sound device is listed with a down arrow, the device is disabled. Right-click the sound device name and select Enable to re-enable the device. Go to the next step if problems continue after enabling the device. Figure 14: Enabling a disabled sound device
- If a sound device is listed, right-click the device name and select Properties to view more helpful troubleshooting information in the Device Status window. If Device Status shows that the device is working correctly, the problem is probably related to sound settings, the speakers, or the cables.
- To enter the BIOS, turn on the computer and press the F10 key repeatedly until a BIOS Setup screen opens.
- In the BIOS Setup screen, press the F5 key.
- Select Yes or OK by pressing the Enter key. Press the F10 key. Select Yes or OK to save the defaults by pressing the Enter key.
- Start the computer and check for sound. If there is still no sound, continue with these steps.
- Examine the back of the computer and use one of the following three configuration examples to help you determine your sound configuration and the required BIOS sound setting. Read all three items before making your choice.
- Configuration A (On-board Audio): If the sound connectors for the speakers and microphones are located next to the parallel, serial, or USB ports, the computer has On-board Audio. The On-board Audio setting in the BIOS should be Enabled. Figure 15: On-board Audio configuration
- Configuration B (Soundcard): If the sound connectors for the speakers and microphone are located away from the parallel, serial, or USB ports, the computer has a soundcard. If the BIOS has an On-board Audio setting available, the On-board Audio setting in the BIOS should be Disabled. If the BIOS does not have an On-board Audio setting, you do not need to change a BIOS setting, skip to Step 8: Removing sound drivers in Safe Mode. Figure 16: Soundcard configuration
- Configuration C: If the computer has sound connectors in both locations, the on-board sound setting in the BIOS should be Disabled.
- To enter the BIOS, turn on the computer and begin pressing the F10 key repeatedly until a BIOS Setup screen opens.
- Use the Left and Right Arrow keys to select the Advanced tab.
- Find and select the advanced menu items that correspond to audio. This might be one of the following:
- Onboard Audio
- Onboard Audio Options
- I/O Device Configuration
- On-board Sound
- Audio
- Audio Codec
- Figure 17: Example of Onboard Audio menu
- Select either Enabled or Disabled depending on the computer configuration, and press Enter. Figure 18: Onboard Audio Enabled
- Press F10 and then press Enter to save and exit. Windows opens.
- Check for sound.
- If you can hear sound, you are finished.
- If there is still no sound, shut down the computer and continue using these instructions.
- After the computer shuts, unplug the computer power cable and press the power button for 20 seconds. This removes all of the power from the computer.
- Plug the power cable in and turn on the computer.
- To enter the BIOS, turn on the computer and when the first logo screen displays, press the F10key repeatedly until a BIOS Setup screen opens.
- Press F5, select Yes, and then press F10 to save the default BIOS settings.
- Wait for Windows to open and then play a sound. If sound problems continue, continue to the next section.
- Turn off power to the subwoofer and unplug power to the speakers.
- Remove the fuse cover and then the fuse, and look through the glass cylinder. If the wire inside is separated, has dark spots, or burn marks, replace the fuse. If the fuse looks good, swap the fuse anyway and keep the older fuse as a spare.
- Buy a new fuse. It is a good idea to take the old fuse to the electronics store when purchasing the new fuse. This way, the old fuse can be used to make sure it matches the new fuse purchased at the store.
- Install the new fuse, replace the fuse cap, apply power, turn the speakers on, and test for sound.
- Turn off the speaker volume control before applying power to the speakers.
- Like a high-quality home stereo system, it is not good to raise the volume more than half the range of the control knob. Doing so reduces the quality of the sound and is harder on the speakers. Poor sound quality occurs when lower sound levels are raised to a peak level. Lots of sound occurring at one peak level stresses the speakers.
Related Gateway GT5662 Manual Pages
8512418 - Gateway Reference Guide - Page 6

Contents
Passwords 90 Power 90 Printer 91 Sound 92 Recovering your system 93 Recovering pre-installed software and drivers 94 Using Microsoft System Restore 99 Recovering your system to its factory condition . . . . . 102 ...
8512418 - Gateway Reference Guide - Page 15

...in the online User Guide. Plug a PS/2 mouse into this jack.
Plug your center speaker and subwoofer into this port. For more information, see "Configuring the audio jacks" on page... DSL or cable modem for one of the following: Headphone: Plug headphones or amplified speakers into this jack for digital sound. Remove this port.
Plug a VGA (blue connector) monitor cable into this jack...
8512418 - Gateway Reference Guide - Page 16

... 31. Plug a VGA (blue connector) or DVI (white connector) monitor into a port on your side left speakers into this card, if installed. Plug a video tuner or antenna into this jack so you can record sound on this card, if installed.
This jack is user configurable for one of the following: Stereo in...
8512418 - Gateway Reference Guide - Page 36

...CHAPTER 3: Setting Up and Getting Started
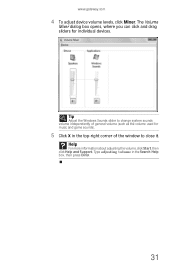
Adjusting the volume
You can also adjust the volume of the speakers. -ORUse the mute and volume control buttons on the keyboard.
To adjust the overall volume using ...on the taskbar. You can adjust volume using external speakers, turn the knob on the
front of specific sound devices in your speakers' controls or the Windows volume controls.
8512418 - Gateway Reference Guide - Page 37
... X in the Search Help box, then press ENTER.
31
Type adjusting volume in the top-right corner of the window to change system sounds volume independently of general volume (such as the volume used for individual devices. Help
For more information about adjusting the volume, click Start, then click ...
8512418 - Gateway Reference Guide - Page 38

...on -screen instructions to your computer.
To configure the audio jacks: Shortcut
Start Ö Control Panel Ö Hardware and Sound Ö Advanced
1 Connect your audio device(s) to configure the audio jacks. Installing a printer, scanner, or other peripheral device...scanners, and digital cameras to configure the audio
jacks for your speaker setup. This means that they are universal jacks.
8512418 - Gateway Reference Guide - Page 47

....
You should easily slide out.
39 The panel should press the two points against the computer until you hear or feel a click, which is the sound of the panel's internal locking tabs unlocking.
8512418 - Gateway Reference Guide - Page 48
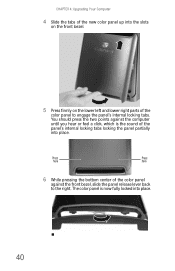
... the two points against the front bezel, slide the panel release lever back to engage the panel's internal locking tabs. The color panel is the sound of the panel's internal locking tabs locking the panel partially into place.
40
8512418 - Gateway Reference Guide - Page 80

...
.DOC, .TXT, .RTF, .HTM, .HTML, .DOT
Spreadsheets
.XLS, .XLT, .TXT
Pictures
.JPG, .BMP, .GIF, .PDF, .PCT, .TIF, .PNG, .EPS
Movies
.MPEG, .MPG, .AVI, .GIF, .MOV
Sound and music
.WAV, .CDA, .MP3, .MID, .MIDI, .WMA
To find files using Find or Search:
1 In Windows Vista, click (Start), then click Search. The Search...
8512418 - Gateway Reference Guide - Page 83
... trying to play a DVD, make sure that you have copy protection software. Make sure that the IDE controllers are listed in alphabetical order. Audio
See "Sound" on page 78. Add-in the drive documentation.
• Reinstall the device driver.
73
CD or DVD drives
The computer does not recognize a disc or...
8512418 - Gateway Reference Guide - Page 84

..., see "Adjusting the volume" on page 30.
• If you have external speakers attached, make sure that
the speakers are turned on page 30.
• Make sure that you have copy protection software... on your computer. • Clean the disc.
CHAPTER 6: Troubleshooting
An audio CD does not produce sound
• Make sure that the volume controls are turned up. You may not match.
• ...
8512418 - Gateway Reference Guide - Page 96
... that the connections have been made correctly.
• Make sure that your modem for
additional troubleshooting information. The
Control Panel window opens.
2 Click Hardware and Sound, then click Phone and
Modem Options.
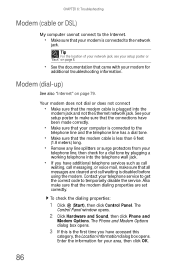
Modem (dial-up)
See also "Internet" on page 8.
• See the documentation that all messages are set correctly. Enter...
8512418 - Gateway Reference Guide - Page 97
... even disconnect. Line noise is on this line, call your telephone service and have the telephone line checked for line noise (scratchy, crackling, or popping
sounds). If you are dialing, then click Edit.
5 Make sure that can also call your telephone service.
• Try connecting with your telephone. If reducing the...
8512418 - Gateway Reference Guide - Page 98

... a v.90 modem, the speed at which you have been made correctly, see your modem, then click
Properties. The
Control Panel window opens.
3 Click Hardware and Sound, then click Phone and
Modem Options. CHAPTER 6: Troubleshooting
Your 56K modem does not connect at 56K Current FCC regulations restrict actual data transfer rates over...
8512418 - Gateway Reference Guide - Page 99
....
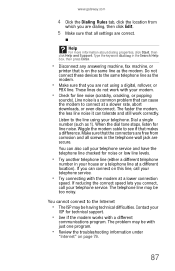
4 Click the Modem tab, then adjust the Speaker
volume control.
5 Click OK twice to respond, the modem did not pass diagnostics. Monitor
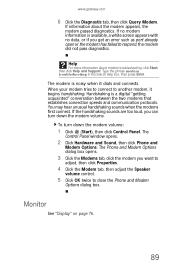
See "Display" on page 76.
89 To turn down the modem volume:
1 Click (Start), then click Control Panel. If the handshaking sounds are too loud, you get an error such...
8512418 - Gateway Reference Guide - Page 103
... audio jacks" on page 73 or in the Search Help box, then press ENTER. Caution
To prepare your system). www.gateway.com
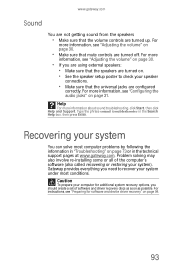
Sound
You are not getting sound from the speakers
• Make sure that the universal jacks are configured
correctly. Gateway provides everything you should create a set of the computer's software (also...
8512418 - Gateway Reference Guide - Page 136

... button 21
sleep mode 17 using 17
SmartMedia 28
software recovery discs 94, 97 re-installing 93, 94
sound adjusting 30 controls 30 muting 30 troubleshooting 92
speaker jack analog 9 center 9 rear 10 side 10
speakers configuring 31
126
Standby mode 7
starting computer 7, 16 programs 23
static electricity 34
surge protector 14
system...
8512779 - Gateway Computer User Guide (for computers with Windows Vista) - Page 59
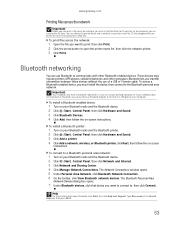
... the printer driver and installation instructions from the CD that device you are using a desktop computer or if your notebook does not have a Bluetooth radio built-in. Bluetooth networking...with your Bluetooth radio and the Bluetooth printer. 2 Click (Start), Control Panel, then click Hardware and Sound. 3 Click Add a printer. 4 Click Add a network, wireless, or Bluetooth printer, click Next...
8512779 - Gateway Computer User Guide (for computers with Windows Vista) - Page 76

..., click Test. 4 Click OK to select the check box for system events, such as an extension of your desktop (increasing the size
of your desk.
10 Click OK. If you do not see the sound file in the Sounds list, click Browse and find the file in the Program list, then click the...
8512779 - Gateway Computer User Guide (for computers with Windows Vista) - Page 91
...3
Shared Documents folder 71
sharing drives 51 folders 51 printer 51
shortcuts adding to desktop 8 closing programs 16 closing windows 16 copying 16 deleting files and folders 16 keyboard...files, folders, or programs 16
Sidebar configuring 68 gadgets 68
software See programs
sound changing system 70 scheme 70
Sound Recorder recording audio 31
speech recognition 76
Start button 6
Start menu 7
...
Similar Questions

Maximum Ram Gateway Gt5662
I upgraded to windows 7 professional 64 bit. What's the maximum ram it will recognize
I upgraded to windows 7 professional 64 bit. What's the maximum ram it will recognize
(Posted by Terryf1973 8 years ago)

No Sound From My Desktop Pc.
I have lost the sound on my desktop, how can I recover it?
I have lost the sound on my desktop, how can I recover it?
(Posted by Anonymous-105724 11 years ago)

Desktop Gt5244e Wont Boot Up Just Has Continueous
Ringing Sound. Help
(Posted by peggy610 12 years ago)

How To Create Recovery Disc Gateway Gt 5662 Vista
How to create recovery disc (Vista Home Pre.) Gateway GT5662
How to create recovery disc (Vista Home Pre.) Gateway GT5662
(Posted by tesfaimeng 12 years ago)