Frigidaire FRQE7000LW Support Question
Frigidaire FRQE7000LW Support Question
Find answers below for this question about Frigidaire FRQE7000LW.Need a Frigidaire FRQE7000LW manual? We have 3 online manuals for this item!
Question posted by goomaster4 on February 6th, 2013
How To Remove Air Duct Cover (lint Filter Holder) From Frqe 7000lw0
The person who posted this question about this Frigidaire product did not include a detailed explanation. Please use the "Request More Information" button to the right if more details would help you to answer this question.
Current Answers
Related Frigidaire FRQE7000LW Manual Pages
Wiring Diagram (All Languages) - Page 1

... has been reset by counting the number of time. Solution
Clear code, exit mode and start dryer.
Remove wires from control thermistor. If reading is not 50 K (± 10%), replace thermistor. If... appear in the code stands for blocked lint filter, blocked exhaust, air leaks around air duct, broken blower fan blades, worn or loose drum seals, dryer installed in closet with solid door, or...
Wiring Diagram (All Languages) - Page 2

...LED'S could be a key beep with each setting. c. d. e. Control thermistor reading is off . Dryer will make the numbers decrease. heat source is displayed.** 6 turns: Drive motor runs; When the OPTION ...heat source is displayed. 3 turns: Drive motor runs; Cool Down LED is lit and "AF" (Air Fluff) is off . When the Pause Cancel button is pressed, all the TEMP LED's should be ...
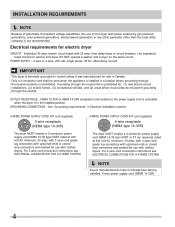
Installation Instructions (All Languages) - Page 1

All about the
Installation
of your Dryer
TABLE OF CONTENTS
Important Safety Instructions 2-3 Reversing Door 18-19 Installation Requirements 4-10 Accessories 20 Installed Dryer Dimensions 11 Español 21 Installation Instructions 12-17
137371800A (1006)
Installation Instructions (All Languages) - Page 2

...easily crushed and trap lint. Save these instructions for natu- ral gas or LP supply, gas dryer)
• Carpenter...dryer are adapters (x2)
and flexible gas supply line (gas dryer) • Metal foil tape (not duct tape)
2
Cartons covered...dryer is unpacked. These conditions will obstruct clothes dryer airflow and increase the risk of fire. • Do not stack a dryer...
Installation Instructions (All Languages) - Page 3

... Gas supply turned on terminal block
‰ Approved strain relief installed ‰ Terminal access cover installed before using this symbol to -back ‰ Cabinet is the safety alert symbol.... messages that follow this dryer. Installation Checklist
Exhaust Venting
‰ Free-flowing, clear of lint buildup ‰ 4 inch (102 mm) rigid or semi-rigid ducting of
minimal length and turns...
Installation Instructions (All Languages) - Page 4
... loop connectors and marked for sale in the installed position. branch circuit fused with clothes dryers. time delay fuses or circuit breakers.
Grounding through the neutral conductor is not recommended.....
4-WIRE POWER SUPPLY CORD KIT (not supplied)
4-wire receptacle (NEMA type 14-30R)
The dryer MUST employ a 4-conductor power supply cord NEMA 14-30 type SRDT or ST (as required) rated...
Installation Instructions (All Languages) - Page 5

... (1.27 cm) pipe.
3 If codes allow, flexible metal tubing may be constructed of 1/2 psig (3.45 kPa).
7 The dryer MUST be isolated from the gas supply piping system during any circumstances, cut, remove, or bypass the grounding prong. Power cord with ground, 120 volt, single phase, 60 Hz, Alternating Current. The tubing...
Installation Instructions (All Languages) - Page 6

These conditions will obstruct clothes dryer airflow and increase the risk of 12 inches (30.5 cm) clearance between the vent hood and the ground or any lint prior to prevent drafts and the entrance of any other obstruction. WARNING
FIRE HAZARD Failure to collapse, be easily crushed and trap lint. The following are...
Installation Instructions (All Languages) - Page 7

...dryer into the laundry area. Lint can accumulate lint, resulting in a fire hazard. • Do not screen the exhaust ends of the vent system, or use any screws, rivets or other fasteners that extend into a chimney, a wall, a ceiling, or any accumulation of lint around the outdoor exhaust opening and remove any concealed space of air...
(2.4 m) duct length.
7 Plugging the system could...
Installation Instructions (All Languages) - Page 8

...lint.
• Compression or crimping of the exhaust system will cause an increase in correct direction:
Exhaust direction
Directional exhausting can be accomplished by installing a quick-turn elbow required to meet minimum installation depth of free-standing dryer... dryer.
3 Read the measurement on the next page.
Í NOTE
Use of 90° quick-turn 90° dryer vent elbow directly to air...
Installation Instructions (All Languages) - Page 9

... a garage, it will come in contact with curtains, drapes, or anything that will obstruct the flow of combustion and ventilation air. 3 On carpet. Rigid metal duct is preferred.
3 If dryer is exhausted through the floor and area beneath the mobile home is enclosed, the exhaust
system MUST terminate outside make up...
Installation Instructions (All Languages) - Page 10

... a door is installed. INSTALLATION REQUIREMENTS
Clearance requirements, continued
Installation in a Recess or Closet
1 A dryer installed in a bedroom, bathroom, recess or closet, MUST be exhausted outdoors.
2 No other fuel burning appliance shall be installed in a closet with equivalent air openings for proper ventilation.
Openings are required to achieve 0" (0 cm) rear installation...
Installation Instructions (All Languages) - Page 13

...and ordinances. Grounding type wall receptacle
Do not, under any circumstances, cut, remove, or bypass the grounding prong. Grounding requirements -
Power cord with this appliance.... of electrical shock by a qualified electrician.
For a grounded, cord-connected dryer: 1 The dryer MUST be plugged into an appropriate outlet that is properly grounded. Check with a licensed...
Installation Instructions (All Languages) - Page 14

... approved manual shutoff valve.
to flow through the gas line. INSTALLATION INSTRUCTIONS
Gas connection
1 Remove the shipping cap from gas supply
4 Check for gas system leaks with an open flame...kit must be installed by brushing on all pipe connections. An L.P. IMPORTANT
DO NOT connect the dryer to 0.96 cm) reducer for gas leaks with a manometer. Do not block access to ...
Installation Instructions (All Languages) - Page 15

... to the SILVER colored center terminal on the terminal block. Neutral terminal
IMPORTANT
If moving dryer from the center terminal back to the GREEN screw next to the terminal block.
15
Tighten...death.
1 Turn off power supply to outlet. 2 Remove the screw securing the terminal block
access cover in the lower corner on the back of the dryer. 3 Install a UL-approved strain relief according to...
Installation Instructions (All Languages) - Page 16

...RED and BLACK power cord conductors to the outer, BRASS colored terminals on the back of the dryer. 3 Install a UL-approved strain relief according to the power cord/strain relief manufacturer's instructions ... or even death.
1 Turn off power supply to outlet. 2 Remove the screw securing the terminal block
access cover in the lower corner on the terminal block. Neutral terminal
GREEN ground...
Installation Instructions (All Languages) - Page 17

...
General installation
1 Connect the exhaust duct to the exhaust vent system. Use of a 4" (102 mm) clamp (item A) is resting
solidly on all other joints.
2 Carefully slide the dryer to check
A
for future reference.... you have any circumstances, cut, remove, or bypass the grounding prong. Power cord with the dryer. Adjust
one or more of the
dryer. Remove and discard door tape.
Installation Instructions (All Languages) - Page 18

.... (Figure 6)
3 Place door on edge of door opposite hinges.
18 After the remaining screws are loosened continue to window. REVERSING DOOR
Figure 1
1 Open door and remove four plugs in the door opening opposite the hinges.
Then only loosen the two remaining screws while firmly holding the door to prevent damage...
Installation Instructions (All Languages) - Page 19

...the door opening and align the top hinge hole to the lower hinge.
REVERSING DOOR
Figure 7
8 Remove lens locating screw. (Figure 7)
Figure 8
9 Disengage several of the retention tabs and pull lens... panel door opening where hinges were originally installed.
19 Figure 9 Figure 10
10 Remove two transition ring plugs and reinstall on transition ring are tightened, install the remaining two...
Product Specifications Sheet (English) - Page 2

.../ Cancel Buttons Energy Saver Option Delay Start Tumble Speed (RPM) Reversible Door Lint Screen Sound Package Adjustable Leveling Legs
7.0 Ready-Select™ Painted Steel Yes White... Next Level
Front Load Dryer
FRQE7000L W 7.0 Cu. Depth Depth with Door Open 90˚ Pedestal Dimensions A - Always consult local and national electric and plumbing codes. Front Load Laundry - Ft. B
C
A
B
C...
Similar Questions

Where Is The Sensor Bar?
My new (to me) Frigidaire Gallery Series, model #GLEQ2152EE dryer runs cold air for about 5 minutes,...
My new (to me) Frigidaire Gallery Series, model #GLEQ2152EE dryer runs cold air for about 5 minutes,...
(Posted by jffryrndll 6 years ago)

Back Waffle Vent Burning
I've had this dryer for 2.5 years and it recently started to smell like my clothes are burning. Upon...
I've had this dryer for 2.5 years and it recently started to smell like my clothes are burning. Upon...
(Posted by Brianatursick 10 years ago)


Dryer Turns Self Off After 10mins Of Run Time
my dryer quits working after 10mins into a cycle. it doesn't matter what temp or time... only runs f...
my dryer quits working after 10mins into a cycle. it doesn't matter what temp or time... only runs f...
(Posted by curleyq81 11 years ago)

Lint Duct
need to remove plastic lint filter holder to remove debris trapped down in hole. how do i?
need to remove plastic lint filter holder to remove debris trapped down in hole. how do i?
(Posted by rogertesch 13 years ago)