Electrolux EW30IS65JS Support Question
Electrolux EW30IS65JS Support Question
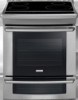
Find answers below for this question about Electrolux EW30IS65JS.Need a Electrolux EW30IS65JS manual? We have 4 online manuals for this item!
Question posted by roninseoul on November 2nd, 2012
How Can I Fix Error Code E15?
The person who posted this question about this Electrolux product did not include a detailed explanation. Please use the "Request More Information" button to the right if more details would help you to answer this question.
Current Answers
Answer #1: Posted by Anonymous-81001 on November 5th, 2012 2:07 PM
Anonymous-81001

Member since:
October 26th, 2012 Points: 182,110

Member since:
October 26th, 2012 Points: 182,110
Hello – Typically depending on where the error code E15 was displayed, either in the burner display or on the clock display the unit could possibly be experiencing communication problem. One can be between the cook top control and user interface or clock and thermal. You may try resetting the range by disconnecting the power to the unit or flipping the household circuit breaker off. Wait approximately ten minutes and usually this will clear most false error codes. If resetting the unit proves to be ineffective, I would suggest contacting a professional to move forward accurately.
Answer #2: Posted by jlmalinowski on June 8th, 2016 10:03 AM
jlmalinowski

Member since:
June 8th, 2016 Points: 10
Member since:
June 8th, 2016 Points: 10
Unfortunately, you almost certainly will have to end up buying a new stove. You can try replacing some of the circuit boards - cost is around $1200.00 for both boards. You might get lucky and this might solve the problem but then again it might not. Electrolux is no help unless your stove is under warranty. You'll be directed to a service tech. Unfortunately, they are as unfamiliar with the design and workings of the circuit boards as you and I are. Nobody is going to tell you they fixed the problem because they can't be certain Electrolux fixed the control boards, even new ones.
The stove looks good and when it works it works well. Unfortunately, every possible cent has been saved in its manufacture. This is pointedly obvious from the materials Electrolux used. So there is nothing to suggest that Electrolux is taking ownership of the problem or doing anything except Duck, Dodge and Deny.
The bottom line is that this is a design or component flaw and can't be fixed reliably. Again, you might get lucky but more realistically you're going to have to buy a new stove.
Related Electrolux EW30IS65JS Manual Pages
Installation Instructions (All Languages) - Page 1

... 3) (76,2 cm) Min. (See Note 3)
3/8"min.
18" Min. (45,7 cm) Min.
Approx. 1 7/8" (4,8 cm)
F
Locate Cabinet Doors 1" (2,5 cm) Min. HEIGHT
B. TOTAL DEPTH TO FRONT OF RANGE
28 5/16" (71,9 cm)
E. pages 1-12
Español - 30" ELECTRIC SLIDE-IN RANGE INSTALLATION INSTRUCTIONS
United States
INSTALLATION AND SERVICE MUST BE PERFORMED BY A QUALIFIED INSTALLER.
Installation Instructions (All Languages) - Page 2

... the side cabinets.
3. 24" (61 cm) minimum clearance between the range and
the wall.
2.
E
E
22 7/8"(58,1 cm) min. 23 1/4"(59,...millboard covered with
backguard
G. IMPORTANT: Cabinet and countertop
width should match the cutout width. WIDTH
(Under Cooktop)
C. TOTAL DEPTH TO FRONT OF RANGE
28 5/16" (71,9 cm)
E. HEIGHT OF COUNTERTOP
35 3/4" (90,8 cm) Min. 36 5/8" (93 cm) Max.
2 HEIGHT...
Installation Instructions (All Languages) - Page 3

... frame should NOT rest directly on the countertop (see illustration 2).
To successfully install the range, the initial level height from the floor to the underside
Space for proper unit support... the cabinet countertop for a 31½" (81 cm) Wide Cooktop. 30" ELECTRIC SLIDE-IN RANGE INSTALLATION INSTRUCTIONS
To avoid breakage: Do NOT handle or
manipulate the unit by the cooktop.
1
The...
Installation Instructions (All Languages) - Page 4

.../NFPA No. 70-latest edition in United States or with CSA Standard C22.1, Canadian Electrical Code, Part 1 in the cabinets above room temperature without adequate ventilation can be secured by installing a range hood that project horizontally a minimum of 5 inches beyond the bottom of time, be seriously burned climbing on the door or...
Installation Instructions (All Languages) - Page 5

... no outlet is required, punch out the knockout. flexible armored or nonmetallic shielded copper cable (when local code allow it) or by connection of fire or electrical shock exists if an incorrect size range cord kit is responsible for use only a power supply kit designed for the minimum wire size (general UL...
Installation Instructions (All Languages) - Page 6

.... To 240 V Receptacle
Figure 3
Cord Mounting
Plate
Neutral (White Wire) Grounding Strap
1 1/8" (2.9 cm) Dia. Silver Colored Terminal
Red Wire
Four Conductor Wire Connection to Range
Where local codes does NOT permit connection of the copper power supply cord (see Figure 3):
1. Match wires and terminals by color (red wires connected to the right...
Installation Instructions (All Languages) - Page 7

...or bare copper) grounding
wire to the neutral (white) wire (see Figure 6): 1. Where local codes permit connecting the appliancegrounding conductor to the grounding wire of the cable. c) Connect the 2 red ...of the circuit breaker, fuse box or junction box.
30" ELECTRIC SLIDE-IN RANGE INSTALLATION INSTRUCTIONS
Direct Electrical Connection to the Circuit Breaker, Fuse Box or Junction Box...
Installation Instructions (All Languages) - Page 8

... cut back 3/4"(1.9 cm) from each front corner and/or rounded edge flattened (Figure 7).
Cooktop sides of range fit over the cutout edge of countertop opening .
Cutout Width
¾" (1.9 cm)
¾" (1.9 cm... Construction
4.1
To eliminate the risk of burns or
fire by installing a range hood that projects horizontally a minimum of 5" (12.7 cm) beyond the bottom of the ...
Installation Instructions (All Languages) - Page 9

... anti-tip bracket template supplied with care. Follow the
instructions under "Leveling the Range".
13 Slide the range into the cutout opening .
9 Shave raised countertop edge to interfere with your
...6).
Make sure that are adjacent to be made or gaps between the countertop
and the range cooktop may occur. Follow the installation instructions on page 11 or on page 3). To provide...
Installation Instructions (All Languages) - Page 10

....
Remove all controls are Complete
Make sure all packaging from the unit. Convection (some models) and Clean functions. When All Hookups are left in your range product and/or need to Adjust Rear Leveling
Device Height
Leveling Screw
RAISE
Font Leveling
Leg
LOWER
LOWER RAISE
Rear Leveling Device
RAISE
LOWER
Figure...
Installation Instructions (All Languages) - Page 11

...Be sure the 4 levelling legs are located in the oven. The screws provided will allow the range to the floor by the anti-tip bracket (Figure 11). BRRAAEACNRKGWEEDLAIGNLLEE OOFR
Kitchen Cabinet
Toe Plate...Anti-Tip Bracket
Rear of the 4 mounting holes shown on the floor the location of Range
Range
Wall
Floor Floor Mount
Screws
Figure 12
Figure 11
SLIDE BACK
11 Serious injury might ...
Installation Instructions (All Languages) - Page 12

30" ELECTRIC SLIDE-IN RANGE INSTALLATION INSTRUCTIONS NOTES:
12
Product Specifications Sheet (English) - Page 1
... and cooking delicate foods and sauces.
Wall Ovens
Warmer Drawers
Cooktops
Built-In Ranges
Freestanding Ranges
Microwaves
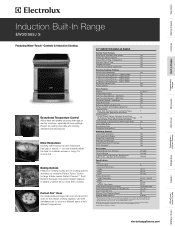
Induction Built-In Range
EW30IS65J S
Featuring Wave-Touch™ Controls & Induction Cooktop
Exceptional Temperature Control Adjust ...Cavity Dimensions - NOTE: Always consult local and national electric codes. Refer to cook two different items at lower settings.
Product Specifications Sheet (English) - Page 2
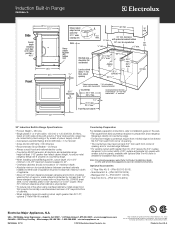
Induction Built-In Range
EW30IS65J S
Side
Overall depth including oven door in 90°open position - 45 1/4"
...; Amps @ 240 / 208 Volts = 55 / 48 Amps
• Recommended Circuit Breaker - 50 Amps
• Always consult local and national electric codes.
• Countertop MUST be level in the U.S.A.
Note: For planning purposes only. clearance
3/8" min. or 4-wire cable, 120 / 240 or 120...
Complete Owner's Guide (English) - Page 1
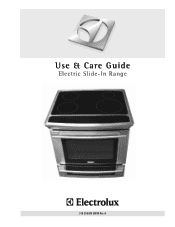
A Use & Care Guide
Electric Slide-In Range
318 205 809 (0909) Rev.
Complete Owner's Guide (English) - Page 3
... Maintenance 50 Cleaning Recommendations for Future Use 2 Model and Serial Number Location 2 Questions 2 Table of Contents 3
Safety 4 Important Safety Instructions 4-7
Feature Overview 8 Your Slide-In Range 8-9 Oven Rack Supports and Oven Vents 10 Removing and Replacing Oven Racks 11 Control Pad Functions 12-14
Getting Started 15 Setting Clock at Power...
Complete Owner's Guide (English) - Page 4
... properly installed antitip bracket(s) provided with CSA C22.1 PART 1-latest edition and local code requirements. Ask your appliance is no guarantee that the anti-tip bracket (s) is engaged. To reduce the risk of tipping of the range, the range must be done only by a qualified technician to reduce the risk of personal injury...
Complete Owner's Guide (English) - Page 5
... bulky cloth instead of a potholder.
• Do Not Heat Unopened Food Containers-Build up of pressure may begin to the appliance. Children climbing on the range to cause burns.
Food left alone or unattended in the area where an appliance is in injury.
• Remove the oven door from steam. Safety...
Complete Owner's Guide (English) - Page 7
IMPORTANT INSTRUCTIONS FOR CLEANING YOUR RANGE
• Clean the range regularly to the hood manufacturer's instructions for cleaning.
• Cleaners/aerosols-Always .... Exposed fat and grease could catch fire. No oven cleaner or oven liner protective coating of any part of any range. The health of the oven listed in the fan could ignite.
• Do not touch a hot light bulb with...
Complete Owner's Guide (English) - Page 53
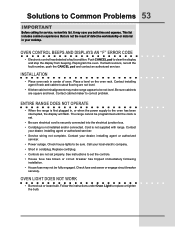
.... Oven Control Beeps and Displays an "F" ERROR COde
• Electronic control has detected a fault condition. Place a level on the oven rack. The range cannot be sure. Contact
your dealer, installing...or circuit breaker has tripped immediately following
installation. • House fuse may make range appear to be fully engaged. Cord is not installed and/or connected. Replace cord...
Similar Questions

Code E15
Code E15 came on. The Surface Elements don't heat up, but the OVEN works fine.I tried to reset the s...
Code E15 came on. The Surface Elements don't heat up, but the OVEN works fine.I tried to reset the s...
(Posted by agibber1 2 years ago)


Ew30if60isa Error Code 75
getting code e75 on my electrolux model ew30if60isa .what part is broke?
getting code e75 on my electrolux model ew30if60isa .what part is broke?
(Posted by bmelectrical 6 years ago)


Error Code C 35
How to fix error code C 35.Cook top dosen't work.Thank you.
How to fix error code C 35.Cook top dosen't work.Thank you.
(Posted by krystynapabian 10 years ago)