Electrolux EW30IS65JS Support Question
Electrolux EW30IS65JS Support Question
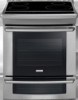
Find answers below for this question about Electrolux EW30IS65JS.Need a Electrolux EW30IS65JS manual? We have 4 online manuals for this item!
Question posted by bmelectrical on January 11th, 2018
Ew30if60isa Error Code 75
getting code e75 on my electrolux model ew30if60isa .what part is broke?
Current Answers
Answer #1: Posted by BusterDoogen on January 11th, 2018 10:23 AM
BusterDoogen

Member since:
October 30th, 2011 Points: 28,565,407

Member since:
October 30th, 2011 Points: 28,565,407
As shown on page 4 of the service manual there's no f75 error code. You should consider f15 or f25.
I hope this is helpful to you!
Please respond to my effort to provide you with the best possible solution by using the "Acceptable Solution" and/or the "Helpful" buttons when the answer has proven to be helpful. Please feel free to submit further info for your question, if a solution was not provided. I appreciate the opportunity to serve you!
Related Electrolux EW30IS65JS Manual Pages
Installation Instructions (All Languages) - Page 1

TOTAL DEPTH TO FRONT OF RANGE
28 5/16" (71,9 cm)
E. pages 1-12
Español - pages 25-36 READ AND ... with
backguard
G. HEIGHT OF COUNTERTOP
35 3/4" (90,8 cm) Min. 36 5/8" (93 cm) Max. 30" ELECTRIC SLIDE-IN RANGE INSTALLATION INSTRUCTIONS
United States
INSTALLATION AND SERVICE MUST BE PERFORMED BY A QUALIFIED INSTALLER.
E
½"min. IMPORTANT: SAVE FOR LOCAL ELECTRICAL ...
Installation Instructions (All Languages) - Page 2

...is protected by the cooktop itself. WIDTH
(Under Cooktop)
C. TOTAL DEPTH TO FRONT OF RANGE
28 5/16" (71,9 cm)
E.
HEIGHT
B.
IMPORTANT: Cabinet and countertop
width should match... (Countertop and cabinet)
30±1/16" (76,2±0,15 cm)
F.
30" ELECTRIC SLIDE-IN RANGE INSTALLATION INSTRUCTIONS
NOTE:
1. C A D
Side Panel
*** IMPORTANT: To avoid cooktop breakage for
door...
Installation Instructions (All Languages) - Page 3

...front and back (see illustration 2).
Level the unit if needed. To successfully install the range, the initial level height from the
floor to the underside
Space for the transport.
5
Slide...Illustration 1
4
Remove and discard the two rear leveling legs, they are only in step 2.
Level the range using
Shave
the two (2) front leveling Raised
1 ½" Max. (3.8 cm Max.)
legs and the ...
Installation Instructions (All Languages) - Page 4

... No. 70-latest edition in United States or with CSA Standard C22.1, Canadian Electrical Code, Part 1 in an area covered with range. Wipe up excess spillage. Serial Plate Location
You will find the model and serial number printed on the range to leave these instructions with the consumer.
Observe all appliances.
Important Note to...
Installation Instructions (All Languages) - Page 5

... closed loop or open spade lug with the frame grounded by a qualified electrician. Connect the appliance in Range is manufactured with upturned ends. Canada Style Figure 1
2. flexible armored or nonmetallic shielded copper cable (when local code allow it) or by means of a grounding strap between the neutral power supply terminal and the...
Installation Instructions (All Languages) - Page 6

... cover and replace the 3 screws.
Punch Out Knockout for 1 3/8" (3.5 cm) Dia.
Cord Kit Hole. Silver Colored Terminal
Red Wire
Four Conductor Wire Connection to Range
Where local codes does NOT permit connection of the frame grounding conductor to the frame of the appliance with the literature package, connect the ground wire (green...
Installation Instructions (All Languages) - Page 7

...listed)
NOTE: Be sure to remove the supplied grounding strap.
30" ELECTRIC SLIDE-IN RANGE INSTALLATION INSTRUCTIONS
Direct Electrical Connection to the Circuit Breaker, Fuse Box or Junction Box
If ...the appliance is supplied on the cable from
residence. 2. Where local codes permit connecting the appliancegrounding conductor to the neutral (white) wire (see Figure 5) on the...
Installation Instructions (All Languages) - Page 9

...your
9 appliance, do not handle or manipulate it by the cooktop. Level the range (see page 8). 4.Install range as not to solidify the unit for installation of the cabinet (shown on the
... and the rear
5 leveling wheels (see page 11) are plumb and level before placing the range at
this point before attaching cooktop.
apart so as in "Countertop Preparation" section (see section ...
Installation Instructions (All Languages) - Page 10

... and wheels.
5. When All Hookups are Complete
Make sure all packaging from the unit. a. c. If the range cannot be hot enough to the Use and Care Manual for the Clock, Timer, Bake, Broil, Convection (some models) and Clean functions. Do not touch the elements. Refer to cause burns.
Take 2 readings with Leveling...
Installation Instructions (All Languages) - Page 11

... and back lines you just drew before. (Use the diagram below to prevent range from the range itself. If range is trapped by properly installed anti-tip bracket and screws packed with the right ... paper template and place it . Bracket must be drilled into place making sure structure of the range, the range must be secured to the floor by the anti-tip bracket (Figure 11). Be sure the ...
Installation Instructions (All Languages) - Page 12

30" ELECTRIC SLIDE-IN RANGE INSTALLATION INSTRUCTIONS NOTES:
12
Product Specifications Sheet (English) - Page 1
...Ovens
Warmer Drawers
Cooktops
Built-In Ranges
Freestanding Ranges
Microwaves
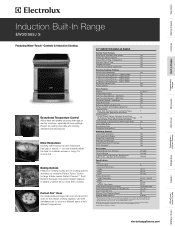
Induction Built-In Range
EW30IS65J S
Featuring Wave-Touch™ Controls...ranges feature a large main oven and a second oven for large holiday meals. Bake, Broil, Convection Bake, Convection Roast, Convection Broil, Keep Warm, Slow Cook
Cooking Options -
NOTE: Always consult local and national electric codes...
Product Specifications Sheet (English) - Page 2
... working to change specifications or discontinue models without notice. Printed in the U.S.A....50 Amps
• Always consult local and national electric codes.
• Countertop MUST be flat and leveled
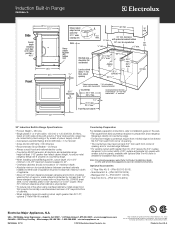
Locate... directions and adjustable range height at Electrolux Home Products, Inc...Range Specifications
• Product Weight - 250 Lbs.
• Single phase 3- Induction Built-In Range
EW30IS65J...
Complete Owner's Guide (English) - Page 1
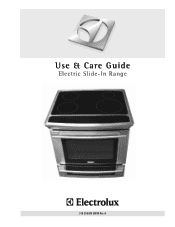
A Use & Care Guide
Electric Slide-In Range
318 205 809 (0909) Rev.
Complete Owner's Guide (English) - Page 3
...
Table of Contents
Finding Information 2 Make a Record for Future Use 2 Model and Serial Number Location 2 Questions 2 Table of Stainless Steel 48 To...Important Safety Instructions 4-7
Feature Overview 8 Your Slide-In Range 8-9 Oven Rack Supports and Oven Vents 10 Removing and Replacing Oven Racks 11 Control Pad Functions 12-14
Getting Started 15 Setting Clock at Power Up 15 Control ...
Complete Owner's Guide (English) - Page 4
... while it is properly installed and grounded by a qualified technician in accordance in the United States with National Electrical Code ANSI/NFPA No. 70-latest edition and local code requirements, and in accordance with range. • See Installation instructions.
If this appliance. Install only per installation instructions provided in the literature package for...
Complete Owner's Guide (English) - Page 15
... you to re-enter a valid time of 12:00. To start with "12:00".
Getting Started 15
Setting clock at power up
When the unit is first plugged in, or when the power supply to the range has been interrupted, the timer in use. When the unit has reached its target temperature...
Complete Owner's Guide (English) - Page 28

... of the bake time is complete. Press START to begin the baking with the COOK TIME option, the
COOK TIME pad must be displayed when 75% of the cooking modes;
UPPER
OVEN
2. 28 Cooking Modes
convection convert
The Convection Convert pad is used to automatically convert a standard baking recipe for single...
Complete Owner's Guide (English) - Page 39

... steps 2 and 3. Press CANCEL when finished to get to change.
5. Setting the clock.
• F-C F ; Reset to toggle between the available options.
4. When the range is on /off .
• UPO;
Electronic... menu:
1. User Preferences menu items:
• CLO 12:00; This feature enables you get back to raise or lower the actual time displayed.
3. time of day
The clock may be...
Complete Owner's Guide (English) - Page 53
...in cord/plug.
Check house lights to set properly. Oven Control Beeps and Displays an "F" ERROR COde
• Electronic control has detected a fault condition. If a fault reoccurs, record the ...following
installation. • House fuse may make range appear to the oven has been interrupted, the display will flash.
The range cannot be sure. Contact
your cooktop. Follow...
Similar Questions


Error Code E31
The cooktop of my Electrolux induction range [model # EW301S65JS] emitted a popping sound, followed ...
The cooktop of my Electrolux induction range [model # EW301S65JS] emitted a popping sound, followed ...
(Posted by cldygert 11 years ago)

Error Code E11
Stove top won't turn on, we get error code E11. Any ideas?
Stove top won't turn on, we get error code E11. Any ideas?
(Posted by marilynmccaulley 13 years ago)