Get support for Dell Latitude CPX - Notebook

Dell Latitude CPX Support Question

Dell Latitude CPX Support Question

Find answers below for this question about Dell Latitude CPX - Notebook.
Need a Dell Latitude CPX manual? We have 1 online manual for this item!
Question posted by carlethen on September 10th, 2013

Unable To Connect The Dell Laptop Wirelessly

The person who posted this question about this Dell product did not include a detailed explanation. Please use the "Request More Information" button to the right if more details would help you to answer this question.

Current Answers

Answer #1: Posted by RathishC on September 10th, 2013 10:53 PM
This answer was accepted by the poster of the original question.
RathishC

Member since:
June 19th, 2012

Points: 2,516,090
1,100
points
Hi Carlethen,

For me to help you in a better manner, I need a few details from you:

1. Are you getting any error message when you try to connect to Internet wirelessly?
2. Do you have any other computer which connects wirelessly at home with the same router?
3 Please let me know the Operating System which you are using?

I would recommend you a link which will give you step by step information about wireless connectivity. Please click the link below:

http://dell.to/19DGYTz

You can refer the Dell Article 125993 on http://dell.to/XULgT1

Once you click the link, it will first ask you to click on the Operating System which you are using and follow the step which should resolve the issue.

Do keep me posted with the results.

Thanks & Regards
Rathish C
#iworkfordell

To know more about Dell Product Support, Drivers & Downloads, Order & Dispatch status -> choose your region US Customers; India Customers. For Dell support videos click Here

Related Dell Latitude CPX Manual Pages

Service Manual - Page 3

Reproduction in any proprietary interest in this document is strictly forbidden. Dell Computer Corporation disclaims any manner whatsoever without notice. © 2000 Dell Computer Corporation. A00 Other trademarks and trade names may be used in this text: Dell, the DELL logo, and Latitude are trademarks of Dell Computer Corporation is subject to either the entities claiming the...
Service Manual - Page 8

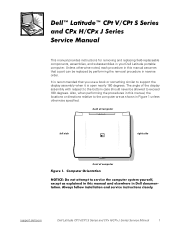
The angle of computer support.dell.com Dell Latitude CPt V/CPt S Series and CPx H/CPx J Series Service Manual 1 Also, when performing the ...when it is recommended that a part can be allowed to the computer are as shown in your Dell Latitude portable computer. This manual provides instructions for removing and replacing field-replaceable components, assemblies, and subassemblies ...
Service Manual - Page 9

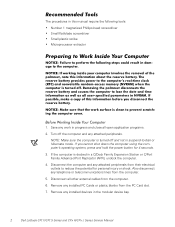
Save any installed devices in the modular device bay. 2 Dell Latitude CPt V/CPt S Series and CPx H/CPx J Series Service Manual If the computer is turned off the computer and any telephone or telecommunications lines from their electrical outlets to -disk or hibernate ...
Service Manual - Page 10

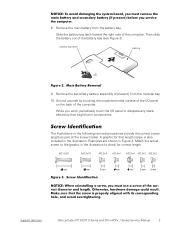
8. Then slide the battery out of the computer. M2.5x20 M2.5x10 M3.0x5 M2.5x4 M2.5x4 M3.0x3 M2.0x3 support.dell.com Dell Latitude CPt V/CPt S Series and CPx H/CPx J Series Service Manual 3 Ground yourself by touching the unpainted metal surface of the I /O panel to check for that might harm components. A graphic for...
Service Manual - Page 11

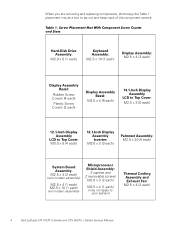
... are removing and replacing components, photocopy the Table 1 placement mat as a tool to your system) Thermal Cooling Assembly and Exhaust Fan: M2.5 x 4 (2 each) 4 Dell Latitude CPt V/CPt S Series and CPx H/CPx J Series Service Manual Hard-Disk Drive Assembly: M3.0 x 5 (1 each) Keyboard Assembly: M2.5 x 10 (7 each) Display Assembly: M2.5 x 4 (3 each) Display Assembly Bezel: Rubber Screw...
Service Manual - Page 12

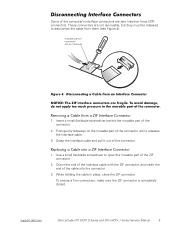
... a firm connection, make sure the ZIF connector is completely closed. movable part of the cable into the connector. 3. Push gently sideways on the movable part of the connector until it out of the connector. 1. While holding the cable in place, close the ZIF connector. support.dell.com Dell Latitude CPt V/CPt S Series and CPx H/CPx J Series...
Service Manual - Page 13

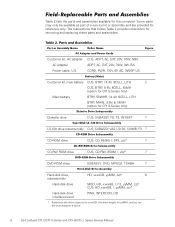
Table 2 lists the parts and assemblies available for the manufacturer's name. 6 Dell Latitude CPt V/CPt S Series and CPx H/CPx J Series Service Manual CUS, ADPT, AC, EXT, 20V, 70W, NBK ADPT, AC, EXT, 20V, 70W, 3W, BA CORD, PWR, 110V, 6F, AC, 3W/3P, US ...
Service Manual - Page 14

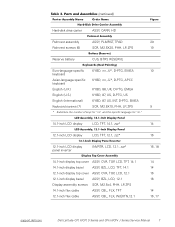
... 14.1-inch flex cable ASSY, CBL, FLX, TFT 12.1-inch flex cable ASSY, CBL, FLX, W/EXTN,12.1 14 14 16 16 14 16, 17 support.dell.com Dell Latitude CPt V/CPt S Series and CPx H/CPx J Series Service Manual 7
Service Manual - Page 15

...-MB CUS, 128MB, DIMM, SDRAM Customer kit, memory module, 192-MB CUS, 192MB, DIMM, SDRAM Customer kit, memory module, 256-MB CUS, 256MB, DIMM, SDRAM 8 Dell Latitude CPt V/CPt S Series and CPx H/CPx J Series Service Manual
Service Manual - Page 16

... Kit, latch, slider, Button Foot, Rubber, Black (4 each) Foot, Rubber, Strike Zone, Black LTCH, BTN, Module Foot, Rbr, Blk Foot, Rbr, Strike Zone, Blk support.dell.com Dell Latitude CPt V/CPt S Series and CPx H/CPx J Series Service Manual 9
Service Manual - Page 17

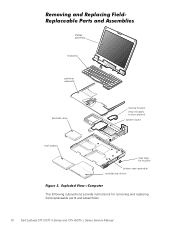
display assembly keyboard palmrest assembly hard-disk drive internal modem (may not apply to your system) system board main battery case plug for modem bottom case assembly modular bay device The following subsections provide instructions for removing and replacing field-replaceable parts and assemblies. 10 Dell Latitude CPt V/CPt S Series and CPx H/CPx J Series Service Manual
Service Manual - Page 18

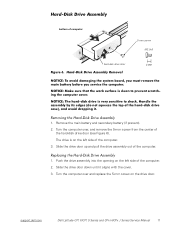
Remove the main battery and secondary battery (if present). 2. support.dell.com Dell Latitude CPt V/CPt S Series and CPx H/CPx J Series Service Manual 11 Slide the drive door up and pull the drive assembly out of computer 5-mm screw M3.0x5 hard-disk drive door 1. ...
Service Manual - Page 19

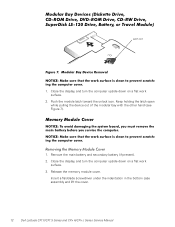
... the computer upside down on a flat work surface. 3. Insert a flat-blade screwdriver under the indentation in the bottom case assembly and lift the cover. 12 Dell Latitude CPt V/CPt S Series and CPx H/CPx J Series Service Manual latch lock 1. Push the module latch toward the unlock icon.
Service Manual - Page 20

... that the memory module is inserted with the double-stacked memory chips facing down does not fit properly in the DIMM A socket. support.dell.com Dell Latitude CPt V/CPt S Series and CPx H/CPx J Series Service Manual 13 Be sure that the memory module can be firmly seated only one memory module, install it in the...
Service Manual - Page 23

... down when you insert the cable into the keyboard ZIF interface connector. 16 Dell Latitude CPt V/CPt S Series and CPx H/CPx J Series Service Manual Carefully disconnect the track stick cable from the connector on the palmrest's flexible printed circuit board. 11. Connect the track stick cable to the connector on the left side of this...
Service Manual - Page 31

Carefully connect the LCD flex cable to the top cover. 24 Dell Latitude CPt V/CPt S Series and CPx H/CPx J Series Service Manual Reinstall the six 3-mm screws securing the LCD panel to the connector on the left edge of the LCD panel. Do not ...
Service Manual - Page 34

...underneath) To replace the 12.1-inch display LCD panel inverter, perform the following steps: 1. The LCD flex cable can connect to either Torisan (T-Sanyo) or Sharp. Fold for more information. If you are printed on the back of the... on the cable (see Figure 18). If you are used . support.dell.com Dell Latitude CPt V/CPt S Series and CPx H/CPx J Series Service Manual 27
Service Manual - Page 35

Place the inverter in the top cover. 28 Dell Latitude CPt V/CPt S Series and CPx H/CPx J Series Service Manual Connect the LCD flex cable to the ZIF connector on the back of the.... 6. Verify that the LCD flex cable is to be curled back to connect to the connector on the left edge of the panel with your hand. 5. Carefully connect the LCD flex cable to the LCD panel (see " Replacing the 12.1-...
Service Manual - Page 36

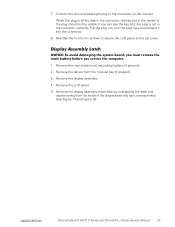
... all the way in the connector, the key slot in the connector correctly. support.dell.com Dell Latitude CPt V/CPt S Series and CPx H/CPx J Series Service Manual 29 Remove the main battery and secondary battery (if present). 2. Remove the LCD panel. 5. Connect the two-wire back-light plug to the top cover. 1. Reinstall the four 5-mm...
Service Manual - Page 39

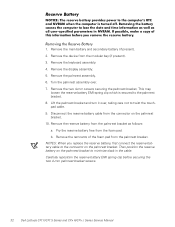
...battery EMI spring clip before securing the two 4-mm palmrest bracket screws. 32 Dell Latitude CPt V/CPt S Series and CPx H/CPx J Series Service Manual Remove the display assembly. 5. Remove the two 4-...mm screws securing the palmrest bracket. NOTES: When you replace the reserve battery, first connect the...

Similar Questions

My Dell Inspiron N5130 Can Not Turn On What Is The Problom
I installed the drivers and restart 32 bytes restart computer I saw that GrailI took out the battery...
(Posted by Ralizada 11 years ago)
How Could I Fix The Alert Of Low C Drive Space?
Don't what program to delete to get more free space
(Posted by fbozasr 11 years ago)
Difficulty Connecting To Wireless
I am having difficult connecting to wireless. Works fine when connected to ethernet. Thanks. I canno...
(Posted by VandyFan15 11 years ago)
Ask a New Question
Use the box below to post a new question about this Dell product .
Points & Prizes
  • You can earn points for nearly everything you do on HelpOwl.com
  • You can trade in those points for gift cards at leading retailers such as Amazon.com and Walmart
  • It's that simple!
See How it Works
Create a Free Account

Dell Manuals

Find free Dell Latitude CPX - Notebook manuals and user guides available at ManualOwl.com. Try out our unique manual viewer allowing you to interact with manuals from directly within your browser!

Dell Reviews

View thousands of Dell user reviews and customer ratings available at ReviewOwl.com.

Contact Information

Complete Dell customer service contact information including steps to reach representatives, hours of operation, customer support links and more from ContactHelp.com.

Scoreboard Ratings

See detailed Dell customer service rankings, employee comments and much more from our sister site.

Dell Recalls

Find comprehensive Dell recall information updated hourly on RecallOwl.com.