Compaq Presario CQ5700 Support Question
Compaq Presario CQ5700 Support Question
Find answers below for this question about Compaq Presario CQ5700 - Desktop PC.Need a Compaq Presario CQ5700 manual? We have 9 online manuals for this item!
Question posted by cjlacy31 on February 28th, 2012
Bios Powering On Password Overide For Presario Cq57
The person who posted this question about this Compaq product did not include a detailed explanation. Please use the "Request More Information" button to the right if more details would help you to answer this question.
Current Answers
Related Compaq Presario CQ5700 Manual Pages
Upgrading and Servicing Guide - Page 4

... by model.
2
570984-001 -
Avoid touching sharp edges inside the computer.
IMPORTANT: Computer features may damage your computer or be used with the power cord attached or power applied. You may vary by touching the metal cage of the computer before touching. Before you begin
Tools Needed: Flathead screwdriver Phillips screwdriver
Flathead...
Upgrading and Servicing Guide - Page 5
... turn off the computer. 2 Disconnect all cables and remove all items from the
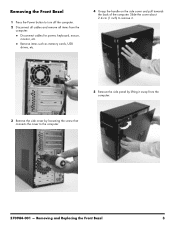
computer: Disconnect cables for power, keyboard, mouse, monitor, etc. Removing and Replacing the Front Bezel
3 Removing the Front Bezel
1 Press the Power button to the computer.
570984-001 - Remove items such as memory cards, USB drives, etc.
4 Grasp the...
Upgrading and Servicing Guide - Page 7
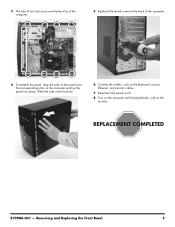
... - Removing and Replacing the Front Bezel
5 Slide the side cover forward.
6 Connect the cables, such as the keyboard, mouse, Ethernet, and monitor cables.
7 Reconnect the power cord.
8 Turn on the computer and lay the panel into place.
Upgrading and Servicing Guide - Page 10

...
Before you open the cover with the screw seen in the following illustration.
IMPORTANT: Computer features may damage your computer or be used with the power cord attached or...
Upgrading and Servicing Guide - Page 11
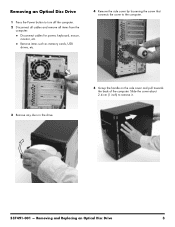
... in the drive.
5 Grasp the handle on the side cover and pull towards the back of the computer. Removing an Optical Disc Drive
1 Press the Power button to turn off the computer. 2 Disconnect all cables and remove all items from the
computer: Disconnect cables for...
Upgrading and Servicing Guide - Page 13
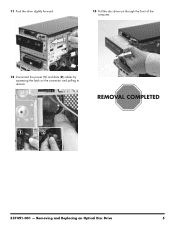
11 Push the drive slightly forward.
13 Pull the disc drive out through the front of the computer.
12 Disconnect the power (1) and data (2) cables by squeezing the latch on the connector and pulling to remove.
1
2
537491-001 - Removing and Replacing an Optical Disc Drive
5
Upgrading and Servicing Guide - Page 14
....
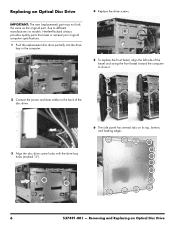
5 To replace the front bezel, align the left side of the bezel and swing the front bezel toward the computer to close it.
2 Connect the power and data cables to different manufacturers or models.
Upgrading and Servicing Guide - Page 15

... on the panel over the corresponding slots on the computer and all peripherals, such as the keyboard, mouse, Ethernet, and monitor cables.
11 Reconnect the power cord.
12 Turn on the computer.
Upgrading and Servicing Guide - Page 18
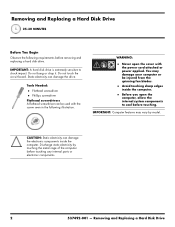
... internal system components to shock impact.
Do not touch the circuit board.
IMPORTANT: Computer features may damage your computer or be used with the power cord attached or power applied. Removing and Replacing a Hard Disk Drive
CAUTION: Static electricity can damage the electronic components inside the computer.
You may vary by touching...
Upgrading and Servicing Guide - Page 19
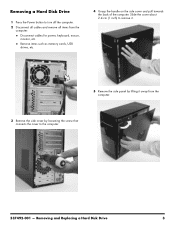
... computer. 2 Disconnect all cables and remove all items from the computer.
3 Remove the side cover by lifting it away from the
computer: Disconnect cables for power, keyboard, mouse, monitor, etc. Remove items such as memory cards, USB drives, etc.
4 Grasp the handle on the side cover and pull towards the back...
Upgrading and Servicing Guide - Page 20
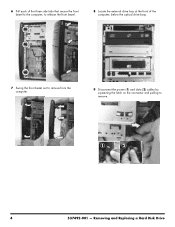
... drive bay at the front of the computer, below the optical drive bays.
7 Swing the front bezel out to remove from the computer.
9 Disconnect the power (1) and data (2) cables by squeezing the latch on the connector and pulling to remove.
1
2
4
537492-001 -
Upgrading and Servicing Guide - Page 22
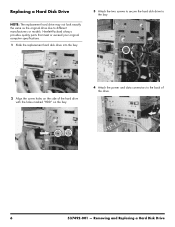
... drive to the bay.
2 Align the screw holes on the side of the hard drive with the holes marked "HDD" on the bay.
4 Attach the power and data connectors to different manufacturers or models.
Upgrading and Servicing Guide - Page 24
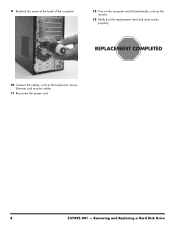
Removing and Replacing a Hard Disk Drive 9 Reattach the screw at the back of the computer.
12 Turn on the computer and all peripherals, such as the monitor.
13 Verify that the replacement hard disk drive works properly.
10 Connect the cables, such as the keyboard, mouse, Ethernet, and monitor cables.
11 Reconnect the power cord.
8
537492-001 -
Upgrading and Servicing Guide - Page 26
...
Before you open the cover with the screw seen in the following illustration. IMPORTANT: Computer features may damage your computer or be used with the power cord attached or...
Upgrading and Servicing Guide - Page 27

... computer. 2 Disconnect all cables and remove all items from the computer.
3 Remove the side cover by lifting it away from the
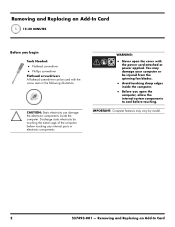
computer: Disconnect cables for power, keyboard, mouse, monitor, etc. Removing and Replacing an Add-In Card
3 Removing an Add-In Card
1 Press the...
Upgrading and Servicing Guide - Page 32
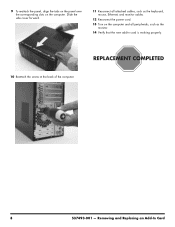
... on the panel over the corresponding slots on the computer and all peripherals, such as the keyboard, mouse, Ethernet, and monitor cables.
12 Reconnect the power cord.
13 Turn on the computer. Slide the side cover forward.
11 Reconnect all attached cables, such as the monitor.
14 Verify that the new...
Limited Warranty and Support Guide - Refurbished - Page 15
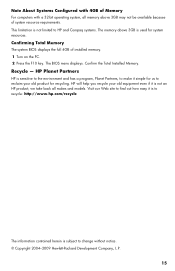
The BIOS menu displays. Recycle - Visit our Web site to find out how easy it is not an HP product; HP ...: http://www.hp.com/recycle
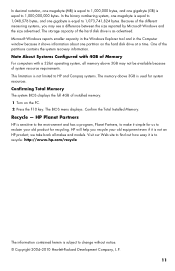
The information contained herein is used for recycling. Confirming Total Memory The system BIOS displays the full 4GB of installed memory. 1 Turn on the PC. 2 Press the F10 key. Note About Systems Configured with 4GB of Memory For computers with a 32-...
Getting Started Guide - Page 6
...the power cord from the electrical outlet.
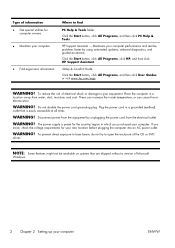
WARNING! HP Support Assistant -
WARNING! Plug the power cord... diagnostics, and guided assistance. WARNING! WARNING! Disconnect power from water, dust, moisture, and soot. Click the... before plugging the computer into an AC power outlet. Where to open the enclosure of...not disable the power cord grounding plug.
The power supply is easily accessible ...
Getting Started Guide - Page 7
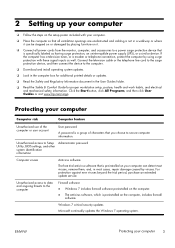
..., protect the computer by placing furniture on the computer, includes firewall software. Unauthorized access to Setup Utility, BIOS settings, and other system identification information
Administrator password
Computer viruses
Antivirus software
The free trial antivirus software that you choose to a power surge protection device that is a group of the computer or user account
User...
Limited Warranty and Support Guide - Page 13
... http://www.hp.com/recycle
The information contained herein is as advertised. Confirming Total Memory
The system BIOS displays the full 4GB of the different measuring systems, you recycle your old product for system resources....to find out how easy it is equal to 1,048,576 bytes, and one partition on the PC. 2 Press the F10 key.
we take back all memory above 3GB is equal to 1,000...
Similar Questions

How To Update The Bios In Hp Compaq Presario Cq3000 Series My Pc Bios In Outdat
(Posted by oussamahassai 5 months ago)

How To Install Power Supply Compaq Presario Sr1000 Computer
(Posted by gsblan 9 years ago)

How To Improve The Base Score Of Compaq Presario Cq57
(Posted by magicnmiricle 11 years ago)

How Do I Add A Desktop Monitor To My Compaq Presario Cq57 As A Second Monitor?
?????
?????
(Posted by whitebread94 11 years ago)

Compac Presario Cq5700y Desktop
hey there i format hard drive compleatly and i don't have recovery disk what i can do to bring the ...
hey there i format hard drive compleatly and i don't have recovery disk what i can do to bring the ...
(Posted by 786pk 12 years ago)