Canon MF6530 Support Question
Canon MF6530 Support Question
Find answers below for this question about Canon MF6530 - ImageCLASS B/W Laser.Need a Canon MF6530 manual? We have 5 online manuals for this item!
Question posted by ayeko on June 15th, 2011
How To Remove Cover And Replace Thin Film On Mf-6530
The person who posted this question about this Canon product did not include a detailed explanation. Please use the "Request More Information" button to the right if more details would help you to answer this question.
Current Answers
Answer #1: Posted by p33mp33ui on June 16th, 2011 5:55 AM
p33mp33ui

Member since:
June 10th, 2011 Points: 107,580

Member since:
June 10th, 2011 Points: 107,580
Related Canon MF6530 Manual Pages
imageCLASS MF6500 Series Basic Guide - Page 26
.... Inc. NOTE
This equipment has been tested and found to comply with the limits for help.
FCC Notice
imageCLASS MF6530: Model F189100 imageCLASS MF6531: Model F189100 imageCLASS MF6550: Model F189102 imageCLASS MF6560: Model F189102 imageCLASS MF6580: Model F189102
This device complies with class B limits in accordance with This Machine? However, there is encouraged to try to correct...
imageCLASS MF6500 Series Basic Guide - Page 137

... drum protective shutter on the toner cartridge. Maintenance
11-10 message persists, replace the toner
cartridge.
Replacing the Toner Cartridge
3 When the LCD displays , redistribute
you can easily hold the toner cartridge by its handle.
- Redistributing Toner
1 Open the left cover.
4 Remove the toner cartridge.
2 Grasp the blue plastic pull tab
(A) on the toner...
imageCLASS MF6500 Series Basic Guide - Page 139

... in the machine. A
3 Pull the blue plastic pull tab until
you cannot close the left cover. If you can easily hold the handle of
the toner cartridge. Maintenance
11-12 Replacing the Toner Cartridge
1 Open the left cover, do not
force it to get your fingers caught.
-
Grasp the blue plastic pull tab...
MF6500 Series Scanner Drivere Guide - Page 64

... ScanGear MF, or
WIA driver? Take care not to modify any changes
to make a
backup copy of the [Control Panel] folder? Q
Have you will be able to scan.
If this happens, remove the ... the ADF. Open the following file in the [Scanners and Cameras], the
machine is replaced with something
inappropriate and you specified the document source
correctly with two or more USB ports...
imageCLASS MF6500 Series Starter Guide - Page 13
... (NSDI) NetSpot Device Installer enables you to do so.
3 Click [Exit]. NOTE - When removing the software, first remove the MF Toolbox, and then the MF drivers.
3 Click [Yes]. When the Repair or Remove program selection screen is running on your computer if asked to create original fax cover sheet templates for this program.
23
24 Restart your...
Service Manual - Page 10

Contents
5.1 Overview/Configuration ...5- 1 5.1.1 Specifications and Control Mechanism 5- 1 5.1.2 Main Components...5- 2
5.2 Parts Replacement Procedure ...5- 3 5.2.1 Laser/Scanner Unit ...5- 3 5.2.1.1 Removing the Laser Scanner Unit 5- 3
Chapter 6 Image Formation
6.1 Overview/Configuration ...6- 1 6.1.1 Specifications and Control Mechanism 6- 1
6.2 Image Formation Process ...6- 1 6.2.1 ...
Service Manual - Page 11

...Function ...8- 3 8.3.1 Outline ...8- 3 8.3.2 Failure Detection ...8- 3
8.4 Parts Replacement Procedure ...8- 5 8.4.1 Fixing Unit ...8- 5 8.4.1.1 Removing the Fixing Unit ...8- 5 8.4.1.2 Installing the fixing unit ...8- 6 8.4.2 Fixing Film Unit...8- 7 8.4.2.1 Removing the Fixing Film Unit ...8- 7 8.4.3 Fixing Pressure Roller ...8- 8 8.4.3.1 Removing the Pressure Roller ...8- 8 8.4.4 Fixing Delivery...
Service Manual - Page 12

... Protective Functions...9- 2
9.4 Parts Replacement Procedure ...9- 4 9.4.1 External Cover ...9- 4 9.4.1.1 Detaching the Reader Rear Cover (Small 9- 4 9.4.1.2 Detaching the Reader Rear Cover 9- 4 9.4.1.3 Detaching the Rear Cover...9- 4 9.4.1.4 Detaching the Reader Left Cover 9- 4 9.4.1.5 Detaching the Front-left Cover ...9- 4 9.4.1.6 Detaching the Rear-left Cover ...9- 5 9.4.1.7 Detaching the...
Service Manual - Page 68

... the Contact Sensor
0011-5281
1) Remove the ADF. 2) Remove the copyboard glass and reader rear cover. 3) Remove the four screws [1], and then remove the ADF base (left) [2].
3-6 Chapter 3
3.4 Parts Replacement Procedure
[1]
3.4.1 Copyboard Glass
3.4.1.1 Removing the Copyboard Glass
[2]
0011-5275
1) Remove the two screws [1], and then remove the glass holder [2].
2) Slide the copyboard...
Service Manual - Page 85

After replacing the ADF motor unit, reinstall the parts removed in steps 3) and 4).
4.4.9 Document Set Sensor
4.4.9.1 Removing the Document Set Sensor
0011-5254
1) Remove the rear cover. 2) Remove the connector [1], release the hook, and then remove the
document set sensor [2].
[2]
[1] F-4-29
4-11 2) Remove the screw [1], and then remove the roller bracket [2]. 3) Remove the pickup roller [3]....
Service Manual - Page 95

5.2 Parts Replacement Procedure
5.2.1 Laser/Scanner Unit 5.2.1.1 Removing the Laser Scanner Unit
0011-5287
The laser scanner was-factory adjusted. F-5-3
Chapter 5
5-3 Never disassemble it. 1) Detach the right cover, inner cover, delivery tray front cover, control
panel, and delivery tray. 2) Remove the laser shutter [1]. 3) Disconnect the connector [2] and flexible cable [3]. 4) Remove the four...
Service Manual - Page 123

... Function...8-3 8.3.1 Outline...8-3 8.3.2 Failure Detection ...8-3
8.4 Parts Replacement Procedure ...8-5 8.4.1 Fixing Unit ...8-5
8.4.1.1 Removing the Fixing Unit ...8-5 8.4.1.2 Installing the fixing unit...8-6
8.4.2 Fixing Film Unit...8-7
8.4.2.1 Removing the Fixing Film Unit ...8-7
8.4.3 Fixing Pressure Roller...8-8
8.4.3.1 Removing the Pressure Roller...8-8
8.4.4 Fixing Delivery Paper Sensor...
Service Manual - Page 129

... slide the guide (rear) [2] backward to its previous position. When replacing the fixing unit with a new one, carry out height adjustment.
1) Detach the rear cover and front cover, and then detach the rear-left door + front cover) prior to shipment. 8.4 Parts Replacement Procedure
8.4.1 Fixing Unit 8.4.1.1 Removing the Fixing Unit
0011-5386
The height of the fixing...
Service Manual - Page 131

... [3] [2]
[1]
[1] [2] [1]
Chapter 8 [1]
F-8-13
6) Perform the following procedure by reversing the installation procedure.
8.4.2 Fixing Film Unit
8.4.2.1 Removing the Fixing Film Unit
0011-5388
1) Remove the fixing unit. 2) Remove the three screws [1], and then remove the reversing guide [2] and
sensor lever unit [3].
[1]
[3]
[2]
F-8-15
See the illustration below when reinstalling the pressure...
Service Manual - Page 132

...24 Chapter 8
[1]
[2]
[1]
[3]
F-8-18
6) Remove the fixing film unit [1].
[1]
F-8-19
8.4.3 Fixing Pressure Roller
8.4.3.1 Removing the Pressure Roller
0011-5389
1) Remove the fixing film unit. 2) Remove the screw [1], and then slide the fixing unit inlet guide [2]
sideways to release it .
[1]
[1]
F-8-20
4) Release the hook and remove the gear [1]. The left cover. 2) Remove the boss [1], and...
Service Manual - Page 137

... Protective Functions...9-2
9.4 Parts Replacement Procedure ...9-4 9.4.1 External Cover...9-4
9.4.1.1 Detaching the Reader Rear Cover (Small)...9-4 9.4.1.2 Detaching the Reader Rear Cover...9-4 9.4.1.3 Detaching the Rear Cover ...9-4 9.4.1.4 Detaching the Reader Left Cover...9-4 9.4.1.5 Detaching the Front-left Cover ...9-4 9.4.1.6 Detaching the Rear-left Cover ...9-5 9.4.1.7 Detaching the Reader...
Service Manual - Page 142

Chapter 9
9.4 Parts Replacement Procedure
9.4.1 External Cover 9.4.1.1 Detaching the Reader Rear Cover (Small)
0011-5392
1) Remove the screw [1], and then detach the reader rear cover (small).
9.4.1.3 Detaching the Rear Cover
0011-5394
1) To release the hooks at the back of the machine, move the machine backward until the hooks are about 10 cm away from ...
Service Manual - Page 146

... six screws [3]. 8) Remove the screw [4], and then remove the IP cover [5]. Read position adjustment (Stream reading: Only when the ADF is displayed. - Input the all connectors from the modem PCB and network PCB.
9-8
[3]
[4]
[1] [2] [4]
F-9-21
9.4.6.2 Procedure after Replacing the Image Processor
PCB
0011-5463
If you have replaced the image processor PCB with PCL functions - After...
Service Manual - Page 161

...Remove the 4 screws of the front cover with
the screws while slightly lowering the fuser unit. -
Chapter 11
[1]
[2]
F-11-3
4) Remove the positioning pin.
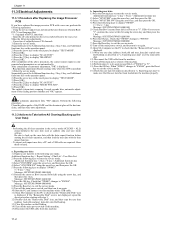
5) Fix the positioning pin of the fixing unit. 2) Remove...Enter the service mode. 11.1 Scanning System
11.1.1 Procedure after Replacing the CS
0012-7427
After replacing the contact sensor (CS), go through the following procedure by 0.5...
Service Manual - Page 162
...replaced the image processor PCB with tbe data import function.
- The optical system starts scanning. Several seconds later, automatic adjustment of output between CIS channels 1) Enter the service mode. Performing the all-clear operation in the following keys to display "SW003".
# > 0 key > 3 key Message: #SYSTEM SW003 00001000 5) Check that the "Removal... rear cover. Perform the following procedure...
Similar Questions

Cant Use Scanner Function On Networked Mf 6530
(Posted by 8318buck 9 years ago)

My Canon Mf 6530 Has The Error Message Download Standby. It Wont Clear
?????? please advise
?????? please advise
(Posted by sjoyner87 12 years ago)
How Do I Rectify Error E808 In Canon Mf 6530 Image Class Printer
correcting error e808 in my printer and low toner error even with new toner
correcting error e808 in my printer and low toner error even with new toner
(Posted by huntermayor 12 years ago)

Canon Image Class Mf 6530 Replace Frame Transfer Tray
how do I replace the frame transfer tray on canon image class mf6530?
how do I replace the frame transfer tray on canon image class mf6530?
(Posted by jgarcia57925 12 years ago)

My Canon Mf 6530 Has The Error Message
Download Standby.
It Wont Clear ??????
(Posted by gvandeputte 13 years ago)