
Brother International PEDESIGN 6.0 Support Question
Brother International PEDESIGN 6.0 Support Question
Find answers below for this question about Brother International PEDESIGN 6.0.Need a Brother International PEDESIGN 6.0 manual? We have 1 online manual for this item!
Question posted by ginggaw on April 27th, 2017
Can I Use Pedesign On My Windowa 7 64bit?
my Window XP laptop is not working Is pedesign 6.0 or 7.0 compatible with my Windows7 64bit?
Current Answers


Related Brother International PEDESIGN 6.0 Manual Pages
Users Manual - English - Page 3

... keep it in accordance with your particular sewing machine model. This software can be used or copied only in a safe place together with the copyright laws. Please refer to ensure safe and correct operation, please read before sewing on your warranty. Important
Using this unit and to the Windows manuals. To obtain the best performance from...
Users Manual - English - Page 12

...3 (Figure Handle stage): The black-and-white image is used to adjust their relative position, orientation and scale. Saving your work as a single object.
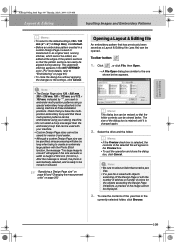
■ Layout & Editing
Layout &..., .png, .eps, .pcd, or .fpx. When your sewing machine for the embroidery pattern to be written to an original card. You can use to the outlines and the inside regions. PeDesignV6Eng.book Page 4...
Users Manual - English - Page 22
... result also depends on your final material and to use the above-mentioned alternate method.
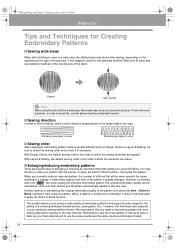
■ Sewing direction
In order to limit shrinking, select a stitch direction perpendicular to scale your pattern with your sewing data before sewing on the same type of fabric as your particular sewing machine model. Another method of maintaining the original embroidery...
Users Manual - English - Page 32
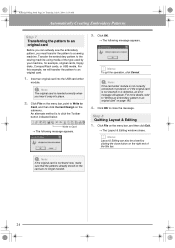
Transfer the embroidery pattern to the sewing machine using media of the title bar. Click OK.
→ The following message appears.
3.
Click File on ...on the menu bar, and then click Exit.
→ The Layout & Editing window closes.
Click OK to close button on the right end of the type used by clicking the close the message.
For more details, refer to "Writing an ...
Users Manual - English - Page 60

... indicated below .
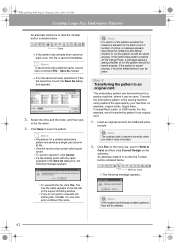
An alternate method is displayed.
4.
a Note:
The embroidery pattern cannot be edited while the realistic preview is to a sewing machine. Realistic Preview
→ A realistic preview of the type used by your machine, for example, original cards, floppy disks, CompactFlash cards, or USB media. Step 13 Transferring the pattern to Card
→ The...
Users Manual - English - Page 70
...window.
• If you hear it snap into the USB card writer
module.
If the pattern is saved anyway, it must be edited before it can be sewn.
Transfer the embroidery pattern to the sewing machine using... 6 Transferring the pattern to an original card
This embroidery pattern can be transferred to a sewing machine, where it can then enter a different file name. a Note:
If the original card...
Users Manual - English - Page 71
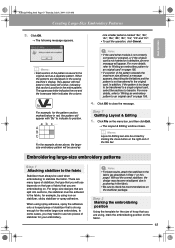
...When the patterns are displayed on the sewing machine's display, they appear with "Bc"... are split into sections, the stabilizer must always be closed by using , mark the embroidering position on the stabilizer package. In addition... original card" on the menu bar, and then click Exit.
→ The Layout & Editing window closes. nine smaller patterns marked "Aa", "Ab", "Ac", "Ba", "Bb", "Bc", ...
Users Manual - English - Page 73

... of the inside frame and the outside frame. Finish hooping the fabric, and then remove the
embroidery sheet. Attach the embroidery hoop to the sewing
machine, and then using the embroidery sheet as shown below. b Memo:
If there is no stitching in well enough that can be hooped separately, tear away the protective...
Users Manual - English - Page 74

...in the Data folder.):
1) Embroider the upper-left side. Remove the embroidery hoop from the sewing
machine, and then remove the fabric from the hoop.
5. After the pattern section is embroidered, alignment... sewn on the right side of the pattern section.
4) Hoop the fabric for hooping fabric using the alignment stitching with the top of the hoop aligned on the alignment stitching at the bottom...
Users Manual - English - Page 85

...can select a Design Page size according to the size of hoop that you will not be using with your machine.
3. Click Option, then Design Page Property.
→ The Design Page Property dialog box...The Figure Object Conversion Setting dialog box appears again when the mouse button is selected, the sewing machine image shows the orientation of Hoop Size), click Default.
• To close the dialog...
Users Manual - English - Page 109
... Opreation Design Center
PeDesignV6Eng.book Page 101 Thursday, July 8, 2004 11:59 AM
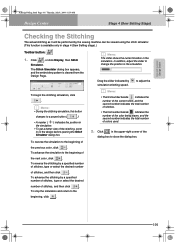
Design Center
Stage 4 (Sew Setting Stage)
Checking the Stitching
The actual stitching as it will be performed by the sewing machine can be viewed using the stitch simulator. (This function is cleared from the Design Page.
To reverse the simulation to...
Users Manual - English - Page 114

.... You can be imported into an embroidery pattern. These images can be sewn from your sewing machine, such as desired. In addition, the embroidery pattern can be printed.
■ Changing Software...the embroidery pattern, you can save your work on the computer hard disk, print it, or transfer it to an original card (or whatever media your sewing machine uses) so that it can move all ...
Users Manual - English - Page 116

...are 10 mm (0.39 in.) smaller than regular embroidery hoops. (This function is selected, the sewing machine image shows the orientation of the background can be changed. Click
, or click File, then ...the current Design Page has not been saved, you will be asked whether you will be using with your sewing machine, select a Design Page size from the selector. You can select a Design Page size...
Users Manual - English - Page 117
This alignment stitching appears in .). Check that you have the multiposition embroidery hoop and that these multi-position patterns can be embroidered using a special embroidery hoop attached to the sewing machine at the edges of the pattern sections so that contains.pes files.
• If a .pes file is ready to be displayed.
3.
b Memo:
This...
Users Manual - English - Page 178
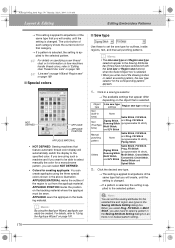
... (TrueType fonts)
None
Satin Stitch, Fill Stitch, Zigzag Stitch, and Prog. Object type
Line sew type settings
Region sew type settings
Text (built-in the above illustration.
b Memo:
By using such a machine and if you select Prog. Click the desired sew type.
→ This setting is applied to all patterns of the same type that...
Users Manual - English - Page 196

... on page 187
Checking the Stitching
The actual stitching as it by the sewing machine can be viewed using the stitch simulator. of stitches, type or select the desired number
of... of stitches, and then click
.
to the next pattern
section, click
. c "Previewing the Sewing Image" on a customsized Design Page, view it will be performed by pattern section. The Stitch Simulator...
Users Manual - English - Page 203

... the objects exceeding the Design Page limitations, the patterns cannot be exported as a simple file, and will be used to export the file. Since the number of codes differ depending on the sewing machine being used, type or select the appropriate value in the Number of a different format (.dst, .hus, .exp, and .pcs).
1. a Note...
Users Manual - English - Page 204

...215; 90 cm (3.54" × 3.54"), and is split into place.
• The sewing machine must be turned off the computer when original cards are inserted or removed. Insert an original card ...into sections and write them onto several pattern sections which exceed the size limit, the space used by the selected pattern sections appears in the available patterns list. b Memo:
To quit the ...
Users Manual - English - Page 211

...
• Choose the appropriate setting after checking the size of the hoop available for your sewing machine. Selecting the Design Page size
1. Advanced Opreation Layout & Editing
PeDesignV6Eng.book Page 203 Thursday...hoop will be embroidered using an multi-position hoop is 130 × 180 mm (or 100 × 100 mm, depending on the sewing area of the embroidering machine), first determine which ...
Users Manual - English - Page 238

... file of one of the new folder.
6. Since the number of codes differ depending on the sewing machine being used to indicate when the thread must be cut in the name of the other formats (.pes, .dst...hus).
1. b Memo:
• If the file is converted to a .pes file, the thread colors are used , type or select the appropriate value in , a message appears, asking if you want to create the folder...
Similar Questions

Instructions On How To Use A Brother Brand Lx2500 Sewing Machine
(Posted by climadandr 10 years ago)

How To Use Foot Attachments Of Brother Sewing Machine Xl 5130
(Posted by brusSi 10 years ago)

How To Use A Brother Ls 1217 Sewing Machine
(Posted by reshiv 10 years ago)

What Stitch To Use On A Brothers Lx2500 Sewing Machine For Stretchy Fabrics
(Posted by linlul 10 years ago)

How To Use A Brother Xl-5130 Sewing Machine
(Posted by labhydea 10 years ago)