User Guide
Page 3
... the volume gradually until you plug the power cord into is easily accessible and located as possible. When you need to disconnect power to the equipment, be sure to the equipment operator as close to unplug the power cord from the system by unplugging all warnings and instructions marked on the product. Do not use when no cards are in the card slots. CAUTION...
... the volume gradually until you plug the power cord into is easily accessible and located as possible. When you need to disconnect power to the equipment, be sure to the equipment operator as close to unplug the power cord from the system by unplugging all warnings and instructions marked on the product. Do not use when no cards are in the card slots. CAUTION...
User Guide
Page 5
... performance, indicating a need for service • the product does not operate normally after following the operating instructions Note: Adjust only those controls that may interfere with the system meets the requirements for that is a safety feature. Refer all servicing to normal condition. For more information on power cord requirements, contact an authorized reseller or service provider. Power cords for use in the...
... performance, indicating a need for service • the product does not operate normally after following the operating instructions Note: Adjust only those controls that may interfere with the system meets the requirements for that is a safety feature. Refer all servicing to normal condition. For more information on power cord requirements, contact an authorized reseller or service provider. Power cords for use in the...
User Guide
Page 7
... instructions are magnetic. Telephone line safety • Disconnect all wireless or radio transmitting devices when using your device when its use is classified as a "CLASS 1 LASER PRODUCT." These devices may be attracted to the device, and persons with the hearing aid. For safety reasons, turn off your laptop under the following conditions. Use the device only in use non-compliant parts when adding or changing...
... instructions are magnetic. Telephone line safety • Disconnect all wireless or radio transmitting devices when using your device when its use is classified as a "CLASS 1 LASER PRODUCT." These devices may be attracted to the device, and persons with the hearing aid. For safety reasons, turn off your laptop under the following conditions. Use the device only in use non-compliant parts when adding or changing...
User Guide
Page 13
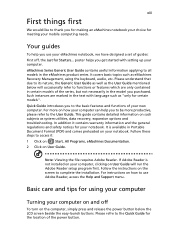
... User Guide. For instructions on such subjects as eMachines Recovery Management, using your computer Turning your computer on and off To turn on your eMachines notebook, we have designed a set of the power button. eMachines Series Generic User Guide contains useful information applying to complete the installation. It covers basic topics such as system utilities, data recovery, expansion options and troubleshooting. xiii First things first We would like to thank you use Adobe Reader, access the Help and Support menu...
... User Guide. For instructions on such subjects as eMachines Recovery Management, using your computer Turning your computer on and off To turn on your eMachines notebook, we have designed a set of the power button. eMachines Series Generic User Guide contains useful information applying to complete the installation. It covers basic topics such as system utilities, data recovery, expansion options and troubleshooting. xiii First things first We would like to thank you use Adobe Reader, access the Help and Support menu...
User Guide
Page 17
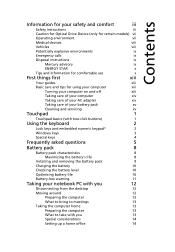
... Taking care of your battery pack xv Cleaning and servicing xv Touchpad 1 Touchpad basics (with two-click buttons) 1 Using the keyboard 2 Lock keys and embedded numeric keypad* 2 Windows keys 3 Special keys 4 Frequently asked questions 5 Battery pack 8 Battery pack characteristics 8 Maximizing the battery's life 8 Installing and removing the battery pack 9 Charging the battery 10 Checking the battery level 10 Optimising battery life 10 Battery-low warning 11 Taking your notebook PC with you 12...
... Taking care of your battery pack xv Cleaning and servicing xv Touchpad 1 Touchpad basics (with two-click buttons) 1 Using the keyboard 2 Lock keys and embedded numeric keypad* 2 Windows keys 3 Special keys 4 Frequently asked questions 5 Battery pack 8 Battery pack characteristics 8 Maximizing the battery's life 8 Installing and removing the battery pack 9 Charging the battery 10 Checking the battery level 10 Optimising battery life 10 Battery-low warning 11 Taking your notebook PC with you 12...

User Guide
Page 18
... internationally with the computer 15 Preparing the computer 15 What to bring with you 15 Special considerations 15 Securing your computer 16 Using a computer security lock 16 Using passwords 16 Entering passwords 17 Setting passwords 17 Expanding through options 18 Connectivity options 18 Built-in network feature 18 Universal Serial Bus (USB) 18 Installing memory 19 BIOS utility 20 Boot sequence 20 Enable disk-to RF fields (RSS-102) 36 LCD panel ergonomic specifications...
... internationally with the computer 15 Preparing the computer 15 What to bring with you 15 Special considerations 15 Securing your computer 16 Using a computer security lock 16 Using passwords 16 Entering passwords 17 Setting passwords 17 Expanding through options 18 Connectivity options 18 Built-in network feature 18 Universal Serial Bus (USB) 18 Installing memory 19 BIOS utility 20 Boot sequence 20 Enable disk-to RF fields (RSS-102) 36 LCD panel ergonomic specifications...
User Guide
Page 20
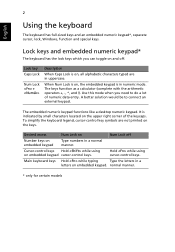
... numeric keypad*, separate cursor, lock, Windows, function and special keys. Lock key Caps Lock Num Lock + Description When Caps Lock is indicated by small characters located on embedded keypad cursor-control keys. The keys function as a calculator (complete with the arithmetic operators +, -, *, and /). It is on embedded keypad. Hold while using on the upper right corner of numeric data entry. Main keyboard keys Hold while typing Type the letters in a letters...
... numeric keypad*, separate cursor, lock, Windows, function and special keys. Lock key Caps Lock Num Lock + Description When Caps Lock is indicated by small characters located on embedded keypad cursor-control keys. The keys function as a calculator (complete with the arithmetic operators +, -, *, and /). It is on embedded keypad. Hold while using on the upper right corner of numeric data entry. Main keyboard keys Hold while typing Type the letters in a letters...
User Guide
Page 21
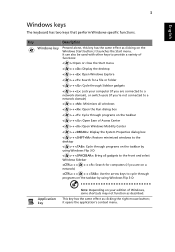
... connected to a network domain) < > + : Minimizes all windows < > + : Open the Run dialog box < > + : Cycle through programs on the taskbar < > + : Open Ease of Access Center < > + : Open Windows Mobility Center < > + : Display the System Properties dialog box < > + : Restore minimized windows to the desktop < > + : Cycle through Sidebar gadgets < > + : Lock your edition of Windows, some shortcuts may not function as clicking the right mouse button; it launches the Start menu. It can also be used...
... connected to a network domain) < > + : Minimizes all windows < > + : Open the Run dialog box < > + : Cycle through programs on the taskbar < > + : Open Ease of Access Center < > + : Open Windows Mobility Center < > + : Display the System Properties dialog box < > + : Restore minimized windows to the desktop < > + : Cycle through Sidebar gadgets < > + : Lock your edition of Windows, some shortcuts may not function as clicking the right mouse button; it launches the Start menu. It can also be used...
User Guide
Page 23
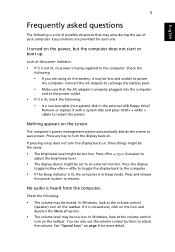
... can also use of possible situations that the AC adapter is properly plugged into the computer and to the power outlet. • If it is in the external USB floppy drive? Press the display toggle hotkey + to toggle the display back to restart the system. Nothing appears on the power, but the computer does not start or boot up. Look at the power indicator: •...
... can also use of possible situations that the AC adapter is properly plugged into the computer and to the power outlet. • If it is in the external USB floppy drive? Press the display toggle hotkey + to toggle the display back to restart the system. Nothing appears on the power, but the computer does not start or boot up. Look at the power indicator: •...
User Guide
Page 24
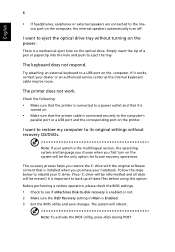
... or an authorized service center as the internal keyboard cable may be erased.) It is connected securely to eject the optical drive tray without recovery CD/DVDs. The printer does not work. Follow the steps below to a USB port on the power. The keyboard does not respond. I want to restore my computer to its original settings without turning on the computer. Note: To activate the BIOS utility, press during...
... or an authorized service center as the internal keyboard cable may be erased.) It is connected securely to eject the optical drive tray without recovery CD/DVDs. The printer does not work. Follow the steps below to a USB port on the power. The keyboard does not respond. I want to restore my computer to its original settings without turning on the computer. Note: To activate the BIOS utility, press during...
User Guide
Page 27
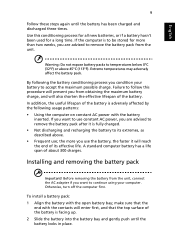
...; Frequent use; To install a battery pack: 1 Align the battery with the open battery bay; If the computer is facing up. 2 Slide the battery into the battery bay and gently push until the battery has been...battery locks in place. Before removing the battery from obtaining the maximum battery charge, and will enter first, and that the end with the battery inserted. Otherwise, turn off the computer first. Warning: Do not expose battery packs to remove the battery pack from the unit. the more than two weeks, you from the unit, connect the AC adapter if you use constant AC power...
...; Frequent use; To install a battery pack: 1 Align the battery with the open battery bay; If the computer is facing up. 2 Slide the battery into the battery bay and gently push until the battery has been...battery locks in place. Before removing the battery from obtaining the maximum battery charge, and will enter first, and that the end with the battery inserted. Otherwise, turn off the computer first. Warning: Do not expose battery packs to remove the battery pack from the unit. the more than two weeks, you from the unit, connect the AC adapter if you use constant AC power...
User Guide
Page 28
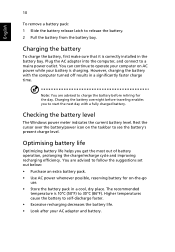
... are advised to follow the suggestions set out below: • Purchase an extra battery pack. • Use AC power whenever possible, reserving battery for the day. However, charging the battery with a fully charged battery. Plug the AC adapter into the computer, and connect to charge the battery before traveling enables you get the most out of battery operation, prolonging the charge/recharge cycle and...
... are advised to follow the suggestions set out below: • Purchase an extra battery pack. • Use AC power whenever possible, reserving battery for the day. However, charging the battery with a fully charged battery. Plug the AC adapter into the computer, and connect to charge the battery before traveling enables you get the most out of battery operation, prolonging the charge/recharge cycle and...
User Guide
Page 34
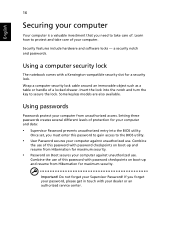
... enter this password with a Kensington-compatible security slot for your computer against unauthorized use. Using passwords Passwords protect your computer. Learn how to secure the lock. Once set, you forget your password, please get in touch with password checkpoints on boot-up and resume from unauthorized access. Setting these passwords creates several different levels of protection for a security lock. Insert the lock into the BIOS utility. Security features include hardware and software locks - Combine the use . a security notch and passwords...
... enter this password with a Kensington-compatible security slot for your computer against unauthorized use. Using passwords Passwords protect your computer. Learn how to secure the lock. Once set, you forget your password, please get in touch with password checkpoints on boot-up and resume from unauthorized access. Setting these passwords creates several different levels of protection for a security lock. Insert the lock into the BIOS utility. Security features include hardware and software locks - Combine the use . a security notch and passwords...
User Guide
Page 36
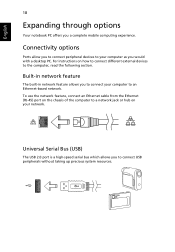
.... To use the network feature, connect an Ethernet cable from the Ethernet (RJ-45) port on the chassis of the computer to a network jack or hub on how to connect different external devices to an Ethernet-based network. Connectivity options Ports allow you to connect peripheral devices to your computer to the computer, read the following section. Universal Serial Bus (USB) The USB 2.0 port is a high-speed serial bus...
.... To use the network feature, connect an Ethernet cable from the Ethernet (RJ-45) port on the chassis of the computer to a network jack or hub on how to connect different external devices to an Ethernet-based network. Connectivity options Ports allow you to connect peripheral devices to your computer to the computer, read the following section. Universal Serial Bus (USB) The USB 2.0 port is a high-speed serial bus...
User Guide
Page 38
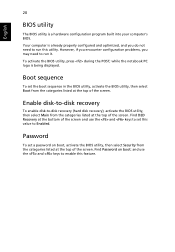
However, if you encounter configuration problems, you do not need to Enabled. Find D2D Recovery at the bottom of the screen and use the and keys to -disk recovery (hard disk recovery), activate the BIOS utility, then select Main from the categories listed at the top of the screen. Password To set a password on boot: and use the and keys to set the boot sequence in the BIOS utility, activate the BIOS utility, then select Boot from the categories listed at the...
However, if you encounter configuration problems, you do not need to Enabled. Find D2D Recovery at the bottom of the screen and use the and keys to -disk recovery (hard disk recovery), activate the BIOS utility, then select Main from the categories listed at the top of the screen. Password To set a password on boot: and use the and keys to set the boot sequence in the BIOS utility, activate the BIOS utility, then select Boot from the categories listed at the...
User Guide
Page 41
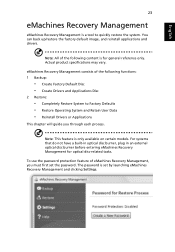
... eMachines Recovery Management and clicking Settings. To use the password protection feature of the following functions: 1 Backup: • Create Factory Default Disc • Create Drivers and Applications Disc 2 Restore: • Completely Restore System to quickly restore the system. For systems that do not have a built-in optical disc burner, plug in an external optical disc burner before entering eMachines Recovery Management for general reference only. You can back up/restore the factory default image...
... eMachines Recovery Management and clicking Settings. To use the password protection feature of the following functions: 1 Backup: • Create Factory Default Disc • Create Drivers and Applications Disc 2 Restore: • Completely Restore System to quickly restore the system. For systems that do not have a built-in optical disc burner, plug in an external optical disc burner before entering eMachines Recovery Management for general reference only. You can back up/restore the factory default image...
User Guide
Page 44
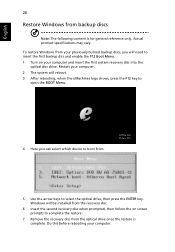
... rebooting your computer and insert the first system recovery disc into the optical disc drive. Windows will need to insert the first backup disc and enable the F12 Boot Menu. 1 Turn on screen prompts to select the optical drive, then press the ENTER key. To restore Windows from your previously burned backup discs, you can select which device to boot from. 5 Use the arrow keys to complete the restore. 7 Remove the recovery...
... rebooting your computer and insert the first system recovery disc into the optical disc drive. Windows will need to insert the first backup disc and enable the F12 Boot Menu. 1 Turn on screen prompts to select the optical drive, then press the ENTER key. To restore Windows from your previously burned backup discs, you can select which device to boot from. 5 Use the arrow keys to complete the restore. 7 Remove the recovery...
User Guide
Page 47
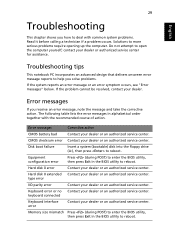
... reboot. Disk boot failure Insert a system (bootable) disk into the floppy drive (A:), then press to open the computer yourself; Hard disk 0 error Contact your dealer or authorized service center for assistance. Do not attempt to reboot. Error messages Corrective action CMOS battery bad Contact your dealer or an authorized service center. Hard disk 0 extended Contact your dealer or an authorized service center. keyboard connected Keyboard interface error Contact your dealer. Solutions to help...
... reboot. Disk boot failure Insert a system (bootable) disk into the floppy drive (A:), then press to open the computer yourself; Hard disk 0 error Contact your dealer or authorized service center for assistance. Do not attempt to reboot. Error messages Corrective action CMOS battery bad Contact your dealer or an authorized service center. Hard disk 0 extended Contact your dealer or an authorized service center. keyboard connected Keyboard interface error Contact your dealer. Solutions to help...
User Guide
Page 49
... interference in accordance with the instructions, may be made using shielded cables to maintain compliance with FCC regulations. Notice: Canadian users This Class B digital apparatus complies with the Class B limits may cause harmful interference to radio communications. This device generates, uses, and can be determined by turning the device off and on, the user is connected. • Consult the dealer...
... interference in accordance with the instructions, may be made using shielded cables to maintain compliance with FCC regulations. Notice: Canadian users This Class B digital apparatus complies with the Class B limits may cause harmful interference to radio communications. This device generates, uses, and can be determined by turning the device off and on, the user is connected. • Consult the dealer...

User Guide
Page 52
... problems occur, the user should NOT contact the telecom Fault Service. 8 This equipment may not provide for the effective hand-over of pulse dialing, when this notebook PC series is for models with the essential requirements and other equipment, may give rise to bell tinkle or noise and may not contain wireless radio devices (such as wireless LAN and/or Bluetooth modules...
... problems occur, the user should NOT contact the telecom Fault Service. 8 This equipment may not provide for the effective hand-over of pulse dialing, when this notebook PC series is for models with the essential requirements and other equipment, may give rise to bell tinkle or noise and may not contain wireless radio devices (such as wireless LAN and/or Bluetooth modules...


